I’ve had a love-hate relationship with my Naked 3 palette. Leaning more to hate. I was actually gonna sell it, but somehow as soon as I made that decision, I took the palette and I did my makeup with it.
And then I did my makeup again with it…
… and suddenly it was the only palette I used.
The problem with the palette before was that the shimmery colors lacked pigment. Solution: using them wet or on top of a glitter primer. I can’t believe I didn’t realize this before! In this makeup look I simply just wet my brush before going in with the shimmery colors. Now it works fine! The matte shades in the palette are great and pigmented, so now I don’t really have any complaints about it. I like the cool shades in the palette and it compliments my eyes beautifully.
And we’re very much in love now.
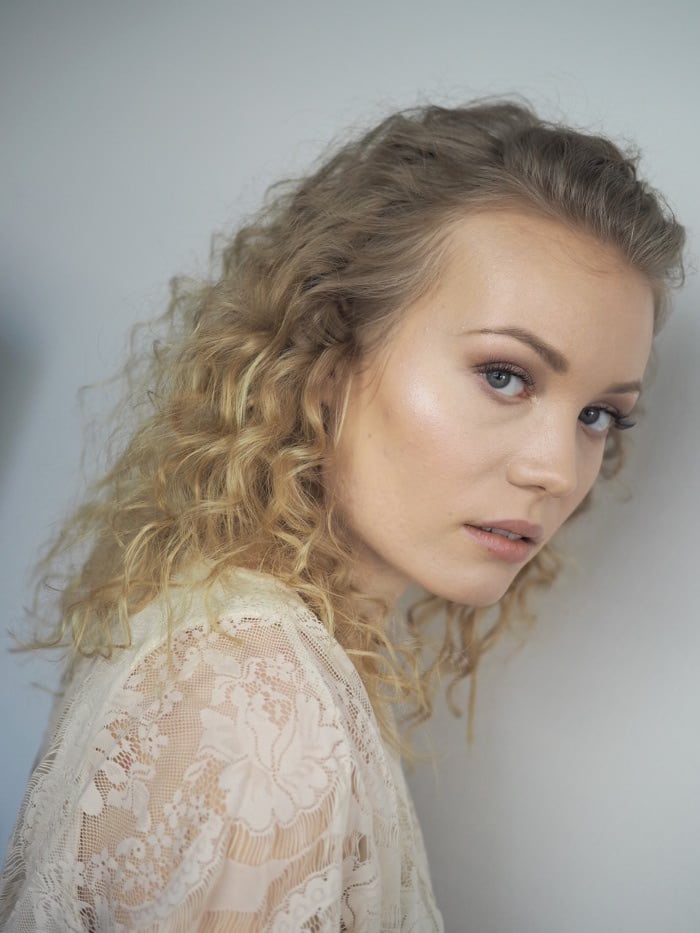
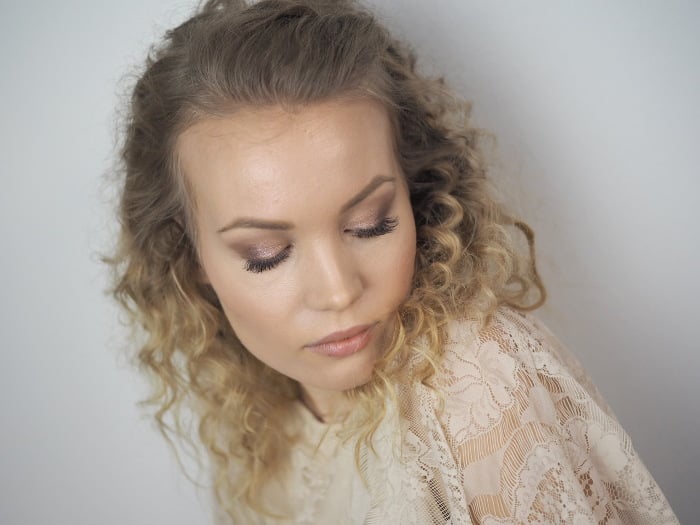
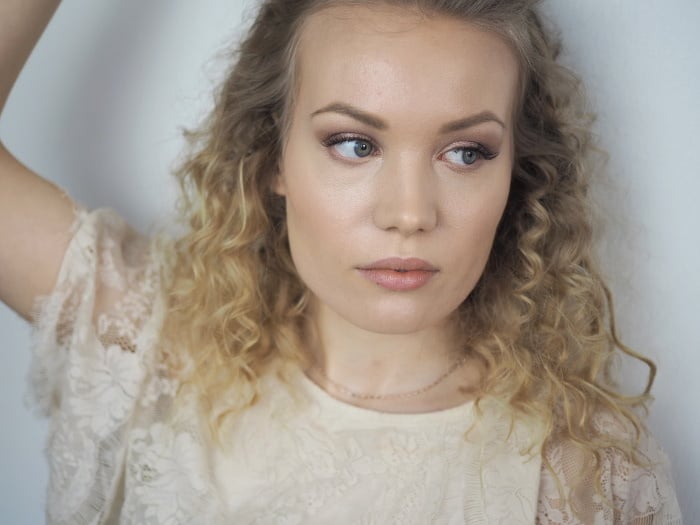
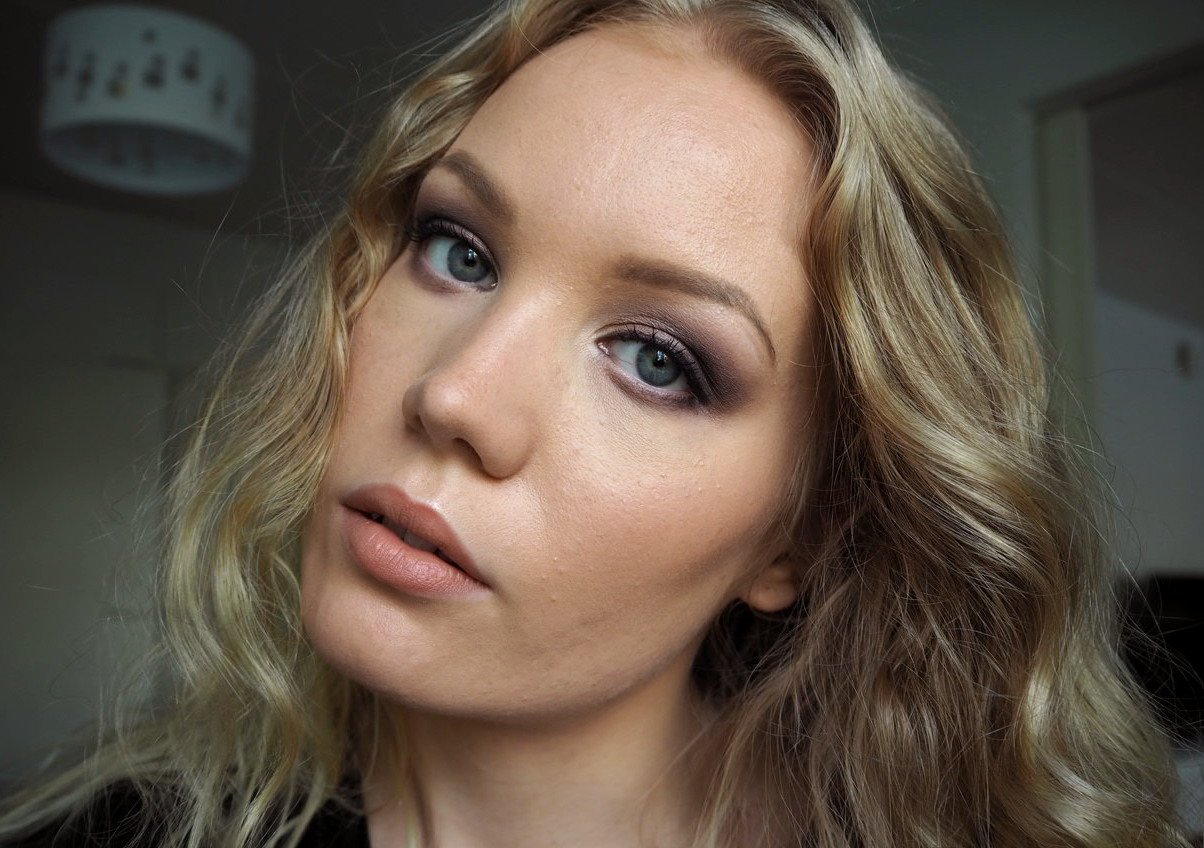
About this makeup look:
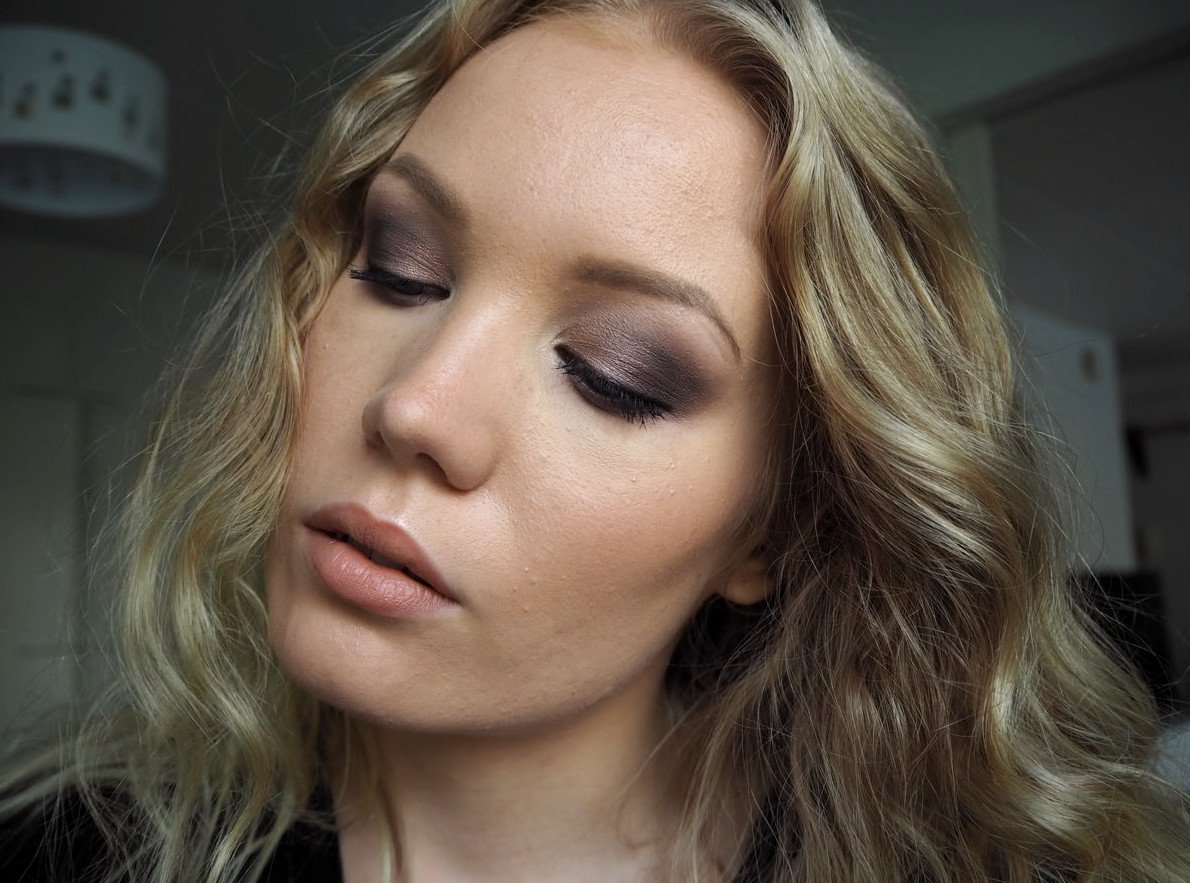
This week we had another photoshoot with Susanna and I did my makeup as I’ve done it a lot lately: using this eyeshadow trick I contoured my eyes first, and then I applied a shimmery shade on the lid with a wet brush. I wanted my base to look flawless but glowy, so I first went in with a primer, that gives a beautiful glow. Then I used my Double Wear, which is amazing for photoshoots or special occassions, because it’s full-coverage and super long lasting. I contoured my face using my favorite contour kit and on my cheekbones I used the Zuii highlighter (which is bomb!). On my lips I’m wearing one of the nude shades from IsaDora. Full product list is below and there are links to the blog posts, if you want to know more about the products.
Applying eyeshadow can be tricky, because we all have different eye shapes. My eye shape is a mixture of hooded eyes and deep set eyes. I’ve definitely struggled with eyeshadows, but through fail and error, I’ve learned some important things. When you’re working with hooded or deep set eyes, it’s all about making your eyes appear more open and balancing the area between your brows and your eyes.
*adlink
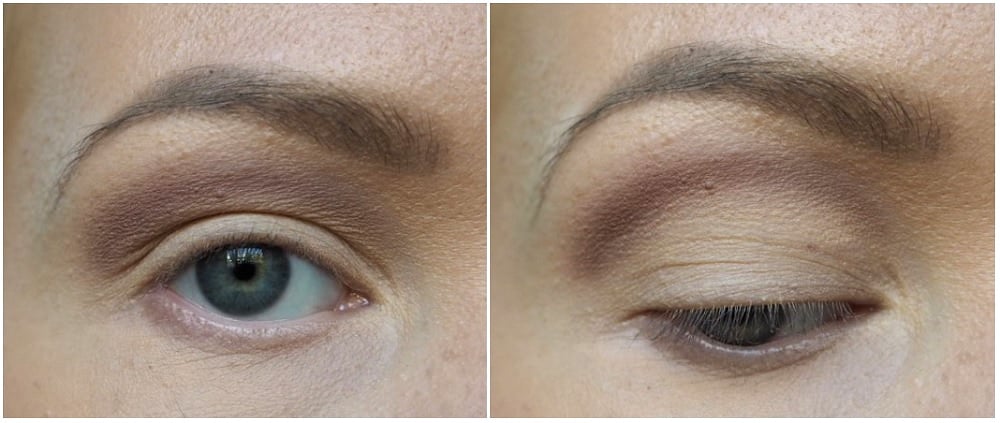
Hooded & deep set makeup tips
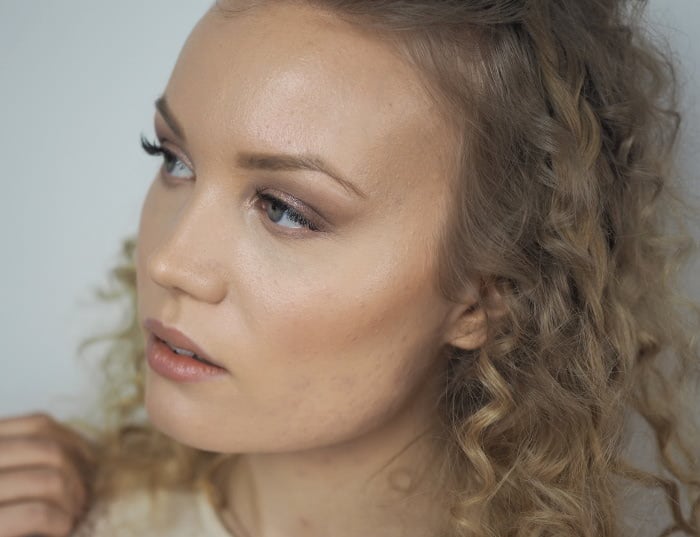
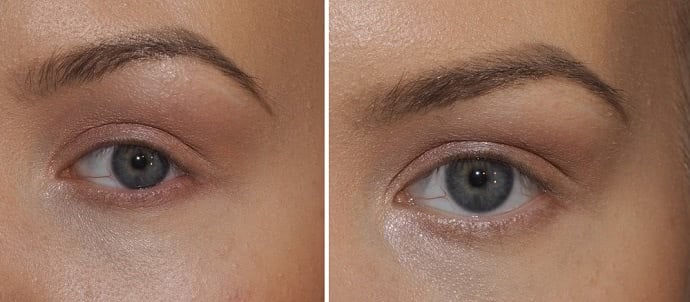
Here you can see my eye shape. My eyes are a bit hooded, which you can see when I look straight and don’t lift my eyebrow at all. With hooded eyes the skin droops over the crease causing the lid to appear smaller. My lids also droop in the outer corner, making cat eyeliners impossible. My eyes are also deep set, which means my eyes are deeper into my skull making the brow bone more prominent.
Hooded eyes and deep set eyes are very similar, because in both cases you don’t have that much visible lid space. Your brow bone and the hooded lid are what’s drawing in the attention and your eyes can appear ‘sunken’. And gorgeous. But you knew that, right?
How to contour hooded and deep set eyes?
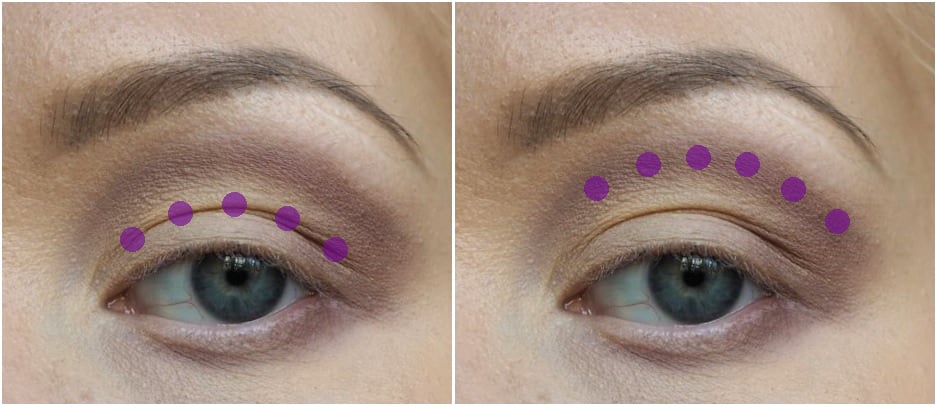
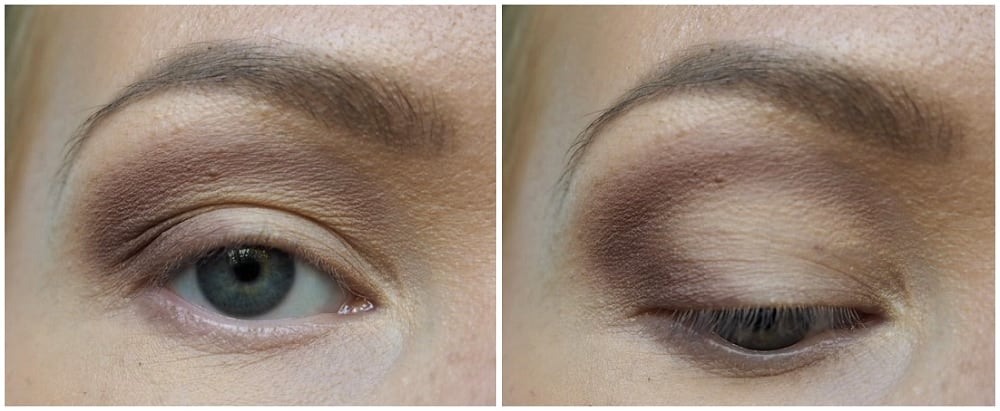
When you’re applying eyeshadow on deep set or hooded eyes, you’re always bringing the color way above your natural crease. Here you can see my natural crease – and where I actually contour my eye. I think of that as my “contour area” or “crease”, even though my natural crease is way lower.
When you’re doing your makeup, make sure you can see some eyeshadow, when your eye is open and relaxed. Other than that, you can choose how high you want to bring the color. I always bring my color right where the natural shadow occurs under my brow bone (more on it on this post about my ultimate makeup trick!).
An open contour.
With my eye shape this is where I should contour. It’s definitely above the crease. A neutral matte shade balances the eye when it’s brought here. It’s almost, like I’m faking my crease and imagining it’s somewhere this high.
An open contour is quick and easy to do and with a more neutral shade, it looks quite natural. It’s almost like a shadow floating on your lids. Except it contours your eyes and does them wonders.
Whenever I’m doing my makeup I always open my eyes and see how it looks that way. I even apply the shadow eyes open to get it just right.
A closed contour/banana contour.
This is a very basic eyeshadow style – contouring the eye in a banana shape. This compliments all eye shapes. The only difference is, in how high you bring the color (obviously with hooded or deep set eyes you bring it above your natural crease).
This is exactly the same as above except the color is brought in the outer corner as well. This makes the eye appear wider and if you bring it even further you can do a cat eye.
This is my eyeshadow base, almost always. After I’ve done this banana contour on my eye, I can just ‘fill in’ the blank space with whatever colors I want.
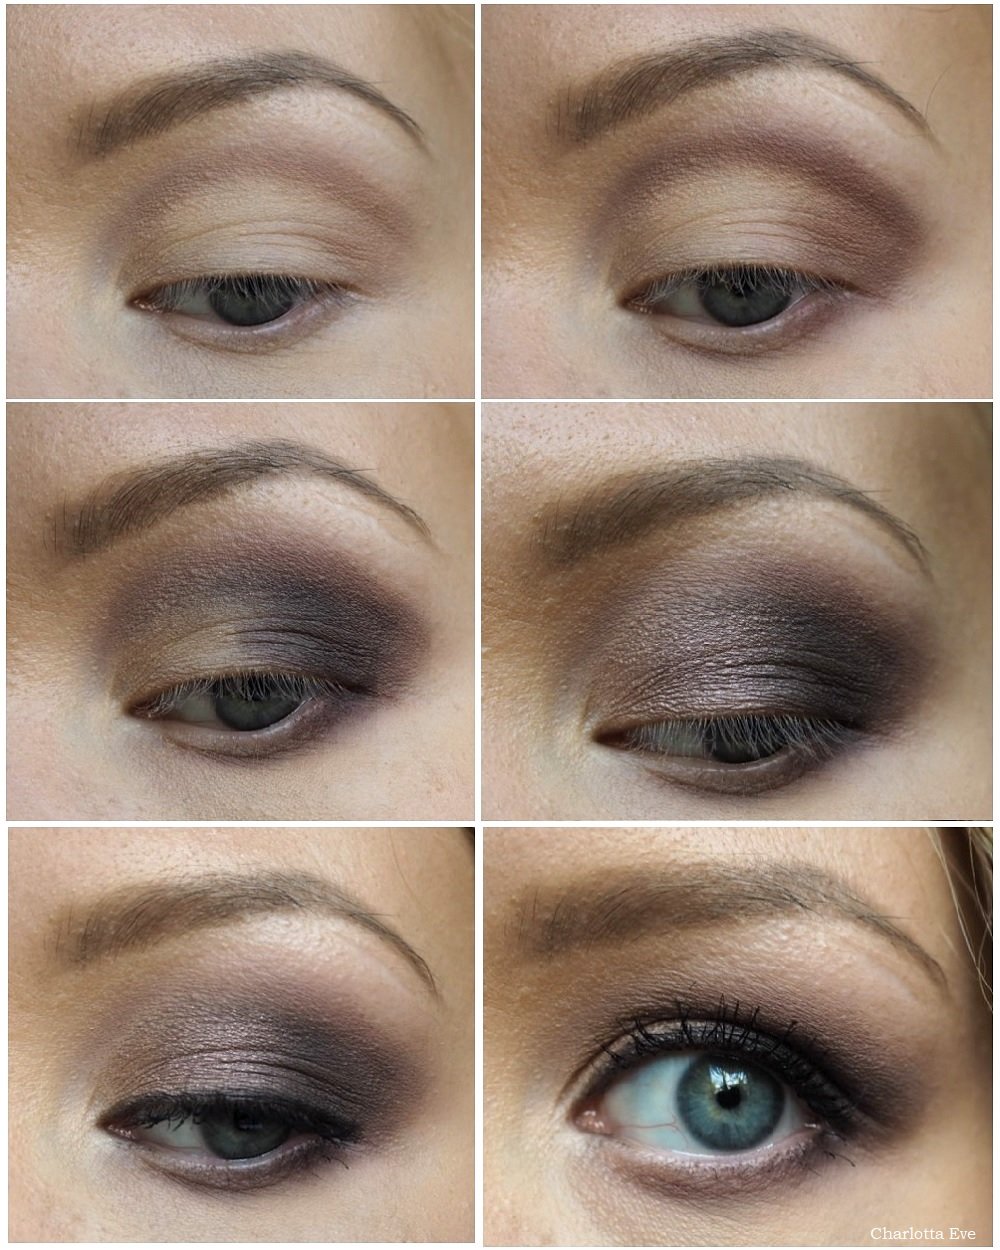
On to the tutorial! The base for this eye makeup is that banana contour. That is the highest I bring any color. I apply other colors inside that contour or on top of it.
Hooded & deep set eyes makeup tutorial using the Naked 3 palette
I used the *Naked3 palette, which is a good basic palette. It has cool-toned mauve colors that suit blue and green eyes. I feel like you can do both casual everyday looks with the palette as well as more dramatic smokey eye looks.
Prime your lids and set the primer, so that it’s not sticky.
Start to contour your eyes using first lighter and then darker colors. I used first ‘Limit’ and then ‘Nooner’. I did a banana-shaped contour as the base for my eyeshadow. I also brought ‘Nooner’ on my lower lashline.
Add a darker color in the outer part of your eye and slightly all over your contour area. Almost like in a banana contour way, but don’t bring it that high, leave some ‘Nooner’ to show on the edges. I applied just a touch of it on my lower lashline as well.
Fill in the blank lid space with a lighter color. I used ‘Liar’ and ‘Factory’ mixed.
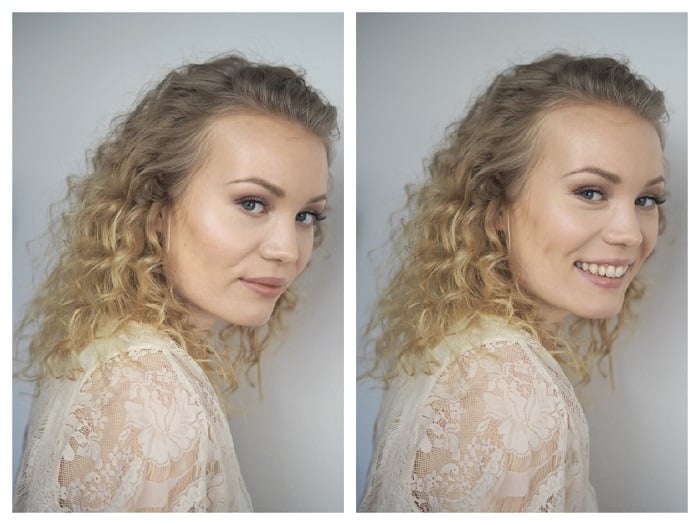
Add your inner corner highlight ‘Strange’, line your eyes and add mascara.
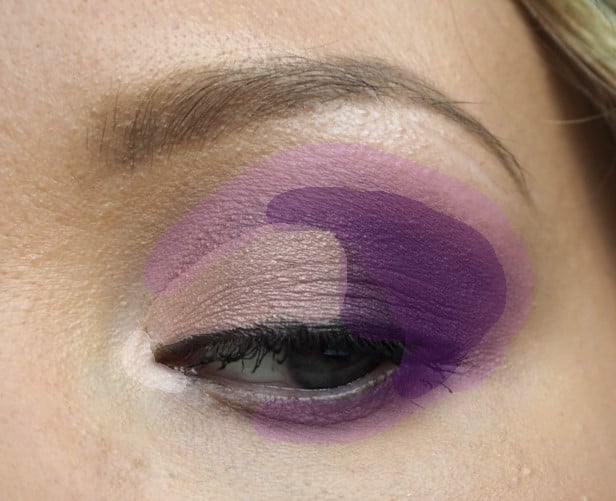
Color placement paint-version.
I hope you liked this tutorial and learned something new.
This website uses cookies to improve your experience. We'll assume you're ok with this, but you can opt-out if you wish.Accept
Privacy & Cookies Policy
Privacy Overview
This website uses cookies to improve your experience while you navigate through the website. Out of these, the cookies that are categorized as necessary are stored on your browser as they are essential for the working of basic functionalities of the website. We also use third-party cookies that help us analyze and understand how you use this website. These cookies will be stored in your browser only with your consent. You also have the option to opt-out of these cookies. But opting out of some of these cookies may affect your browsing experience.
Necessary cookies are absolutely essential for the website to function properly. This category only includes cookies that ensures basic functionalities and security features of the website. These cookies do not store any personal information.
Any cookies that may not be particularly necessary for the website to function and is used specifically to collect user personal data via analytics, ads, other embedded contents are termed as non-necessary cookies. It is mandatory to procure user consent prior to running these cookies on your website.