Floating contour for deep set and downturned eyes

deep set eyes makeup

*adlink


If you want to try something new for your deep set or downturned eyes, why not try a floating contour? I like to do this when I feel like doing something different and want to keep my eyes (lids) more bare.

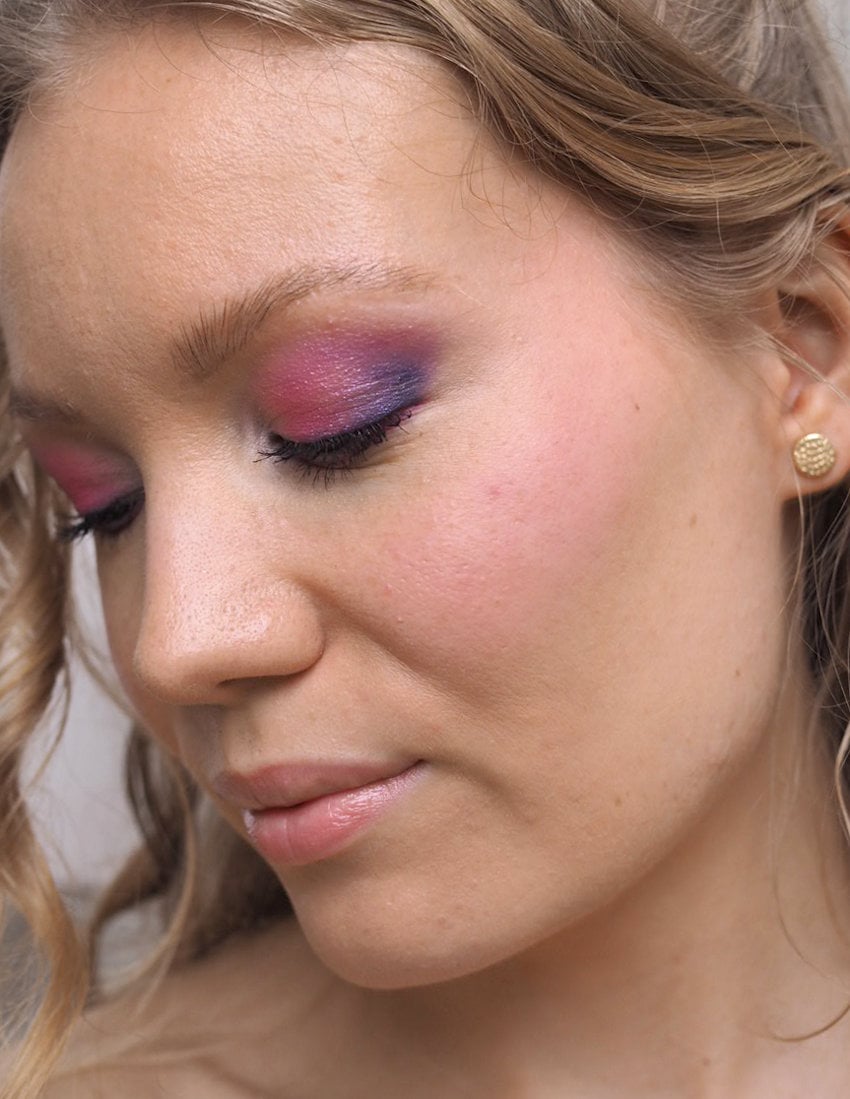
This technique works for downturned and deep set eyes, as the idea is to pull away the attention from the hood and the (downturned) crease with a matte eyeshadow. You see, typically I would add a darker eyeshadow to hide the so called problem area. But in this look I totally just ignore it, applying eyeshadow elsewhere to trick the eye. I call it the floating contour or an open contour, because it floats on the lid and is not connected in the outer corner, like the usual style. It’s all about contouring and shaping the eye with a darker eyeshadow, mimicking shadow.

makeup tutorials beautyblog

Floating contour for deep set or downturned eyes

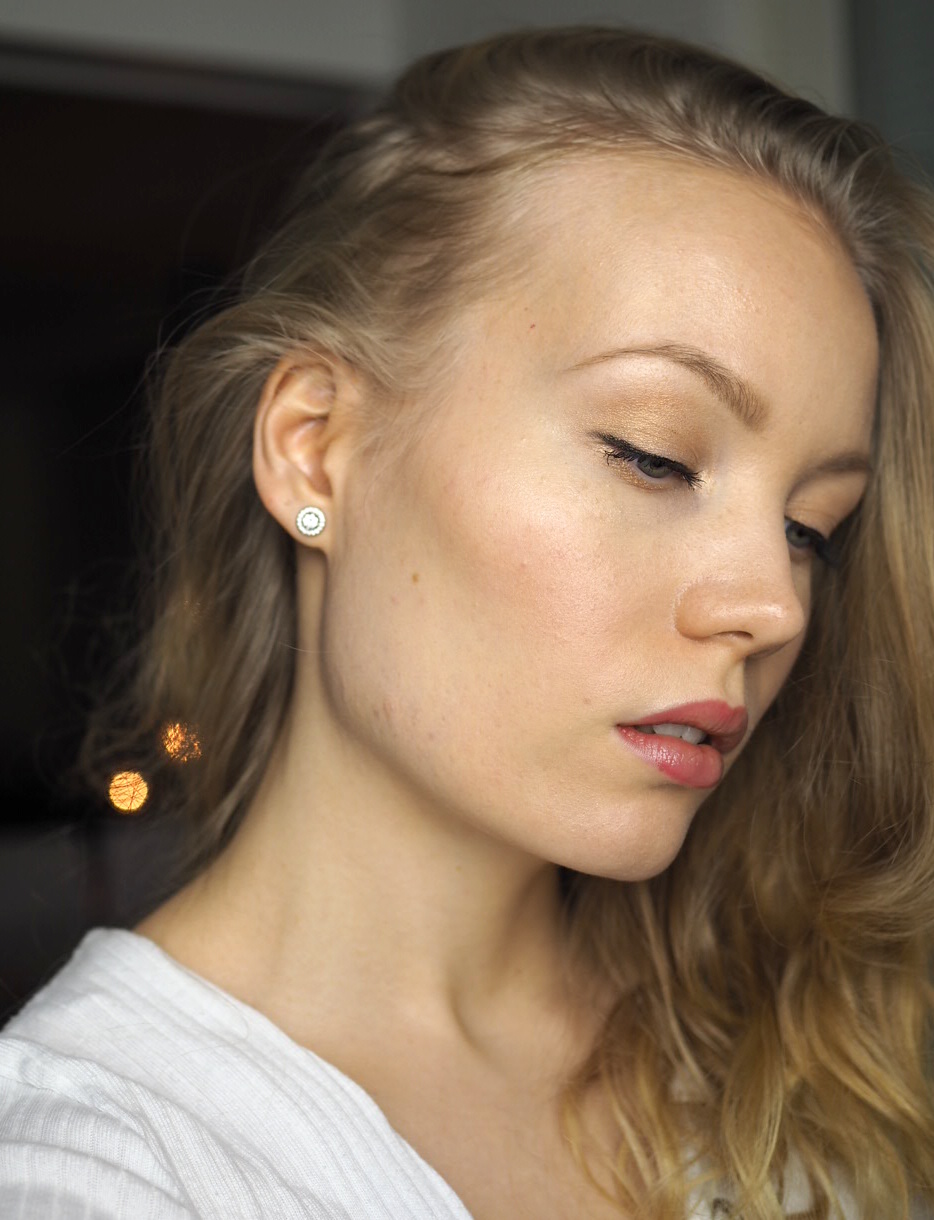
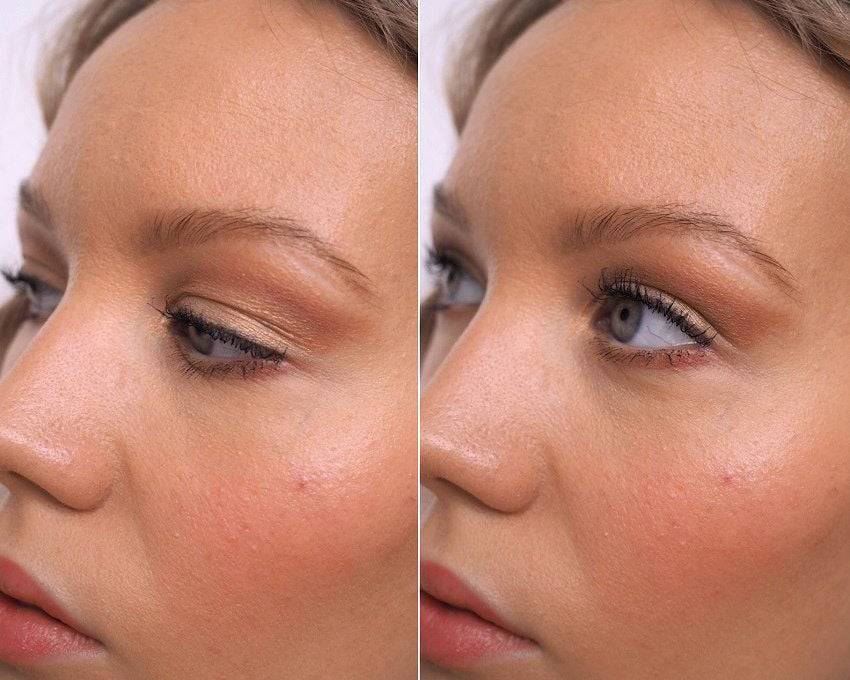
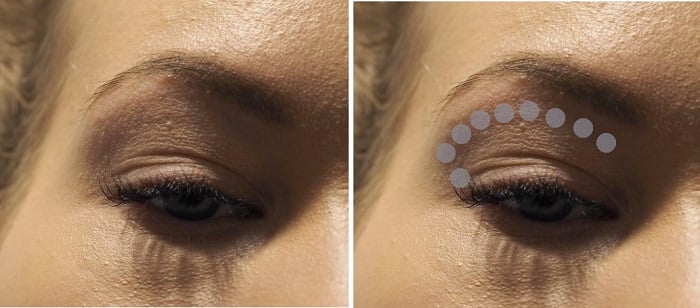
As most eye makeup tips, it’s easiest to explain and do when your eye is relaxed and open. See that outer corner in my eye? It’s where my eye creates a tiny little hood and my crease tilts downwards. This is the area that I typically hide with matte colors. But in this look I apply matte eyeshadow on top of that area to lift up the eye. And then I highlight my lid with a lighter shimmer color, making my eye look more open.

floating contour deep set eyes

deep set downturned eyes makeup from the side
How this floating contour looks from the side.

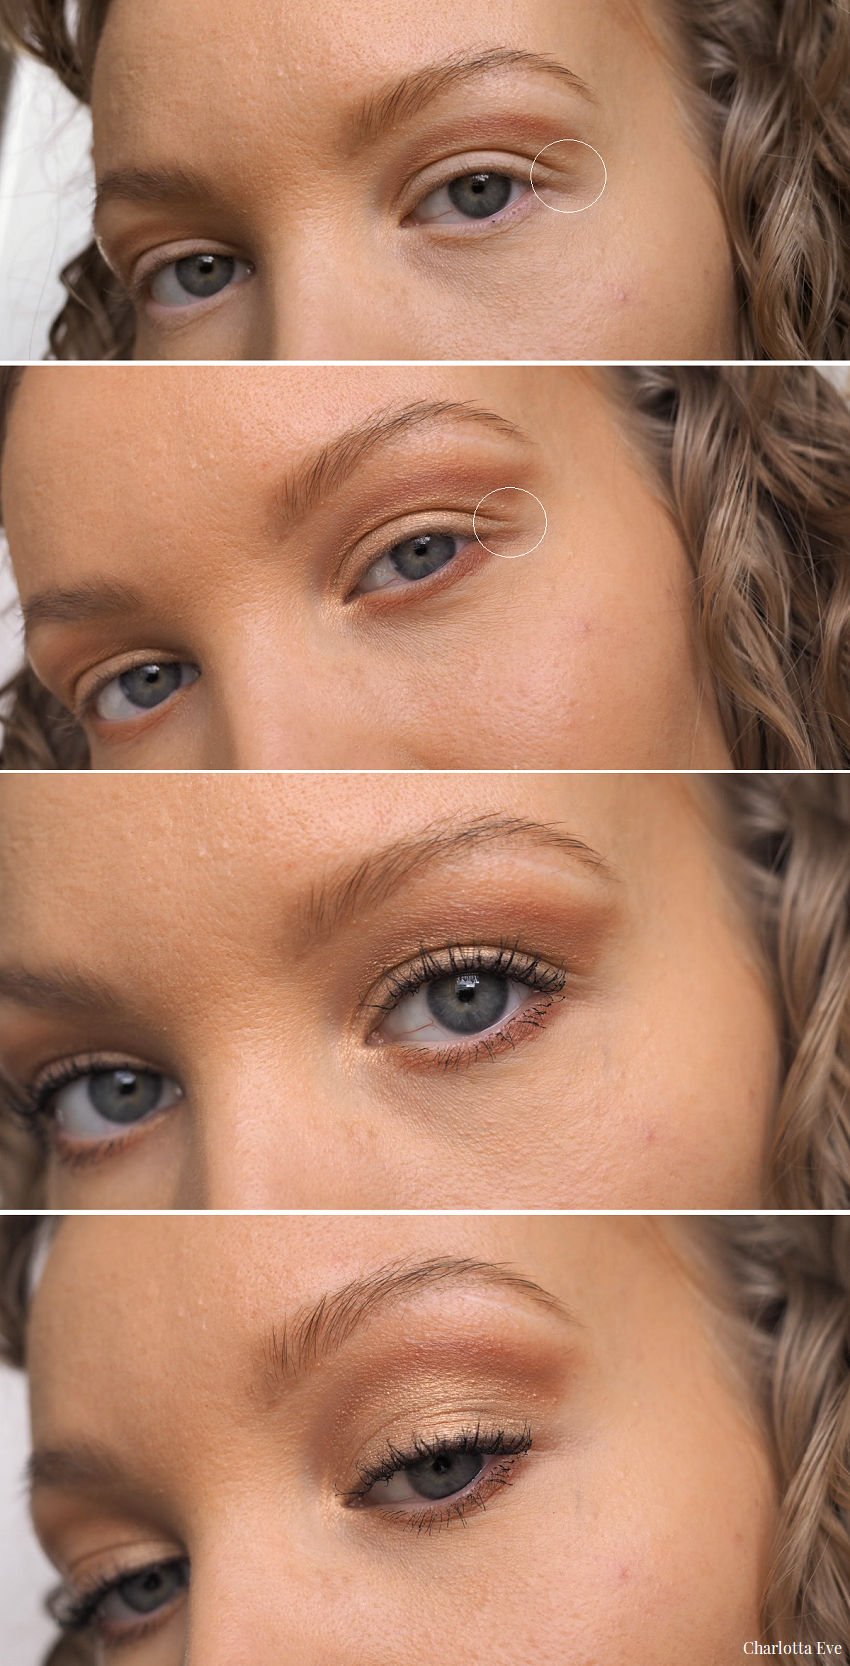
Now – how to find the right spot for the contour?

I’ve shared this tip before, but it’s all about working with the natural shape of your eye. The right spot is where a natural shadow occurs on the eye, where the brow bone ends. When you put a brush in that spot, you can kind of feel that brush sink in there: that’s about where your contour should go. Though in my eye I apply it there, but tilt it slightly upwards.

I also shared a video tutorial of the technique on my Instagram (@charlottaeve).

eyeshadow trick for hooded deep set eyes

how to contour deep set eyes
You can feel the ‘hollow’ in your eye, where the brush sinks in. That’s a good guideline for the contour!

Another way to look at it is to keep your eye open and draw the contour where you can see it.  Obviously it’s way higher than the natural crease. How high you want to bring it is up to you though. Just make sure to leave a gap right under your brow.

This technique doesn’t hide the so called problem area (the crease/hood), but it shifts your focus to someplace else. Makeup is all about having fun and trying different things. So you know, why not try a different look every once in a while? There are no rules. Personally I enjoy wearing my eyeshadow a bit differently sometimes.

deep set downturned eyes different makeup styles
1st photo: how I usually do my makeup, adding dark matte eyeshadow in the outer corner. 2nd photo: An open/floating contour.

Related posts:
Do’s and don’ts for deep set eyes
How to: makeup for downturned eyes

makeup tip for deep set eyes

Floating contour – step by step photo tutorial

Floating contour deep set eyes tutorial

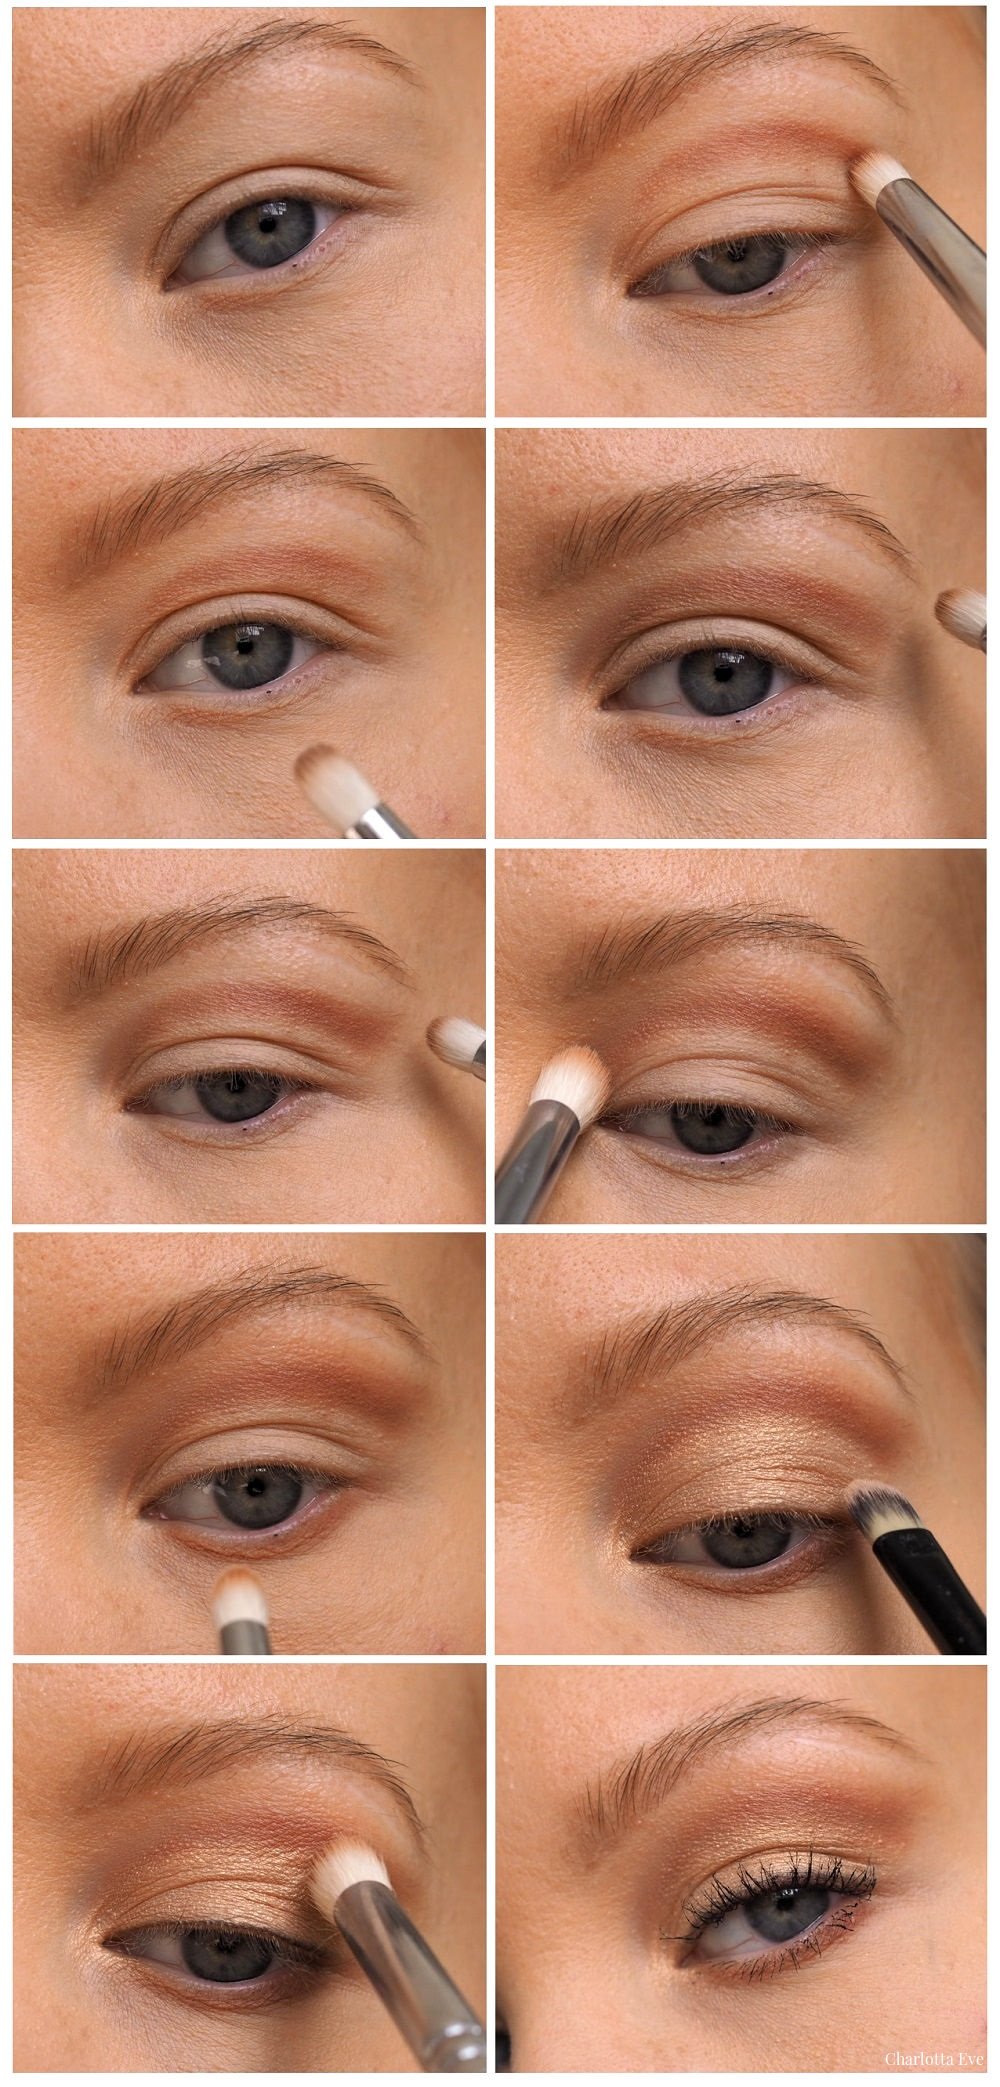
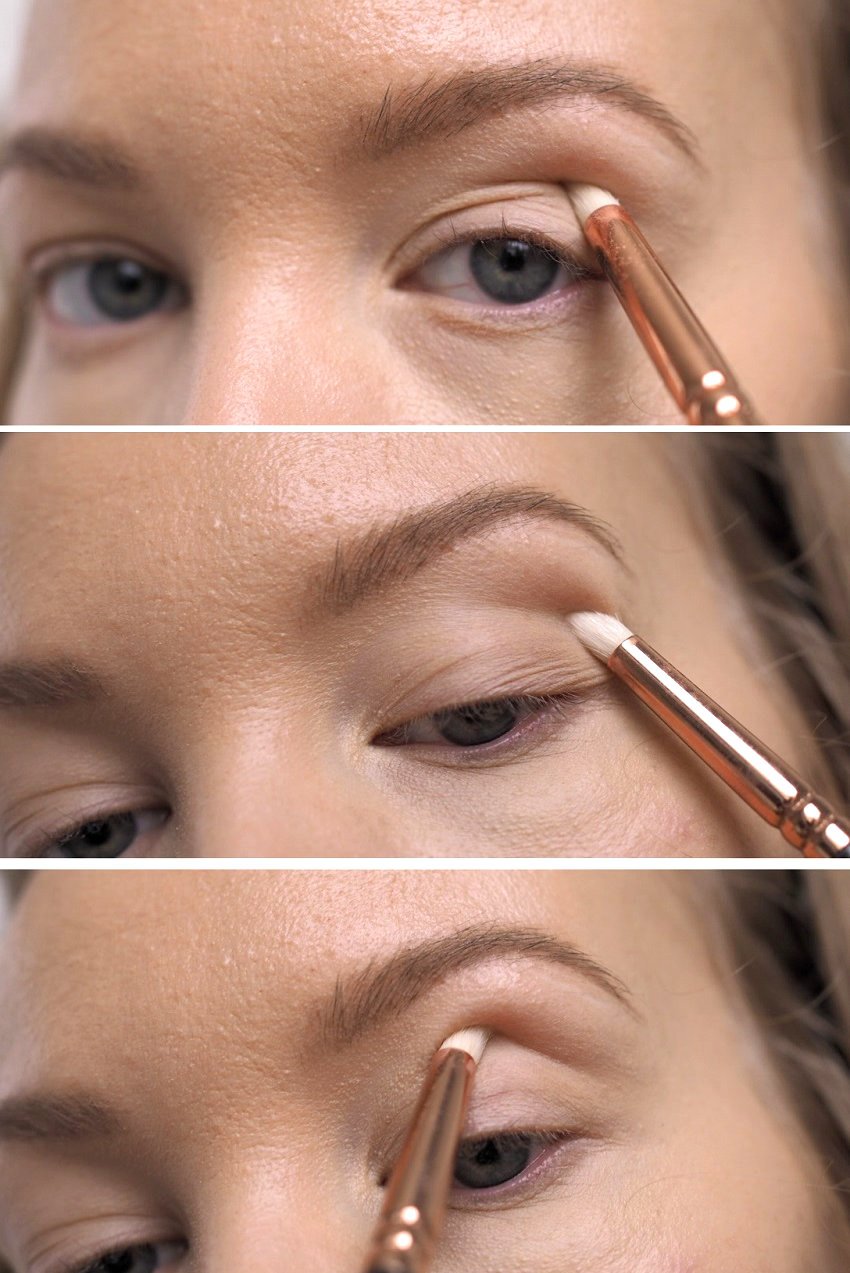
Here’s the step by step for this look.

  1. Draw the floating contour on the eye with a pencil brush. (I used Zoeva 230.) You can tilt it upwards in the outer corner to create a bit of a  winged look.
  2. Blend that out using a slightly bigger and rounder brush. (I used Zoeva 225.) You can also take a color that is slightly lighter than the one you just used and blend it out using that. Blend slightly on top of the line or towards your brow, so that the lightest color is closer to your brow, blending nicely to your skin tone.
  3. Add the same colors to your lower lid as well.
  4. Then you can add your lid color. I added it all the way to the inner corner, because it was so light. Blend it slightly (still Zoeva 225), so that the contour line is not that harsh. Or you could also leave it more visible, faking a crease type of thing. (I used a flat brush from Coastal Scents brush set.)
  5. Line your eyes and add mascara. Done!

deep set hooded eyes makeup floating contour

Eyeshadow palettes I love:
Illamasqua Unveiled Nude Artistry Palette  *Illamasqua Unveiled Artistry Palette (UK)
*NYX Perfect Filter Palettes
*Too Faced Gingerbread Extra Spicy Palette

Makeup brushes I use:
*Coastal Scent Brush Set (this brush set is what I started with)
*Zoeva rose gold brush set (more expensive, but more quality too)

Key products used in the makeup:
*NARS Sheer Glow Foundation
*NARS Soft Matte Concealer, Custard
*Ilia Multi-Stick Cheek & Lip I Put A Spell On You
*Laura Mercier Transluscent Powder
*Urban Decay Primer Potion
*Benefit 24-HR Brow Setter Gel
*Jane Iredale Triple Luxe Lipstick, Ellen

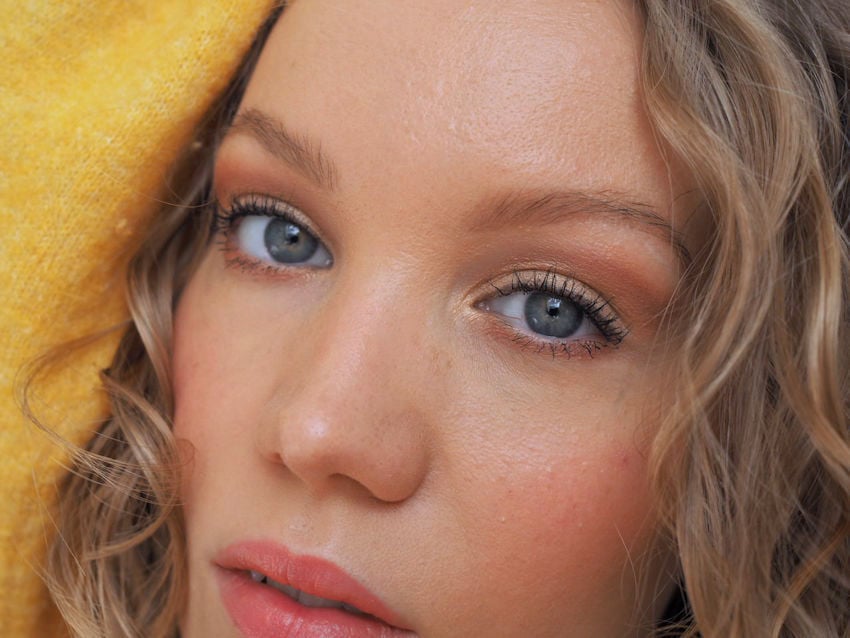
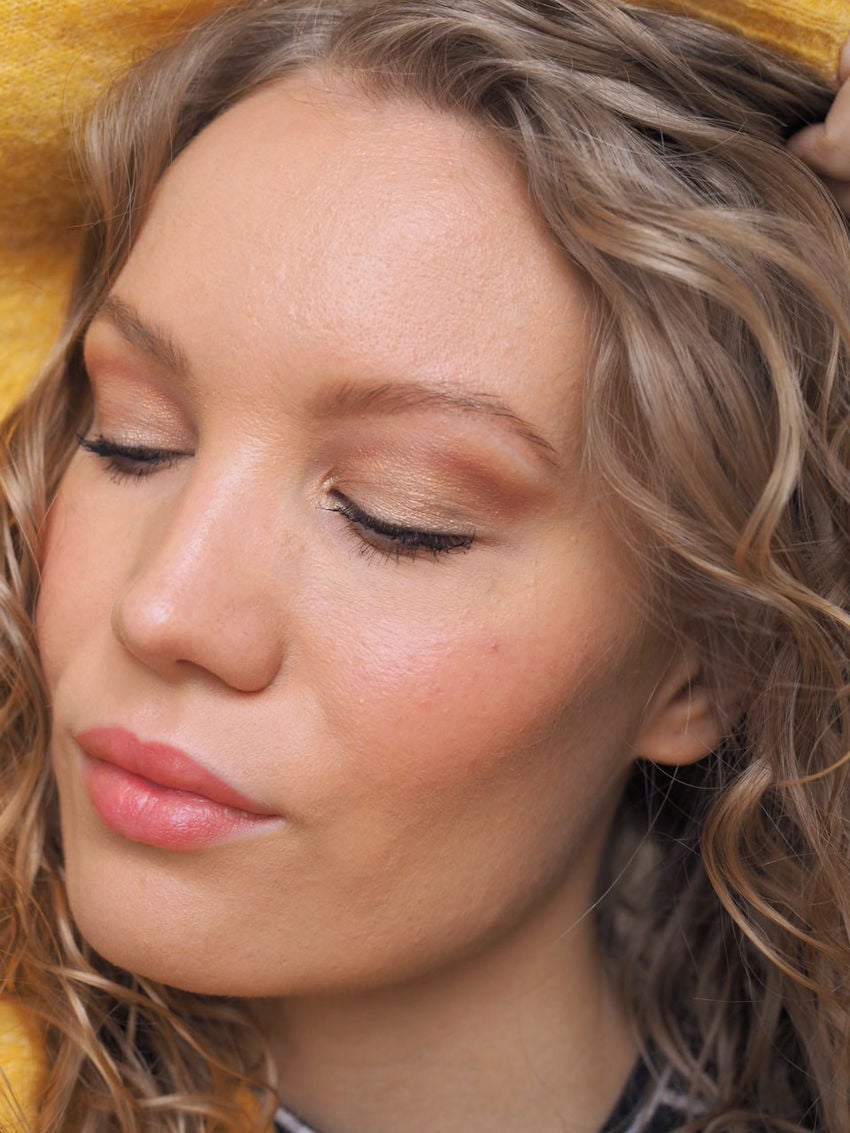
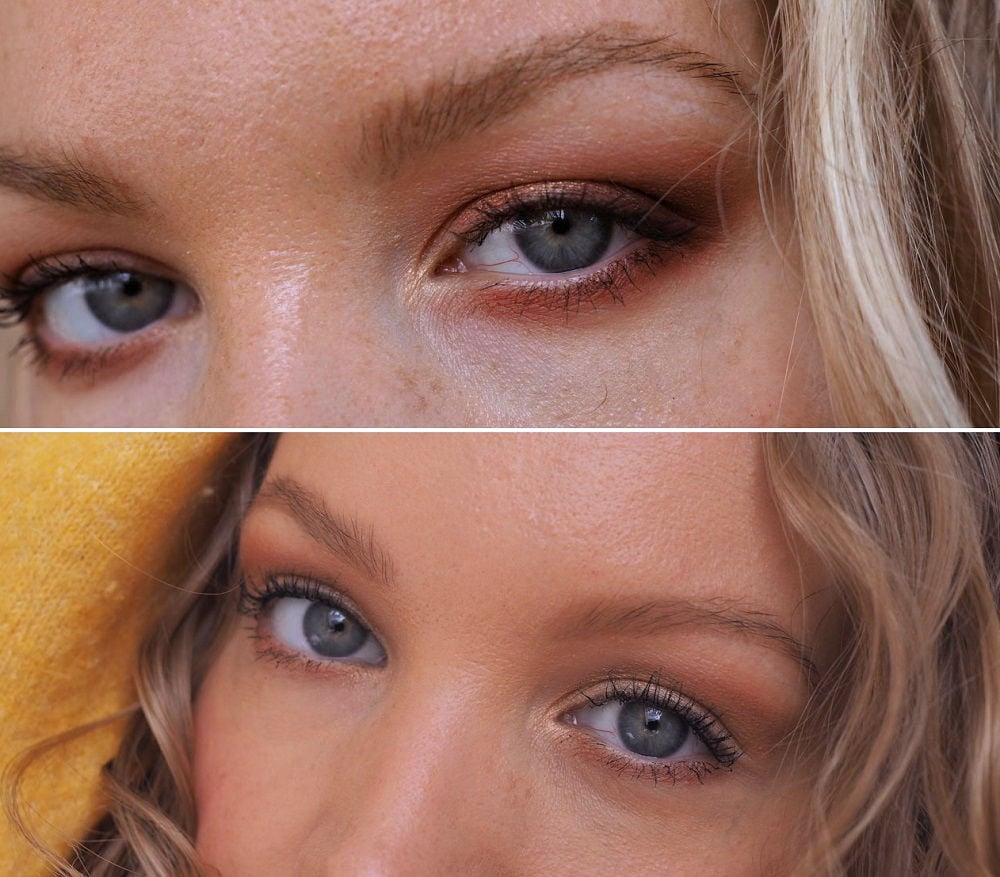
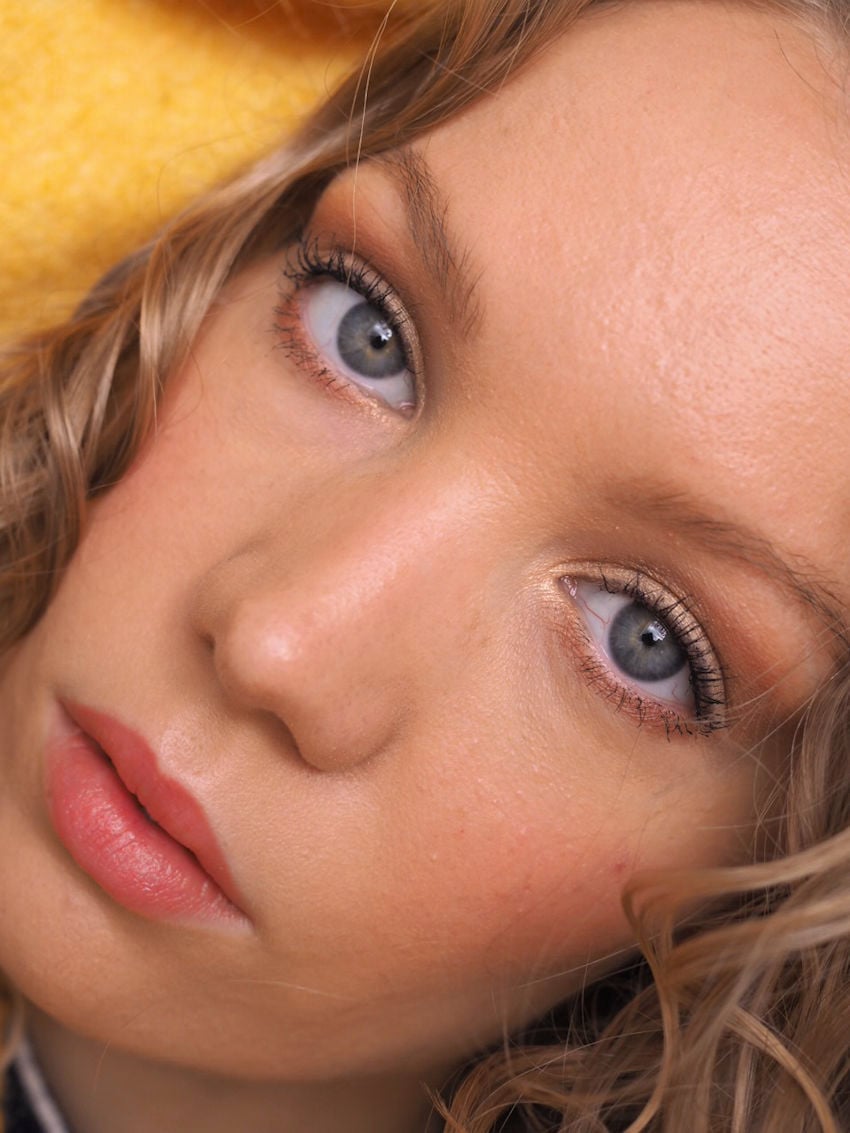
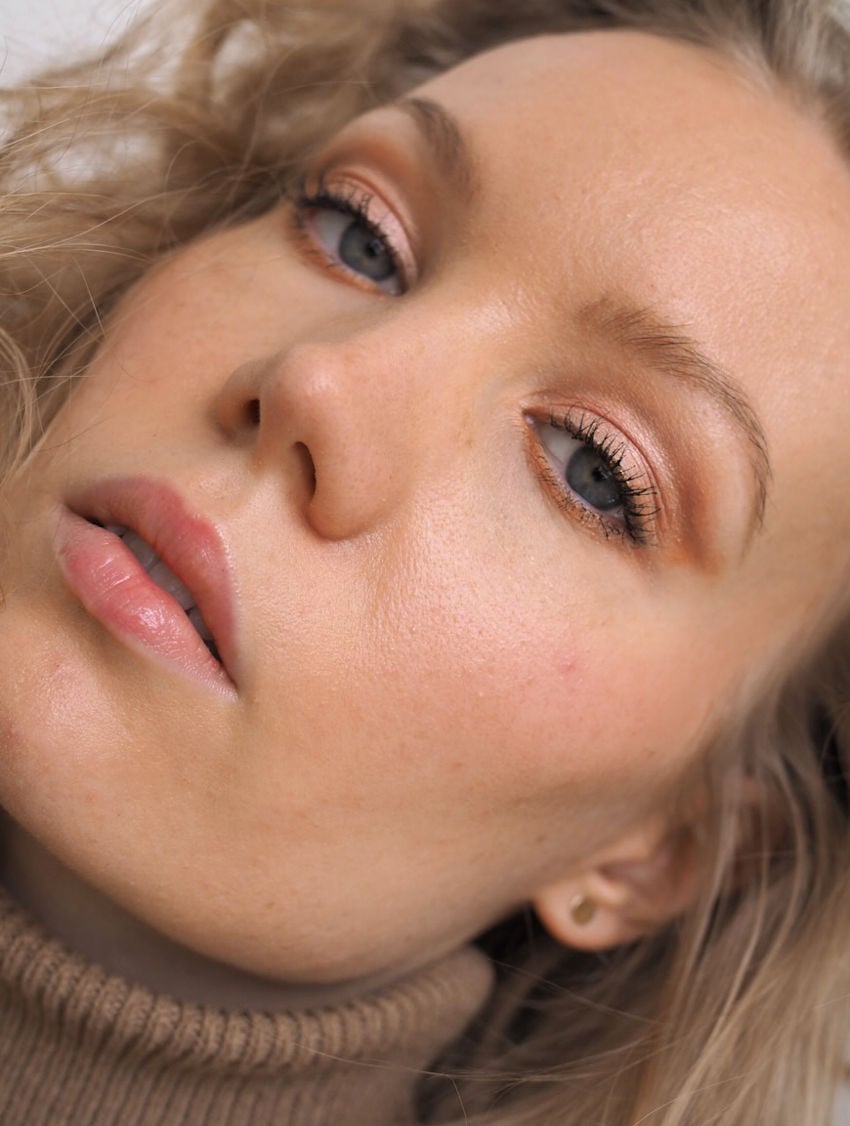
Here’s also two other looks with a floating contour. There’s also a video tutorial of the look below & the technique on my Instagram (@charlottaeve).


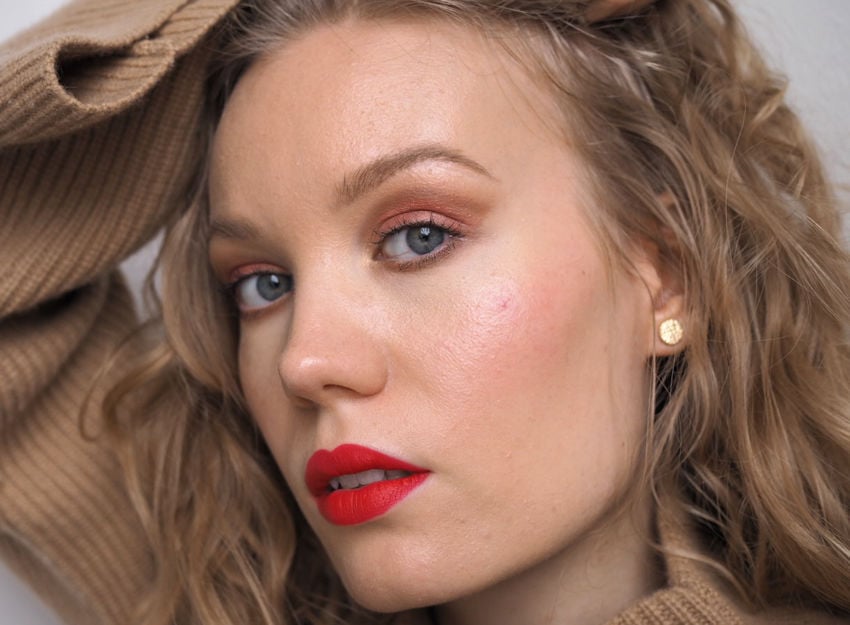
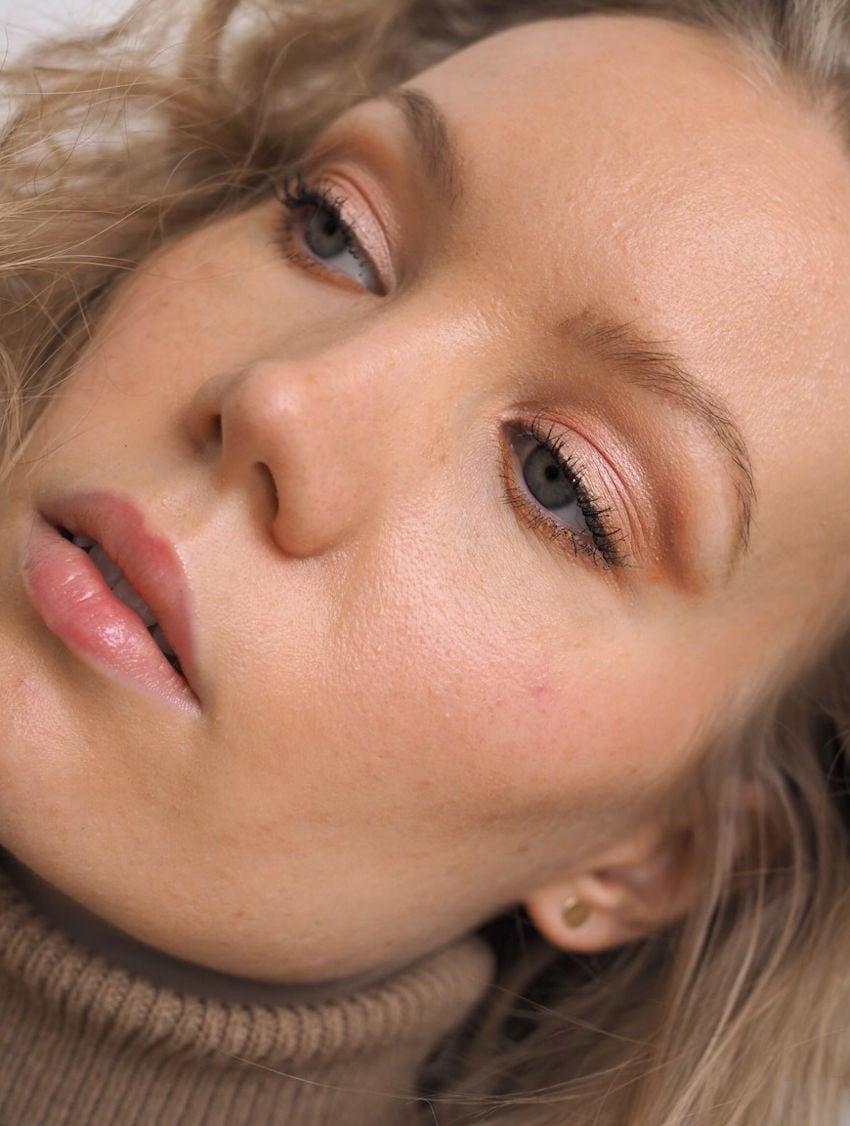
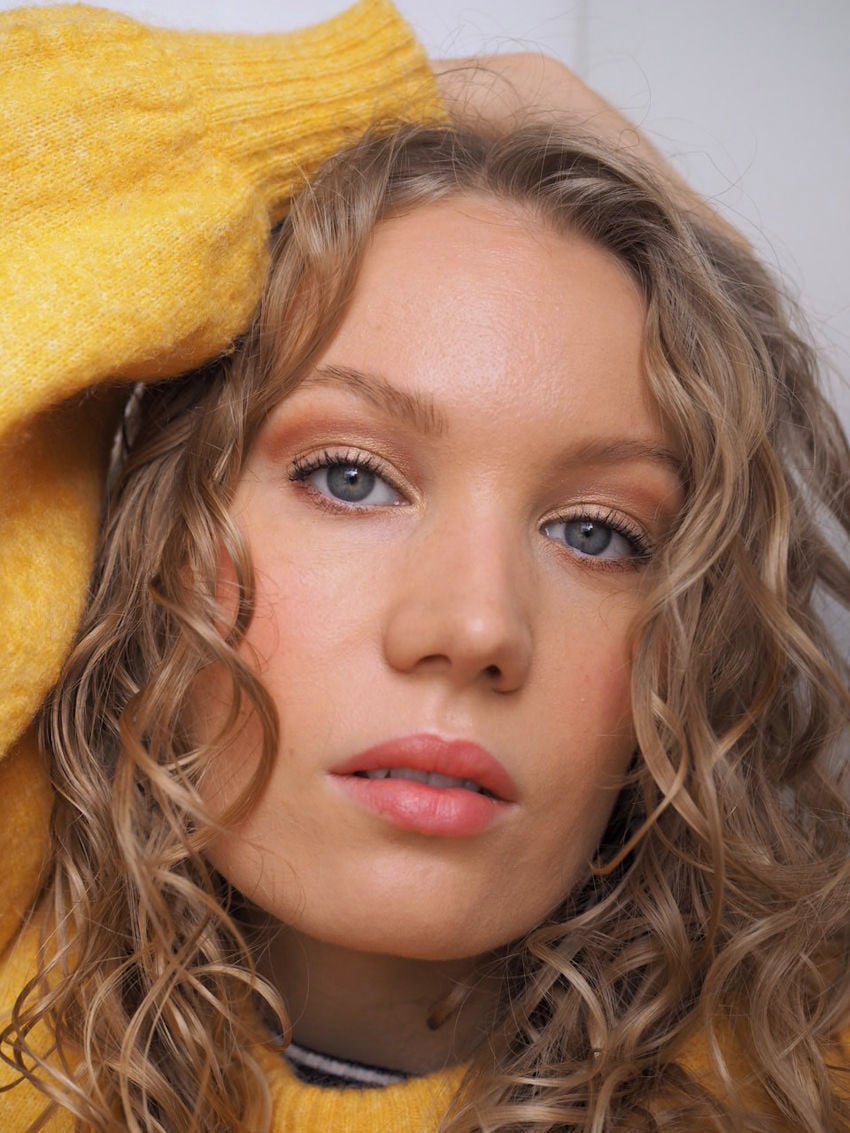
By the way: That red dot on my cheek is not a pimple, but spider veins. So annoying, but I’m waiting for it to just disappear. I’ve had one before on my nose and that went away on its own. Don’t ask how I got it, I live in Finland okay? (Sensitive thin skin on the cheeks + harsh weather is not the best combo.)

How to apply foundation


glowy skin purple eye makeup

*adlink

Foundation is possibly the most important product in anyone’s makeup routine. It’s the key to a beautiful makeup. Once your base is nice and even, everything else looks better. Ever wondered why red lipstick looks messy on you? Check your foundation. Wondering why your makeup looks like a mask? Houston, we have a foundation problem.

In this post I’m sharing my tips on how to apply foundation and how to get a beautiful, natural-looking base. It’s very simple: apply less product, use a beautyblender and choose the right foundation for your skintone. I have some product recommendations at the end of this post!

How to foundation correctly for a natural flawless finish

1: Apply thin layers.
Start small. Take a little bit of foundation and blend it to the skin little by little rather than applying just one thick layer. You can always apply more but it’s not as easy to take off excess foundation afterwards. Thin layers don’t necessarily offer as much coverage as you’d like – but that’s what concealer is for! Concealers are usually very pigmented so they are perfect for any redness, spots or dark circles. You don’t need to have that full coverage effect all over your face – just on those areas, that really need it.

2:  Use a beautyblender.
It really makes a difference. A moist makeup sponge makes the application a lot more easier. It blends the foundation onto the skin beautifully so you don’t get streaks. The water in the sponge blends and thins out the foundation so you get a natural sheer finish. If you have normal or dry skin you can use a really wet sponge and if you’re oily you can just spray the sponge lightly with water.

3: Blend to your neck and blend the edges well.
Start the application on the center of your face and blend towards the edges. Remember to blend the foundation to your neck as well! Actually – when you think you’re done, go over the edges of the foundation again and blend.

the beautyblender electric violet swirl

4: Show some skin.
As I said – don’t cover up everything. Your real skin can and should shine a bit through. It makes the foundation look natural. Like your skin, but better. This way your foundation looks natural even when it’s wearing off. You can start the application on the center of your face: on the forehead, on the nose, on the cheeks and a bit on the chin. Start there and blend with circular motions. This way you get the most coverage on the center of your face – which is what people see first when they look at you – and just a light light layer on the sides of your face.

5: Know your undertone.
It is super important you know your undertone, when choosing a foundation. Having the right undertone is actually more important than having the right color (how dark the shade is).  If you have more yellow tint to your skin, you have yellow undertone. If your skin has more light pink tint to it, you have pink undertone. If you can’t really say if you’re yellow or pink, you’re probably neutral.

How to know if you’re cool, warm or neutral? Read this post to determine your undertone!

undertones cool warm neutral

6: Try mineral makeup.
Mineral makeup offers an easy solution to almost any foundation problem. It’s easy to apply with a brush and it gives you a nice coverage – you don’t even necessarily need a concealer. Mineral makeup reacts with your skin temperature and “melts” to your skin so it looks extremely natural and it also gives you a nice glow. Mineral makeup (depending on the brand) is also good for problematic skin. It lets your skin breathe and it doesn’t clog pores – actually it moisturizes, balances and protects it.

lily lolo makeup review
Wearing Lily Lolo mineral makeup foundation, blog post here!

Some of my favorite foundations & product recommendations

*Clarins Everlasting foundation
Quite full-coverage, long lasting, for oily & combination skinBlogpost

*Estee Lauder Double Wear foundation
Full-coverage, long lasting, for oily, combination & normal skin – Blogpost

*NYX Total Control Drop Foundation
Light to full coverage, for all skin types – Blogpost

*Lily Lolo Mineral Foundation
Affordable, but awesome mineral makeup base – Blogpost

*Madara City-CC Cream SPF 15
Not a foundation, but a tinted moisturizer. I love this one for a super natural glowy skin. – Blogpost

*beautyblender

Scroll to top