Pink makeup for Valentine’s Day – tutorial

pink valentines day makeup tutorial


*adlink

Last weekend I checked the date and realized we’re already on the second chapter of 2020. Just like that, we survived January. I mean, it was a good month, but oddly grey and rainy.

This year more than ever I want to do makeup tutorials for all the seasons and even though Valentine’s Day is not huge in my country, I wanted to take the time and celebrate it at least with makeup.

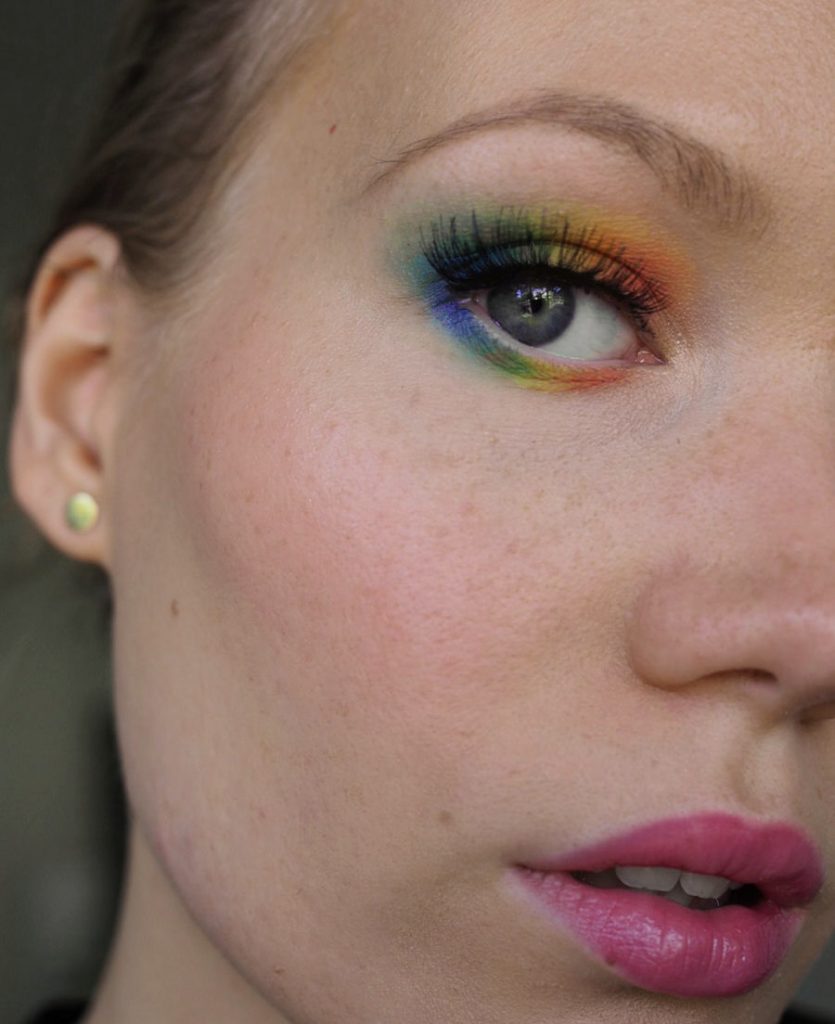
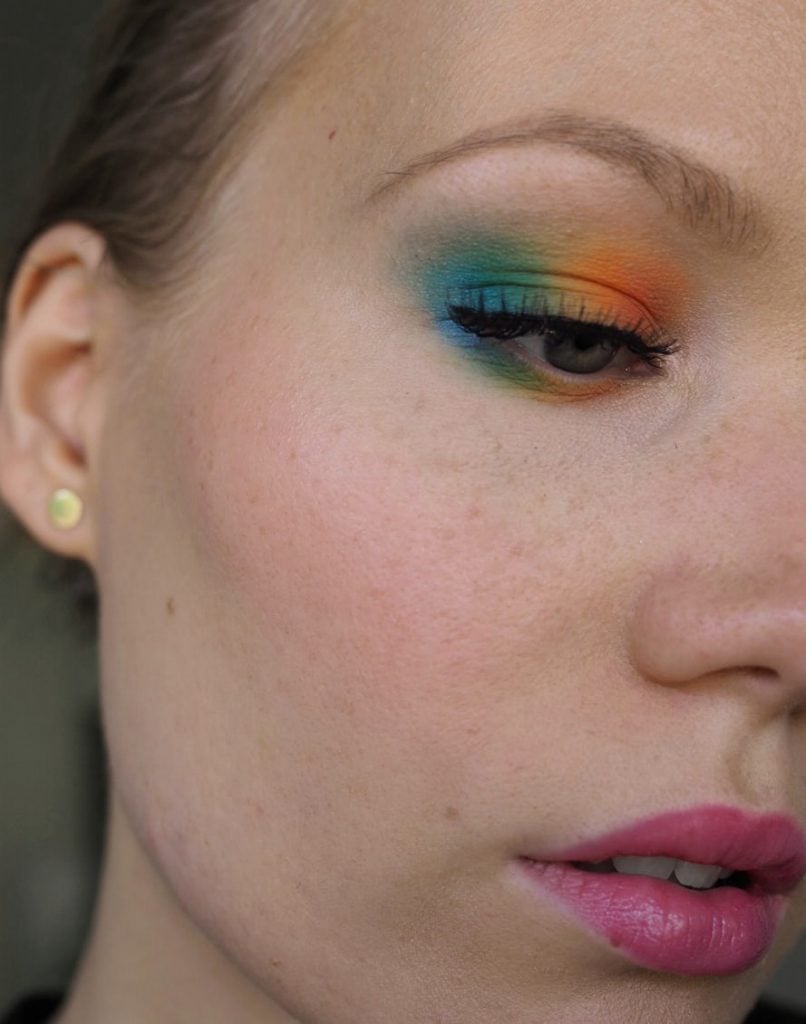
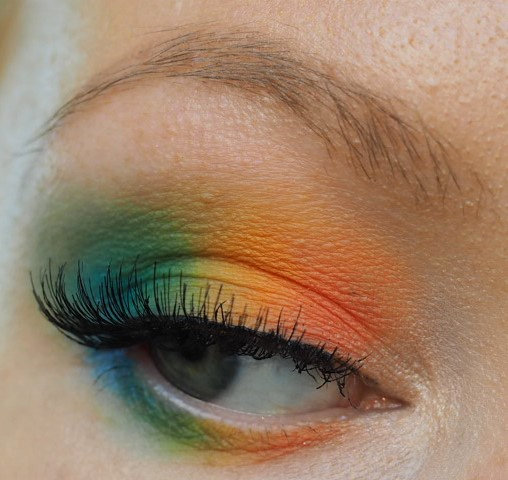
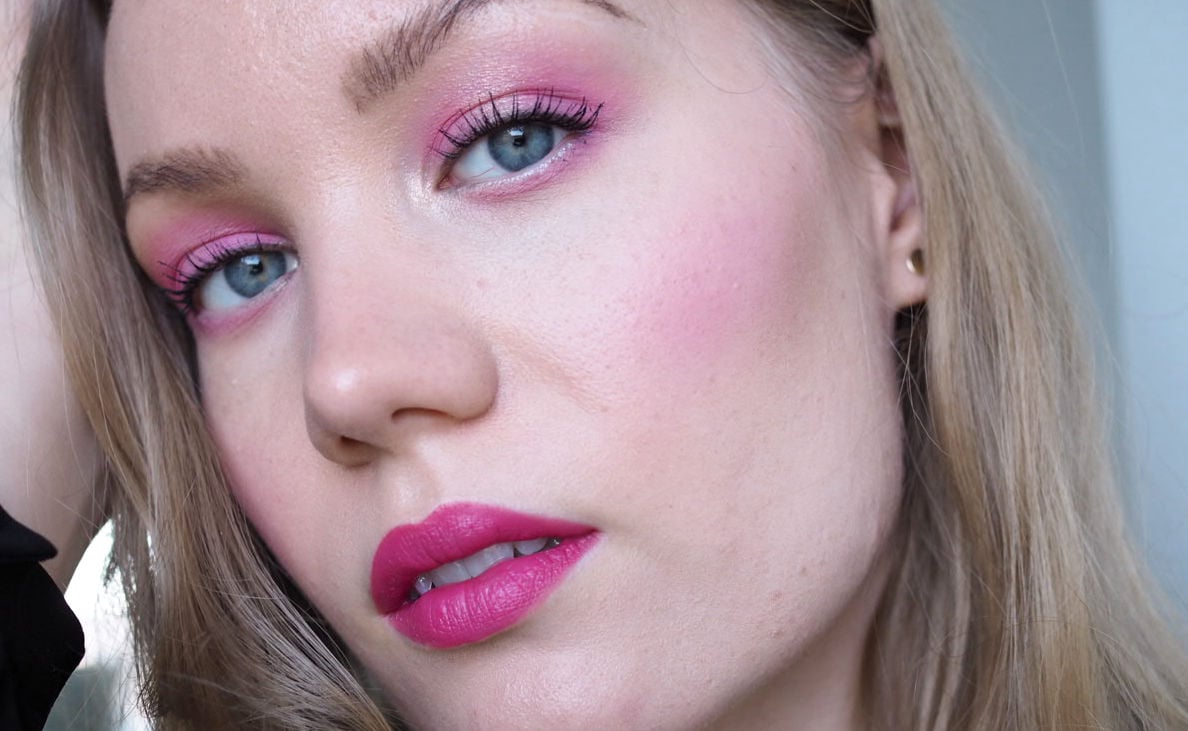
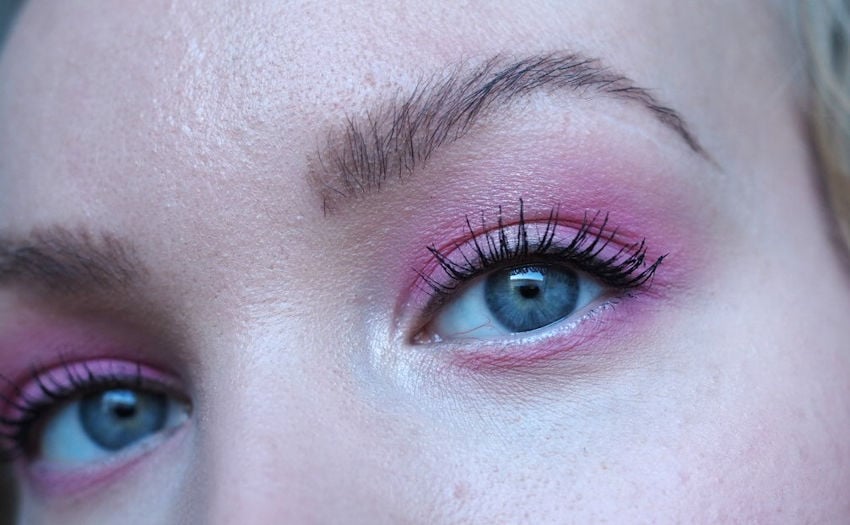
Using pink was expected, but necessary. Did you know pink eyeshadow actually looks beautiful on all eye colors? It’s especially flattering for blue and brown eyes. It also works great for green, but for green I would choose a deeper redder shade.


valentine's day makeup pink

Pink Valentine’s Day makeup tutorial

This look is pretty easily achievable, because I used bronzer to shade, a blush all over the lid and a highlighter as a light shimmer. So chances are, you already have the products and you don’t have to go and buy pink eyeshadow. Also, when you a choose a lighter blush color, it’s not going to be as intense. That’s going to make it more wearable, if a super bright color is not your thing.  In that case, check out my last year’s Valentine’s Day look as well, which was a bronzed rose gold kind of look.

pink valentines day makeup tutorial


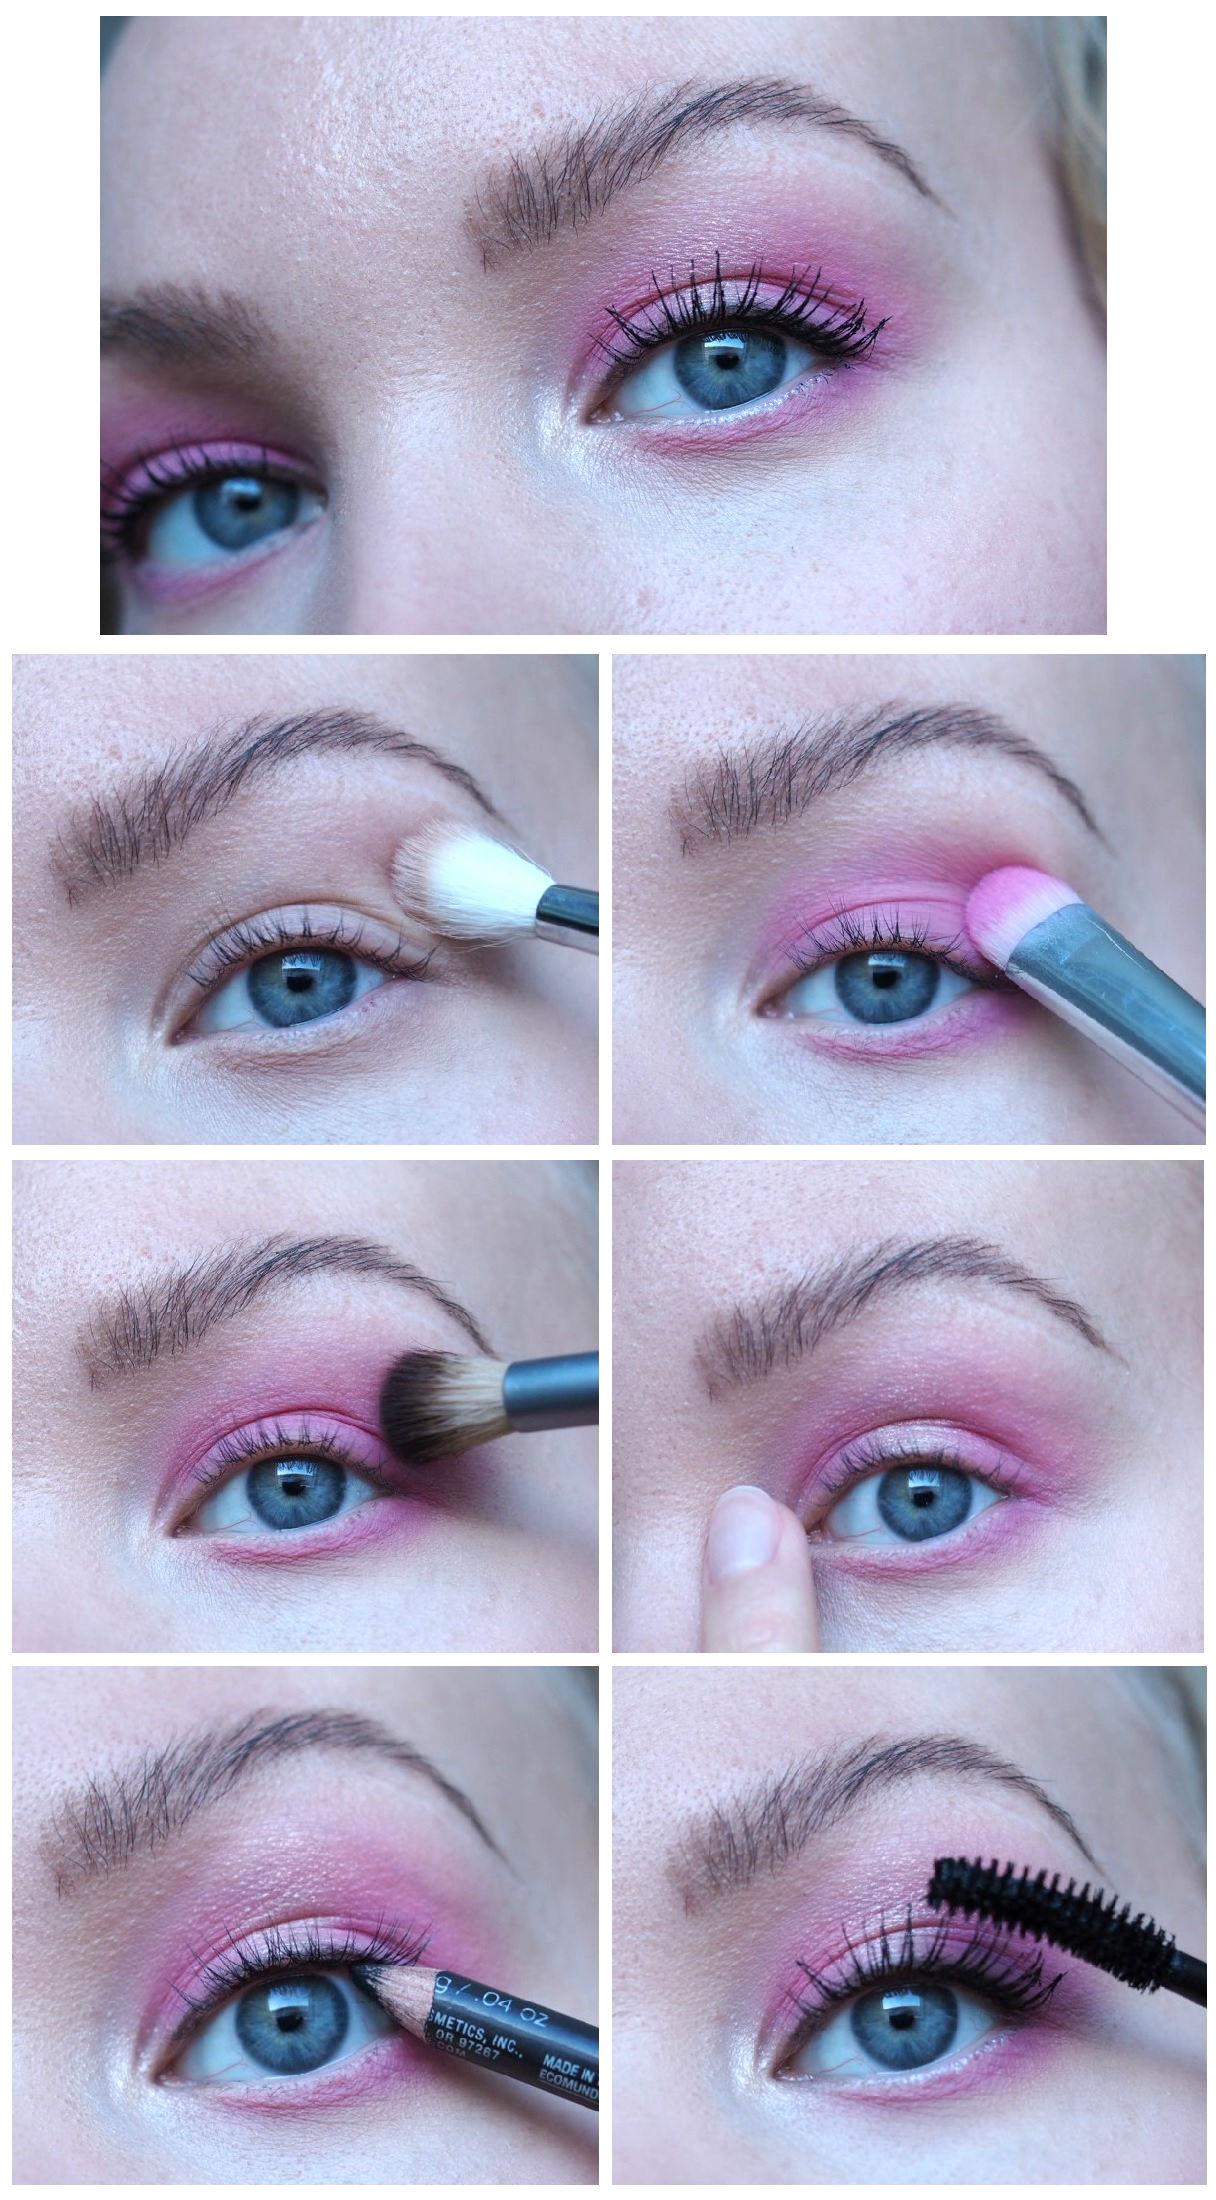
  1. Start shading the eye with a light brown color. Apply this shade to where you want the pink color to end, which is usually your crease or if you have deep set or hooded eyes, it’s the area where I have my brush in the photo, slightly below the brow bone. This helps to blend the pink to your skin tone better. I kept the color quite light. I used a big fluffy brush, Zoeva 221.
  2. Start packing the pink color all over the lid and to your lower lashline as well. I used elf 201 flat brush, which is actually pretty great (and super affordable). Blend using circular motions and a fluffy brush. I could have also used Zoeva 221, but I used a rounder fluffy brush from Ecotools, because it’s more concentrated.
  3. Apply some highlighter to the center of your lid and your inner corner. This brings some more definition to your eye and helps to brighten up the look. I used a new highlighter from NYX, which has a weird gel-like formula. It works great applied with a finger like this. It actually feels like a metallic eyeshadow.
  4. Tightline and line your eye using a black pencil. Add mascara and you’re done. Especially if you have a lash lift done to your eyelashes (it’s the best).

If you want to see this tutorial in a video format, head over to my Instagram Stories (I will save it for highlights too). @charlottaeve

valentines day makeup pink

pink eyeshadow on blue eyes makeup


PRODUCTS

*Benefit Hoola Bronzer
*Milani Baked Blush, Pink Delizioso
NYX High Glass Illuminating Powder, Moon Glow
Alima Pure Ink Pencil
*Tony Moly Panda’s Dream Mascara

*Zoeva brushes (Zoeva 221)
elf 221 brush
*Ecotools brush set

*MAC Amplified Lipstick Girl About Town

P.S. If you’re wondering why my brows look different and so good (no? just me?), it’s because I recently got a brow lamination/brow lift done. It’s a beauty treatment that I’m already obsessed with.

valentine's day makeup pink

Colors of the rainbow – tutorial

colorful eye makeup

colorfuleye makeup rainbow colors

I don’t always play with colors, but when I do, it’s a full rainbow. No but seriously, it happens. I don’t wear makeup for a long time, then I feel like doing something cool – and then I end up with something like this. Glad I did though, I feel my inspiration slowly coming back and I already have ideas for more fun, colorful looks.

For this look I used my *NYX Off Tropic Palette. It honestly has such good pigment. I primed my other eye white pencil, but for the other eye I didn’t use any white base whatsoever (yes, I forgot, okay?). And the colors turned out just as bright. So for anyone looking for colorful palettes, my vote goes for the inexpensive NYX palettes.

Palette was gifted to me. *adlink

Colorful rainbow eye tutorial

rainbow makeup tutorial

This look is honestly quite easy to do. The key is in the color placement. For example: I put green next to yellow, and blue next to green. Because when you mix up yellow and blue, you get green. That makes it look harmonious.

  1. You can apply a very light brown transition color to your crease area (or fake crease, in my case, with my deep set eyes), but it’s optional. I applied the tiniest amount of light brown under my brow bone, but it doesn’t really show up on camera.
  2. Then you can just start applying the colors one by one. First orange, then yellow, green and blue. I didn’t blend too much – rather I kind of tapped around the edges of where two colors collided.
  3. Finally I applied a light shimmer in my inner corner, lined my eyes with a black liner and added falsies. I think black liner and lashes are very important in this makeup – it balances the whole look and makes it look more put together.

This photo shows you better where I applied my transition color (that light brown). Again, it’s because of my eye shape. You can read more about working with deep set and hooded eyes here and here.

Colorful rainbow makeup

Key Products:

*Madara City CC , Medium Beige (blog post)
*NARS Soft Matte Concealer, Custard
*NARS Radiant Creamy Concealer, Vanilla

*NYX Off Tropic Palette
*Eylure Lashes

*Yves Saint Laurent Volupte Shine Lipstick, 41

Did you already see my previous tutorial? It was about how to apply mineral makeup & a quick luxury makeup. That tutorial is for the whole face, rather than just for eyes.
I also want to remind you of my big post for brides. I gathered the best bridal makeup products and showed you a bridal makeup look on a video there. And I just want to mention that all the product recommendations are based on actual experience on working with a lot of brides.


And finally – if you’re interested in good coffee, go participate in my giveaway here!

rainbow colored eyeshadow

P.S. What is everyone up to this weekend? I’m travelling to my hometown to celebrate my grandpa’s and grandma’s 80th birthday. Roadtrip, here I come! Luckily 7 hours in a car feels easy after being used to driving all the way up north, like last year, when we drove to Lapland.

Scroll to top