PEARL SKULL – Easy Halloween makeup tutorial

Halloween makeup tutorial - Pearl skull

Halloween pearl skull white pink

*adlink


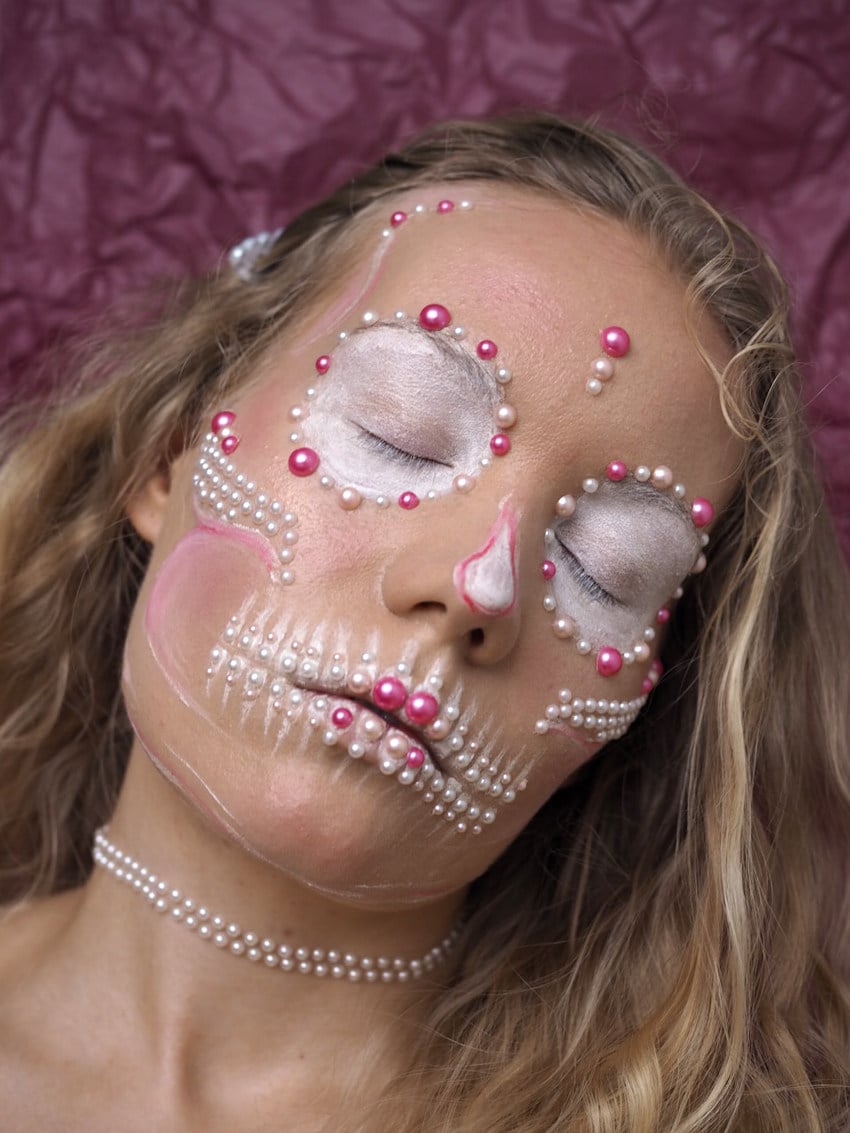
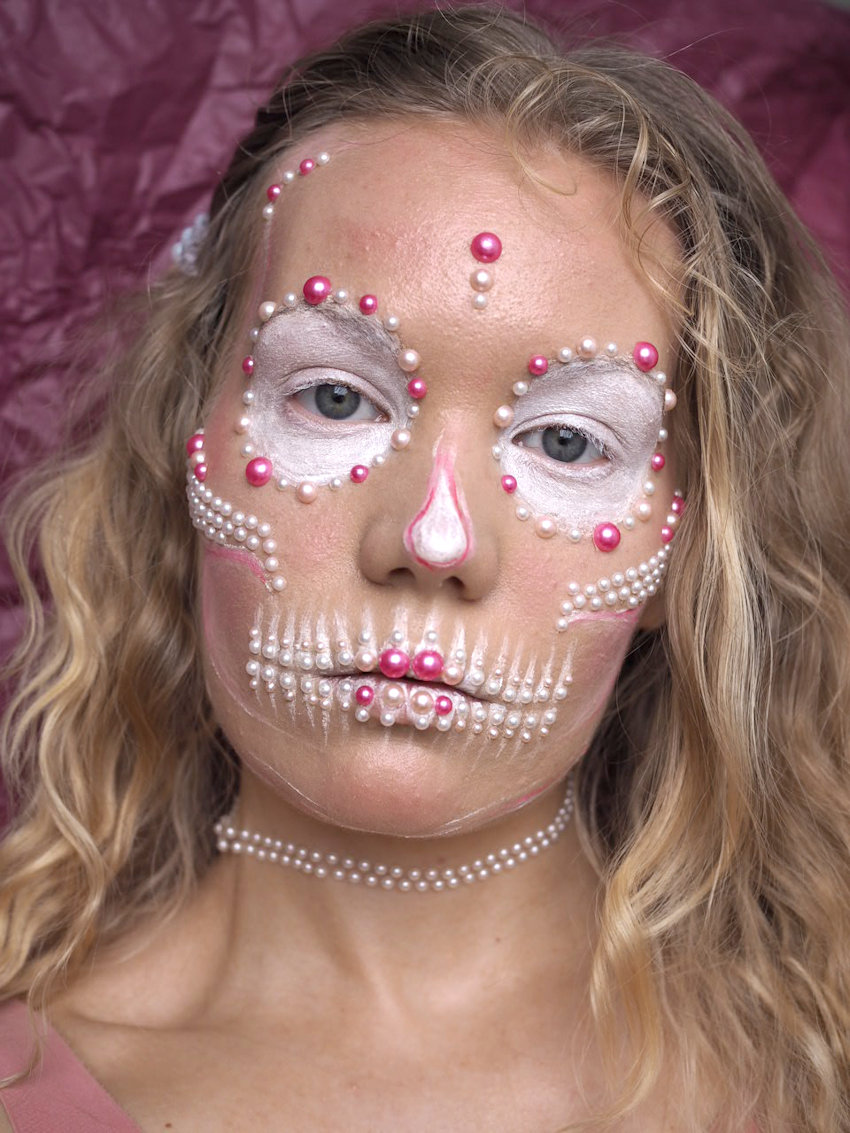
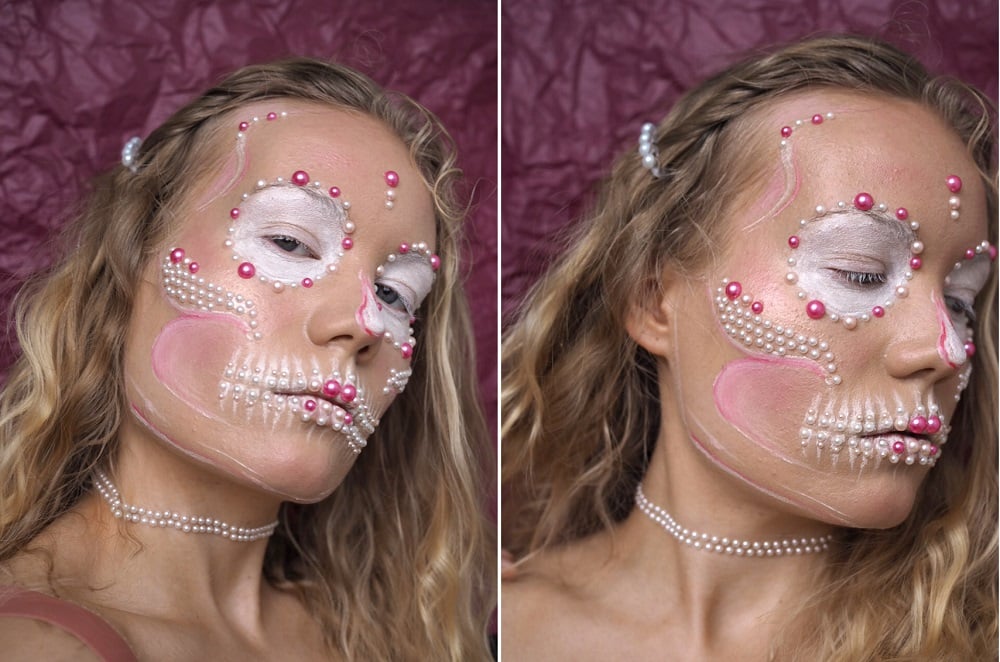
Easy pearl skull Halloween makeup tutorial.

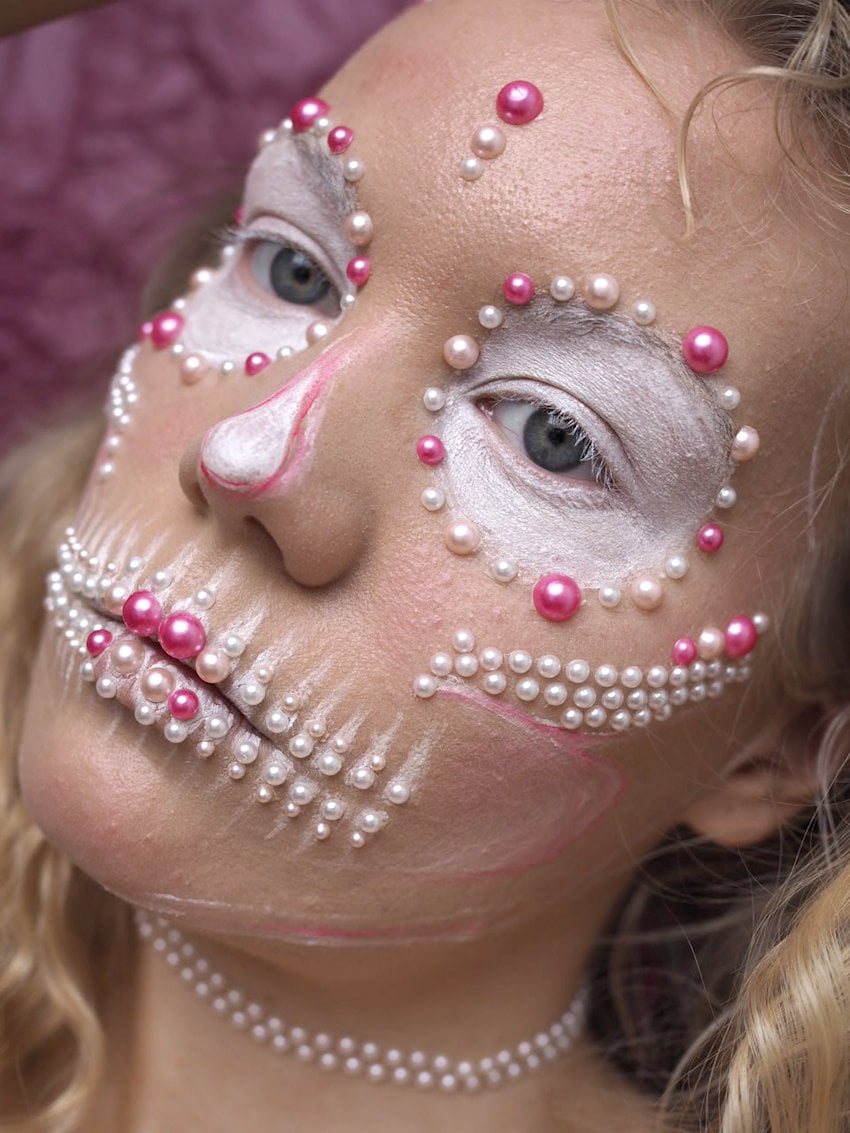
I’d like to say this white pink pearl skull created itself.  In reality I struggled with it for over two hours and almost quit a few times, but my sister pushed me to keep going. I just tried to go with the flow and added things here and there. I wanted to keep it light and pretty, even if it is a skull. In the end, it turned out really nice. So my point is: keep going and trust the process!

Pearl skulls are beautiful and I definitely want to do one in the future as well. But in all honesty: pearls require patience. I basically glued each pearl one by one (because the stickers didn’t stick). But the result is worth it.

Anyway – here is my tutorial for this easy pearl skull!

pearl skull easy halloween makeup tutorial

Easy pearl skull halloween makeup tutorial

Here are the step by step photos and written instructions for creating this pearl skull. All the products are listed at the end of this post.

Pearl skull Easy Halloween tutorial


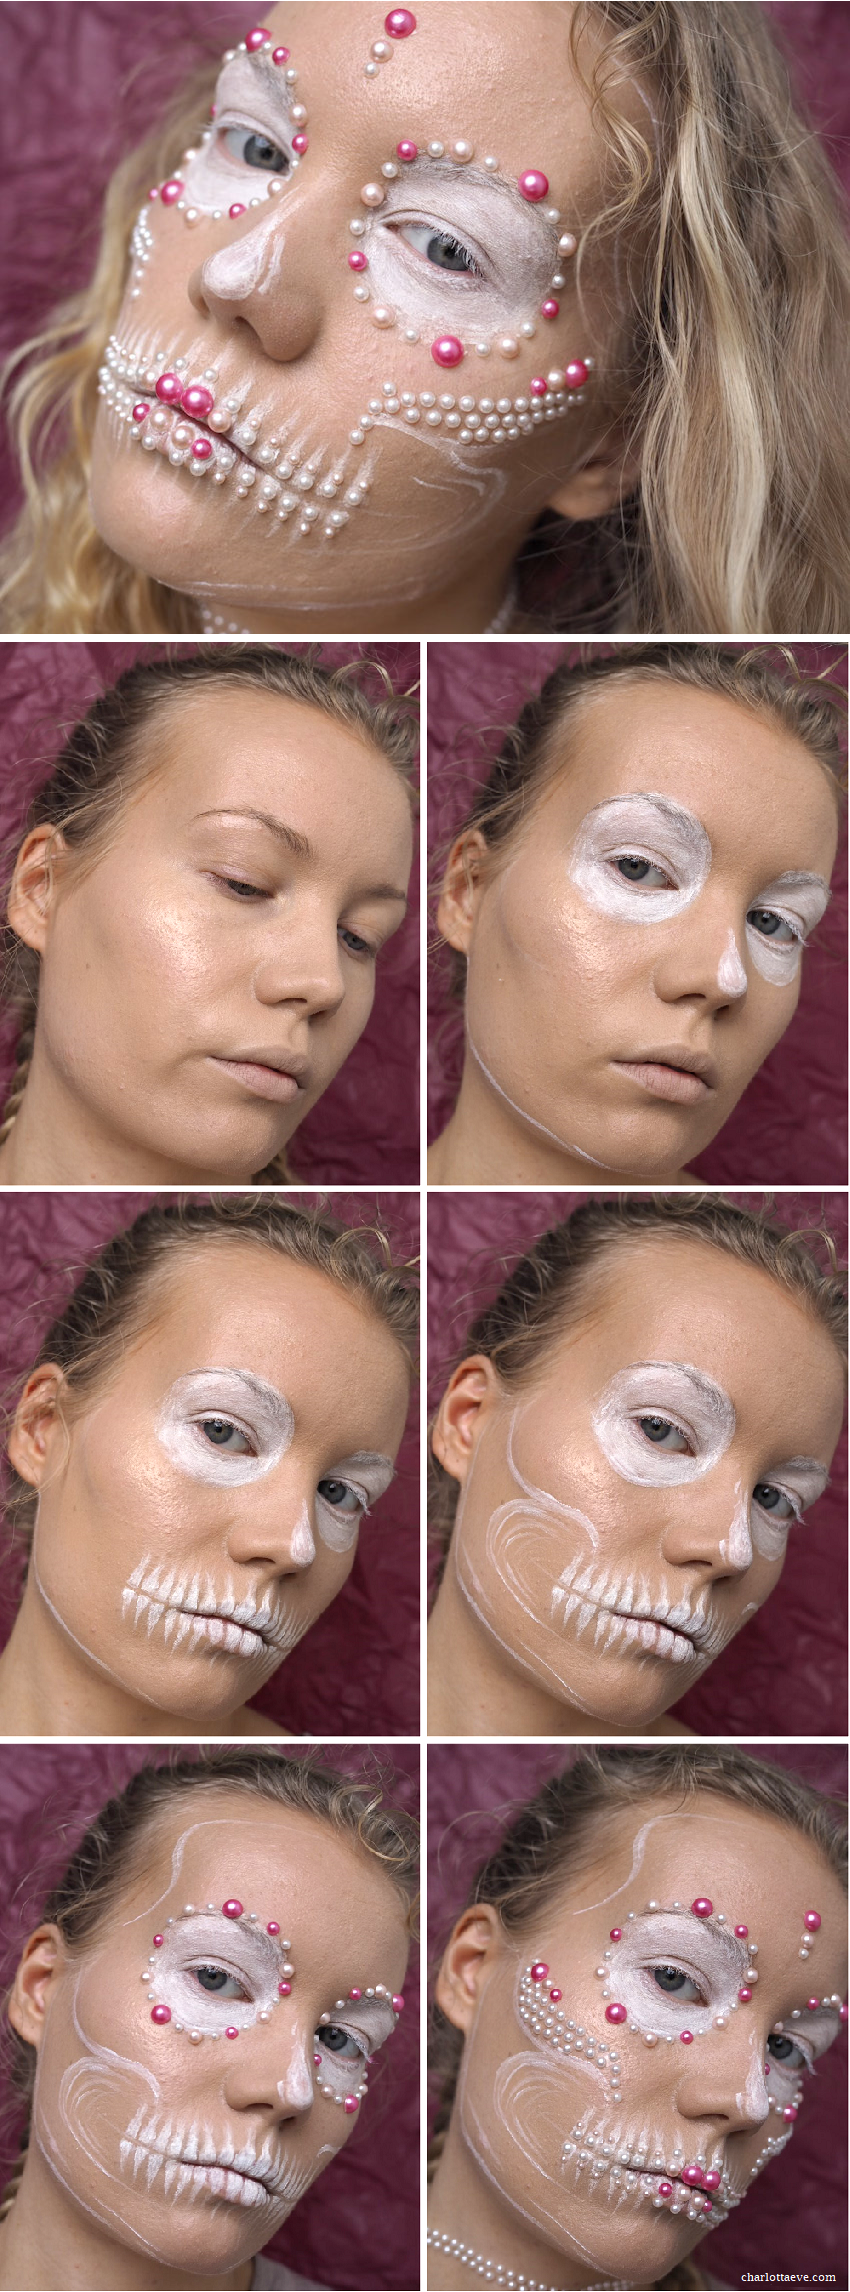
  1. Apply a light reflecting primer all over your face. Bonus, if the primer has a pearly shade to it. Then apply a full coverage foundation all over the face. After that highlight your face – at least your cheekbones. A cool toned/pearl highlighter is perfect for this look. I would also suggest adding a lot of pink blush at this point! I applied blush only in the end, but it did look really nice, so I recommend doing it right in the beginning. You can add blush on your cheeks, nose, chin and forehead.
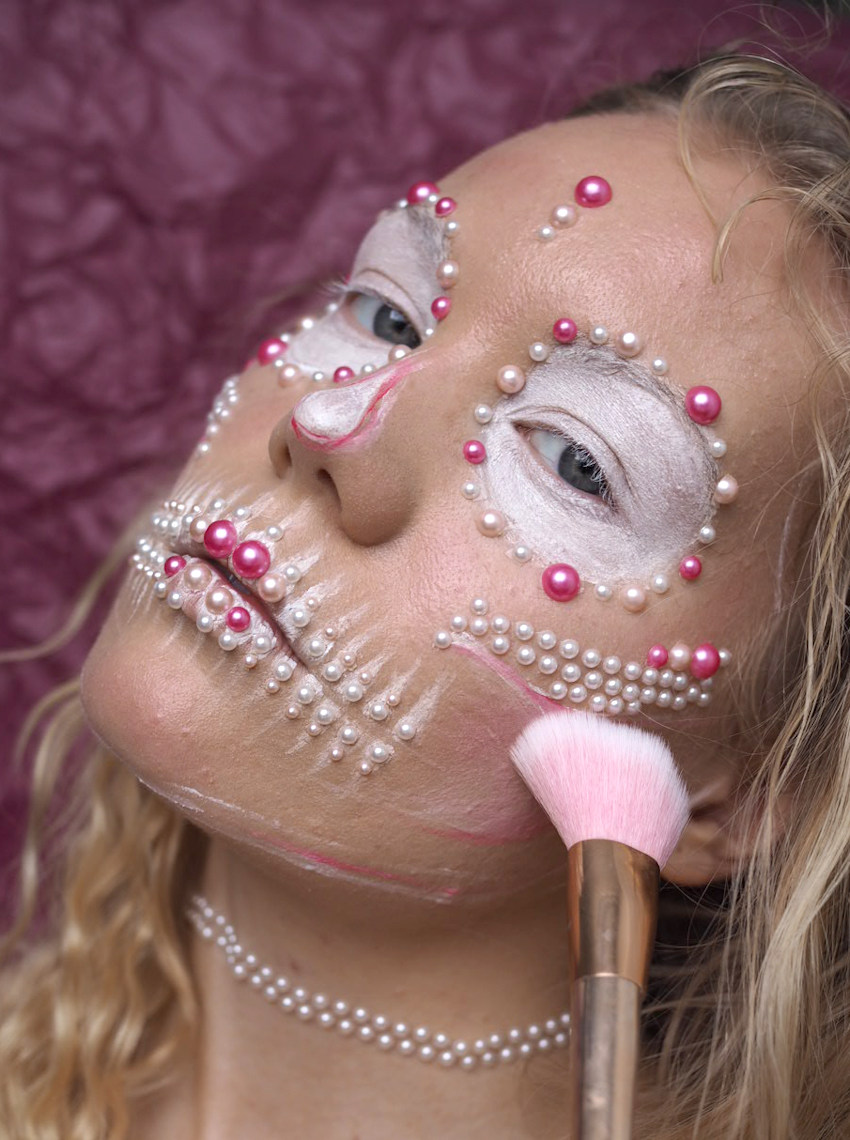
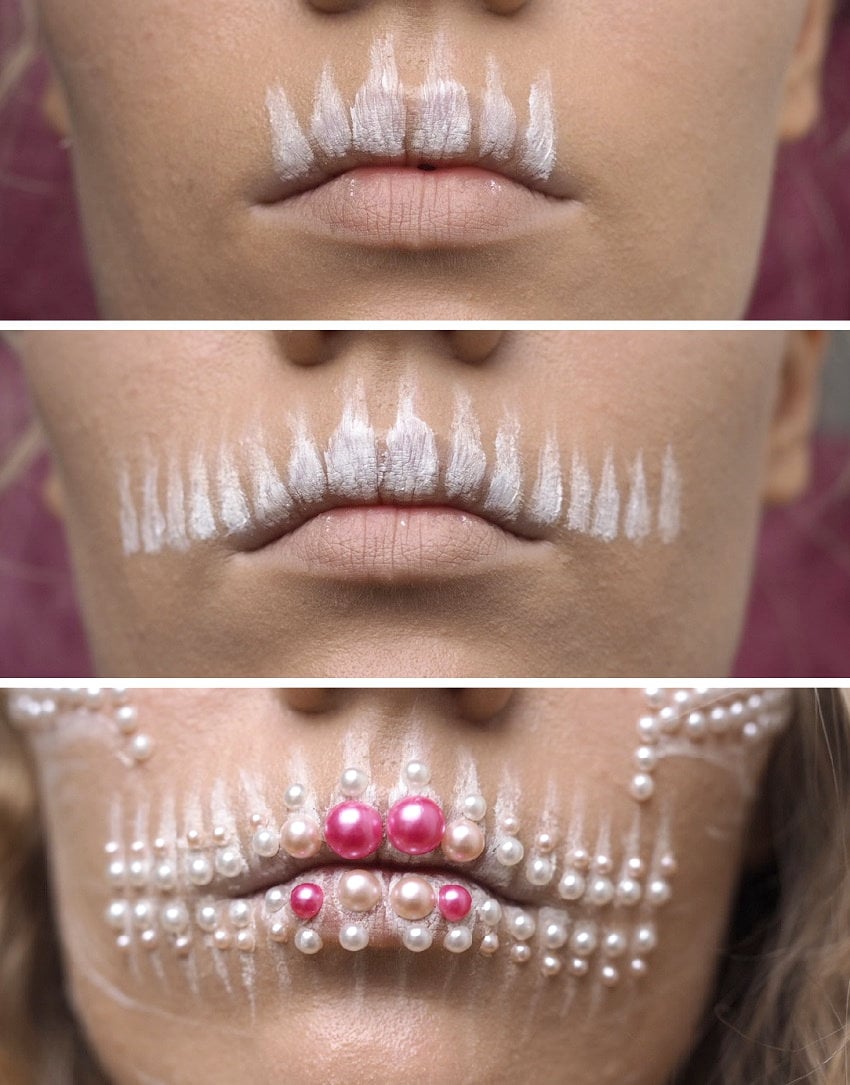
  2. Start sketching out the skull with white face paint. I also did some extra brush strokes here and there (on my nose, chin etc).
  3. Finally – add your pearls one by one. And that’s it! Finish off the look with some pearl accessories.


pearl skull teeth makeup


pearl skull easy halloween makeup tutorial

pearl skull makeup


The most important things for this look are basically just face paints (or you could use a white pencil like *NYX Jumbo Eye Pencil in Milk), glue and pearls (or pearl stickers).
If you’re extra like I am, you also need light reflecting primer, a full coverage foundation, a highlighter and a blush.

PRODUCTS

*beautyblender opal essence primer
*Estee Lauder’s Double Wear
*Milani Baked Blush, Bella Rosa
*Becca Cosmetics Prismatic Amethyst Highlight
*Face paint set with brushes
*Face pearl stickers

*Pearl hair clips

pink white pearl skull halloween makeup


Halloween makeup idea: ICE QUEEN

ice queen halloween makeup

*adlink

I created this ice queen Halloween look for my friend back in 2017. It’s one of my favorite creative looks, but I haven’t shared it here ever. It’s time to fix that mistake! You can recreate this look to suit your makeup skill level – so even if you were a beginner, I think you can totally pull it off. The important things are to use cool blue tones throughout the makeup, add some glitter and add your extra accessories such as blue contact lenses or false lashes.

I swear – it’s one of those makeup looks, that looks a bit more complex than it is. But that still doesn’t mean it doesn’t take time to do it. Adding details such as rhinestones, hand drawn snowflakes or false lashes is fine work that takes a bit of patience.


Ice queen Halloween makeup

Ice queen makeup how to

What you need for this look:


ice queen makeup


ICE QUEEN MAKEUP HOW TO

BASE:
First step is to add foundation to get a nice even base. I recommend using something that has a lot of coverage. For example *Estee Lauder’s Double Wear would be perfect. After that, contour and sculpt your face using a blue color. Add blue also on your neck. Then add icy highlight.

FACE DETAILS

Snowflakes
Draw on some snowflakes around the face and on the cheeks. Snowflakes are basically just straight lines that cross each other (google snowflake and learn from example). Don’t forget the neck!

Glitter
Add a touch of fine glitter on the highest points of the face as a highlight – and on the brows. I used fine, almost white glitter.

EYES
Do your eyebrows with blue eyeshadow or pencil.
As for the eyeshadow – the important thing is to use blue cool colors. If eyeshadow is not your strong suit, one color all over the lid will do. But you can also learn! I have lots of eyeshadow tutorials on my blog – you can check them out and just switch out the colors. I contoured the eyes with darker blues and left the lid quite light.
To finish off the eye look, add customized false lashes and glue on rhinestones with lash glue.

LIPS
Finally, add blue lipstick. If that is too much, you could also try to use a cool nude shade. That’s it!

ice queen makeup halloween makeup idea

What do you think of this look? Anyone fancy going (online) as an ice queen this Halloween?


Scroll to top