Instagram makeup trends & the challenge

OLYMPUS DIGITAL CAMERA

OLYMPUS DIGITAL CAMERA

OLYMPUS DIGITAL CAMERA

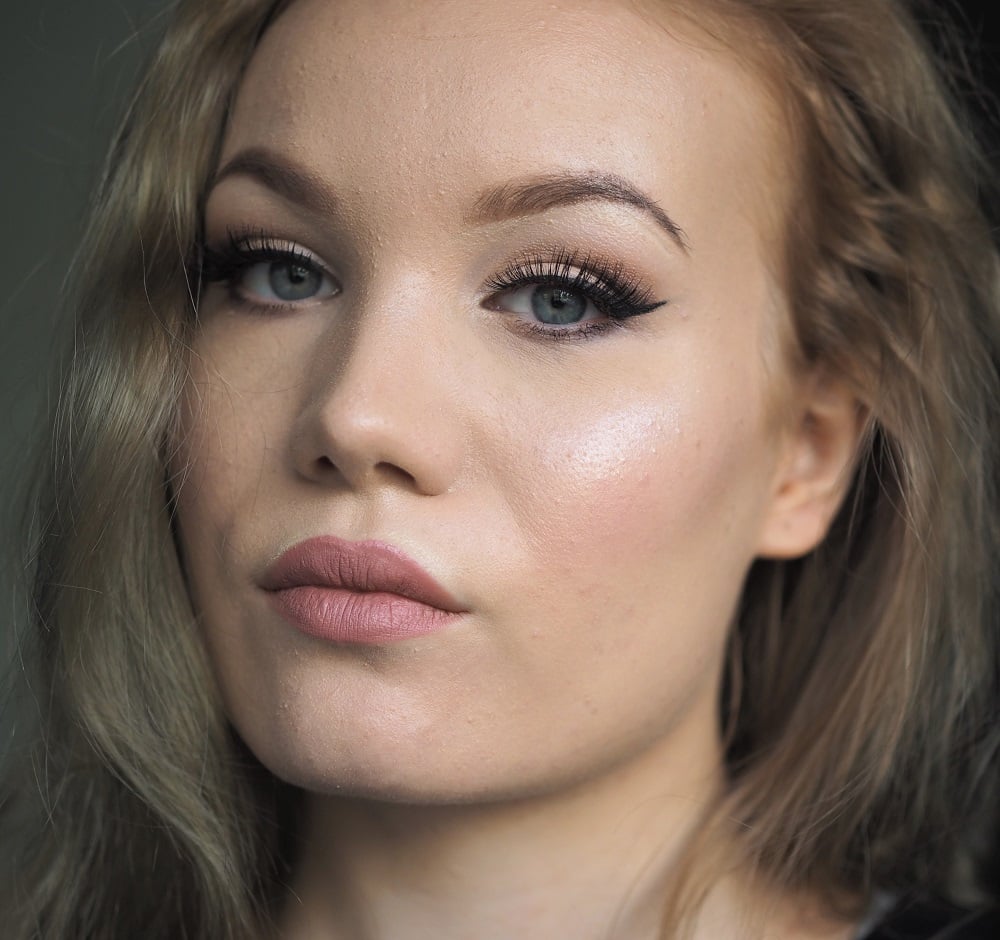
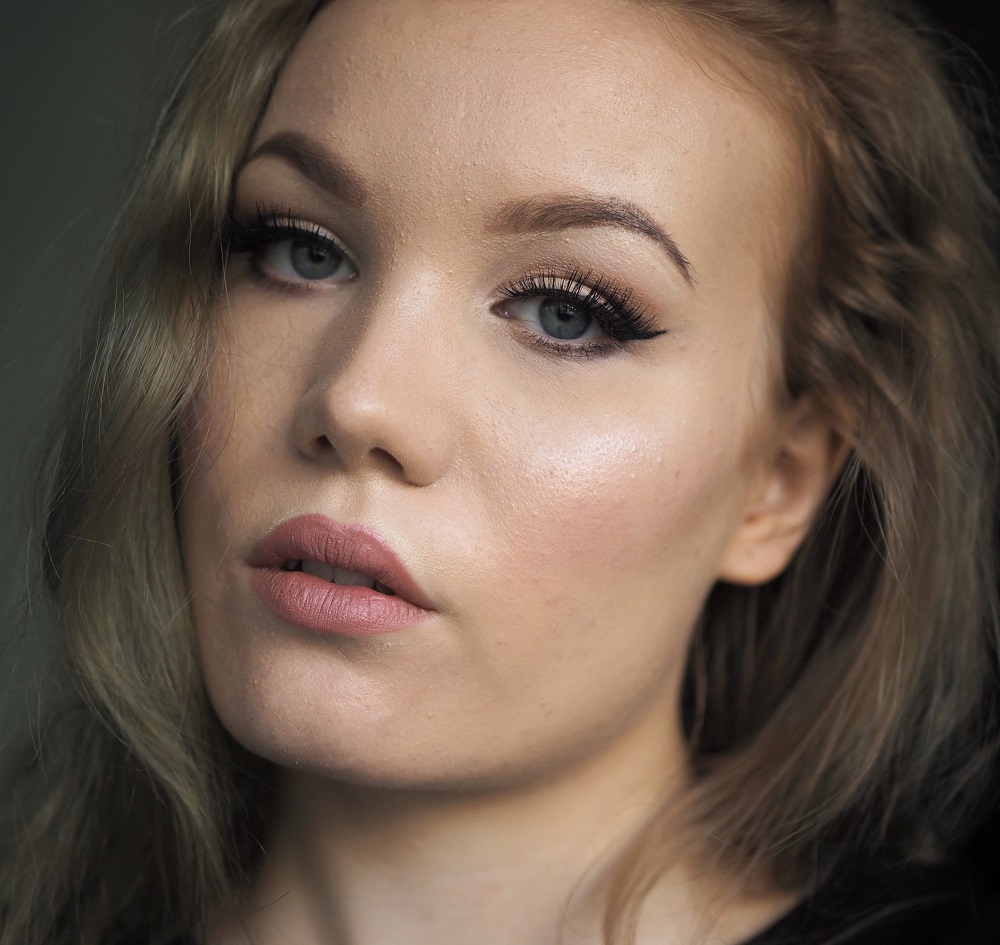
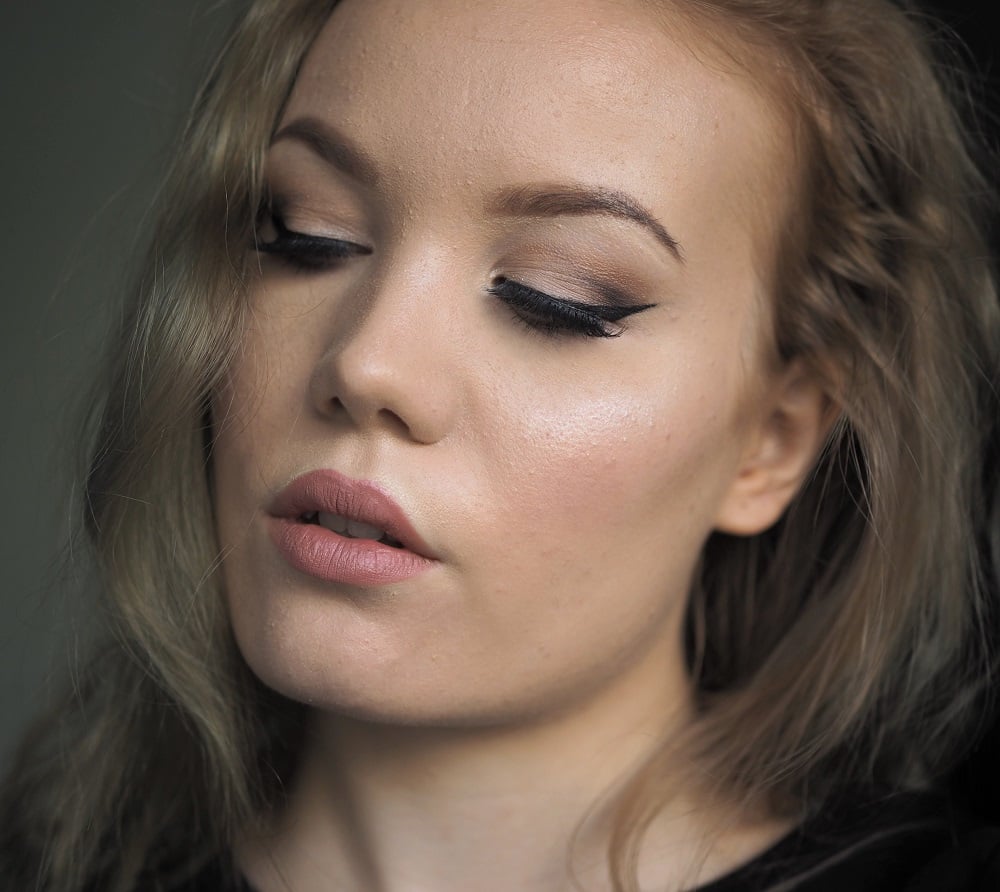
Defined and full brows, brown colours on lids with some kind of a cut crease, big winged liner, full lashes, a ton of highlighter and overdrawn nude lips. That is my overstated take on the #instagrammakeup.

Beautiful Pauliina from All The Little Royals -blog did this challenge and I wanted to take part in it too. The idea is to copy a makeup look that is really in right now and that is seen with many bloggers and vloggers. Instagram really shows the makeup trends that are in at the moment and even though I don’t agree with all the trends doesn’t mean I don’t enjoy gorgeous photos of awesome makeup.

I like full coverage foundation but don’t really wear it on every day basis ’cause it can look cakey and heavy especially when it starts to wear off. On photos though it looks amazing – especially if you pair it with photoshop. I feel like I can’t talk about instagram makeup without talking about photoshop a bit – ’cause they seem to walk hand in hand. I really can’t bear the blurred skin and bright eyes and shimmering photoshopped highlighter with some of the vloggers. I do sometimes edit my photos but mainly I do it to remove pimples or something like that. I like my makeup to be the shining star – not my editing skills. Do you feel me?

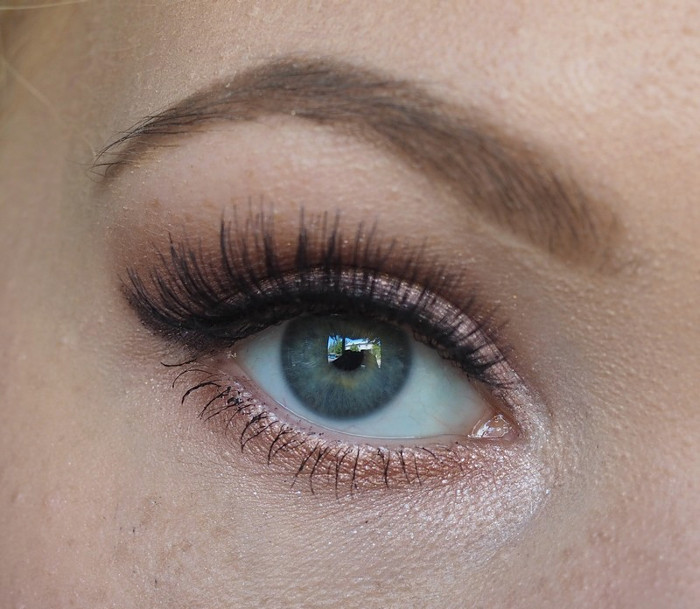
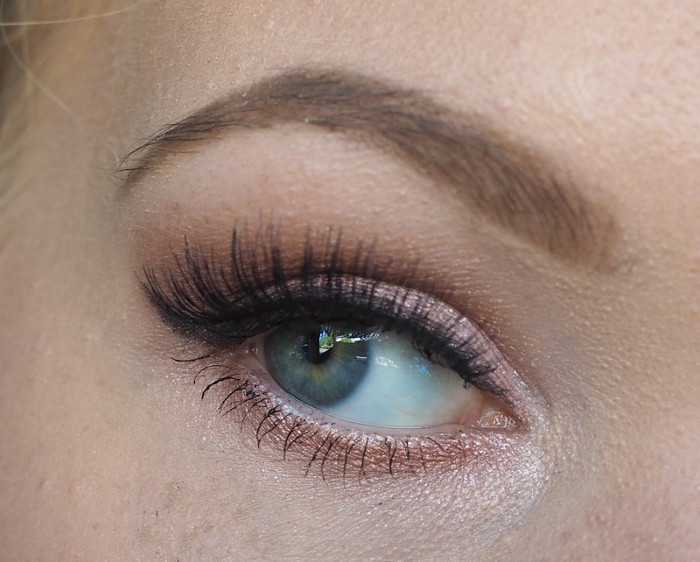
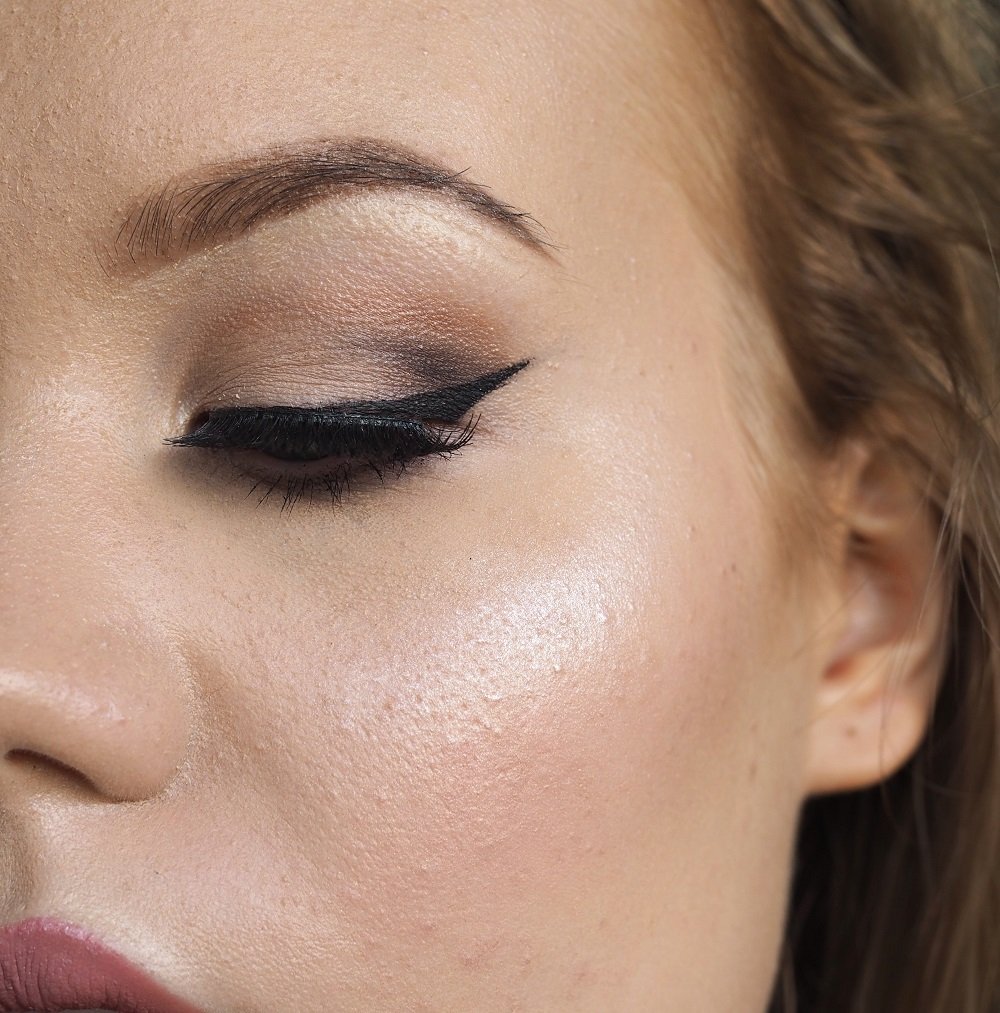
Back to the makeup – I love this eye look! Brown neutrals suit everyone and big lashes make everything better. I like winged liner too but I just can’t make it work for my eye shape. The struggle is real with that one. I accidentally did a really thick liner for this look but luckily it looks fine with big lashes. I solemnly swear to learn to slay my wings in the future.

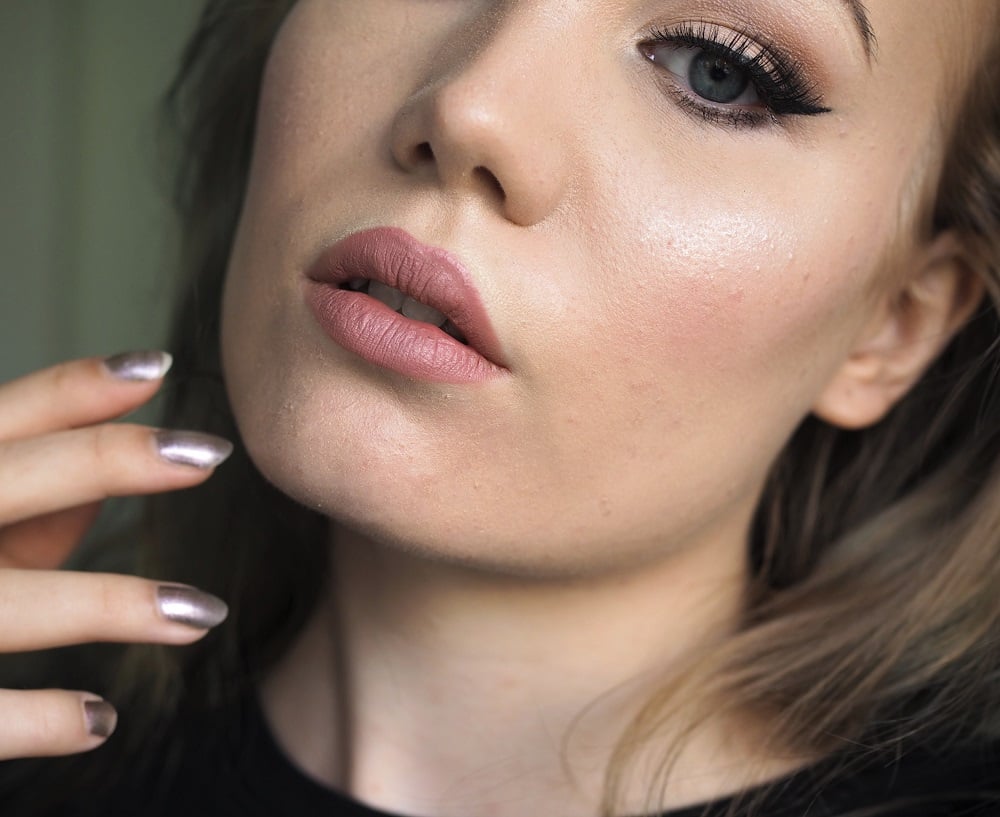
Nude lips have slowly got me. They’re just easy to pair with anything and they look good even wearing off. Overdrawn lips though are not really my thing. I do line my lips slightly over my real lip line but never like this. I feel like I look ridiculous and bigger lips don’t suit my face. I’m actually relieved about that – I don’t want to want to get lip injections. That seems to be a trend now too which is a bit sad.

What do you think on the instagram trends and makeup looks?

OLYMPUS DIGITAL CAMERA

OLYMPUS DIGITAL CAMERA

PRODUCTS

Benefit Porefessional Primer
Clarins Everlasting Foundation in Nude
Innisfree No-Sebum Mineral Powder*
NARS RCC in Vanilla
Benefit Hoola Bronzer
Zuii Organic Melon Blush
Sleek Makeup Solstice Highlighter Palette

UDPP
Sleek I-Divine All Night Long  Palette
Essence Liquid Eyeliner
Eylure 143 Lashes
Zuii Organic Maxi Lash Mascara

Rimmel  Lasting Finish Lipliner in Natural
MAC Faux Lipstick

[related_post_by_tax]

Graduation makeup – Naked3 tutorial

naked 3 eye makeup

naked 3 palette eye makeup

Spring and summer is full of parties so I decided to do a little tutorial for graduation makeup. I used a palette that many of us have – Naked 3. It has nice warm neutrals so you can use any palette you have with same colors (there are a lot of dupes for the palette!).

This tutorial is also good for hooded or deep set eyes as my eyes happen to be like that. I hope you find this tutorial helpful! I’m referring to the colours from the Naked 3 palette with “x” .

Naked 3 tutorial

1.Prime your eyelids. I use the classic Urban Decay’s Primer Potion. I set it with  “Strange”. 
2.
Do your brows. That helps to give your eyes a frame and is just a personal reference really. Brows make quite a difference, right!
3. Prime your eylids with white eye pencil like this. This helps to make the shimmery colours show up more and with Naked 3 some of the colours lack pigment so don’t skip this!
4. Blend with your fingers.
5. Add “Dust” to the inner corner and blend to the center. The colour should cover almost like a third of the lid.
6. Add “Trick” to the centre of the lid but leave a little space to the outer corner.
7. Add “Liar” to the outer corner where you left a little empty space.
8. Blend these three colours together with a tapping motion.
9. Apply  “Limit” to the crease and slightly above it.
10. Apply “Nooner” to the outer corner of your eye and to the crease.
11. Apply “Dust” and “Trick” to the lower lashline.
12. Line your eyes using a damp liner brush and “Blackheart”. You can wing it or not – up to you and your skills.
13. Add mascara and falsies (mine are Eylure #143).

Blending instructions:
With hooded eyes you want to bring the colour up here so blend it up and straight from the crease. As you can see when the eye is relaxed it hides some of the eyeshadow. So you want to make it rise higher on the outer corners so it lifts the eye. This works for other eye shapes as well and creates a cat eye look to them.

Face

1.Prime your face! Especially for parties such as graduation you want your makeup to last all day long and a primer helps with this. Choose a primer suitable for your skintype – more here!
2. Apply foundation and set it with powder. I used Rimmel’s Lasting Finish Nude in Ivory and I do recommend that for all skintypes. It’s a great foundation. It’s my go to foundation for parties.
3. Do your basic contouring if you like. I applied just a little Hoola under the cheeks. I concentrated to the highlighting this time and I used “Dust” as a highlighter.
4. Apply a light natural colour to the cheeks. I used Jane Iredale’s Flawless blush*.
5. Any lipcolour could work for this look but I deciced to go with nude glossy lips. I lined my lips with Zuii Organic’s Nude liner and lipstick is IsaDora’s Twist-Up Gloss Stick in Milk ‘N Chocolate.

Products

Rimmel Lasting Finish Nude
Jane Iredale Flawless Blush
Urban Decay  Primer Potion
NYX Jumbo Eye Pencil -Milk
Urban Decay Naked 3*
IsaDora Twist-Up Gloss Stick -Milk ‘N Chocolate
Eylure – 143


*adlink

Scroll to top