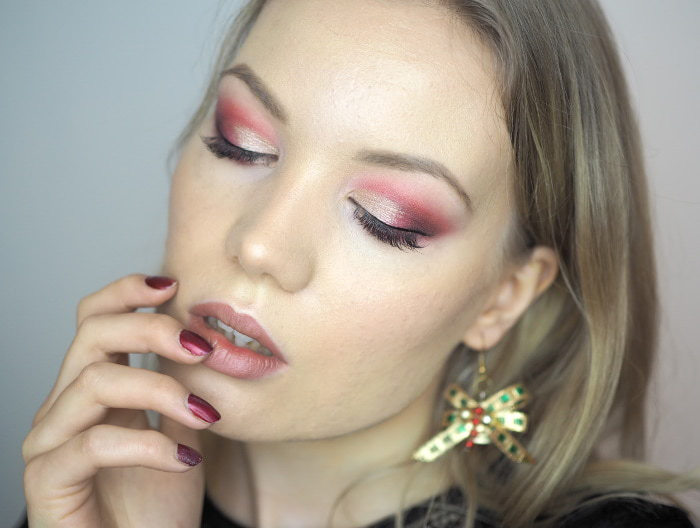
I think with makeup you can use what colors you like. And many colors actually do suit everyone. But for the best results, it’s helpful to know a little something about what colors work best for your eye color.
In this post I will share a makeup tutorial specifically for blue eyes. It’s an easy color to bring out.
Basically you just need to know a little something about complementary and analogous colors. You also need to work with what you have. Are your eyes more warm or cool -toned? If they’re cool, you can use warm colors to get the biggest impact. Or cool colors, if you want your look to be more harmonious.
What colors suit blue eyes?
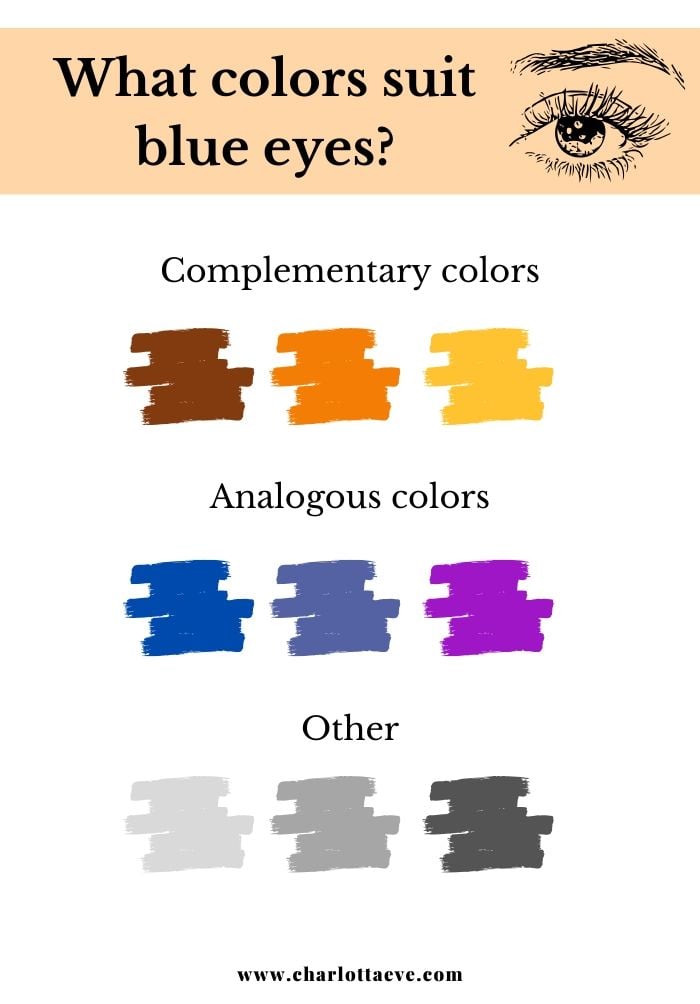
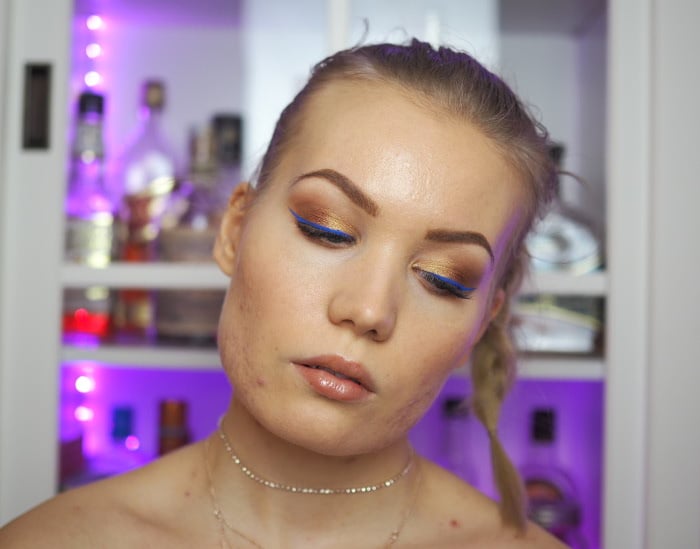
The complementary eyeshadow colors are bronze, golden and orange. Basically you can’t go wrong with warm brown shades. Blue is cool, so pairing it with warm complementary colors really makes it stand out.
You can also try analogous colors, such as blue or purple. It looks really nice and harmonious.
Another great color for blue eyes is grey. It makes your eyes look super icy blue and it’s great for those, who prefer cool tones.
What if my eyes are blue AND green?
I’m one of those people. Basically you can bring out the blue in your eyes using these same tricks and you can also follow the rules for green eyes, to bring out the green in your eyes. It’s a win win! I find that since my eyes are blue-green and leaning more to warm than cool – I can make the blue in my eyes stand out the most with cool tones such as purple (maybe that’s why it’s also one of my favorite eyeshadow colors).
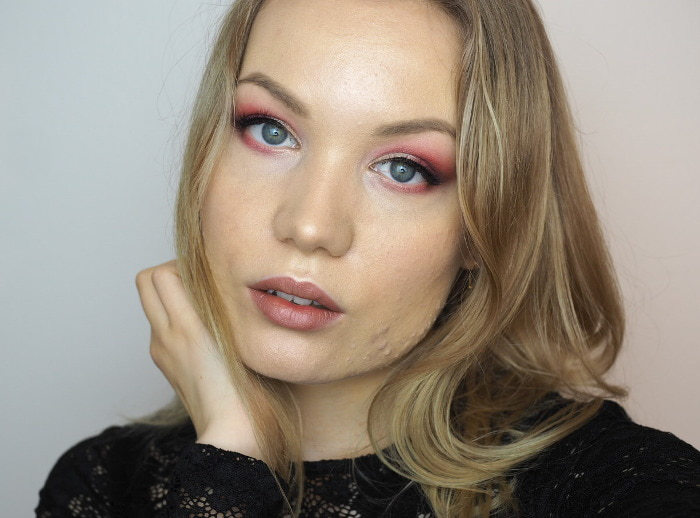
Makeup for blue eyes
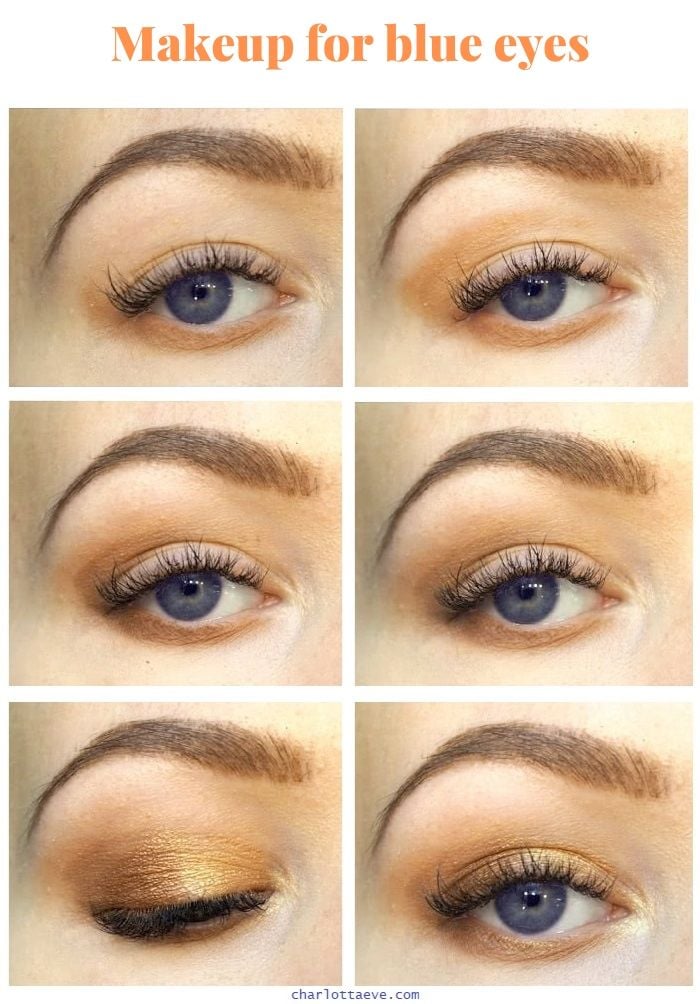
This tutorial is very basic. I used warm brown colors with gold and bronze. The colors really make your blue eyes pop! I also paired this look with a fun blue liner for photos, but you can obviously skip that or replace that with a regular black liner.
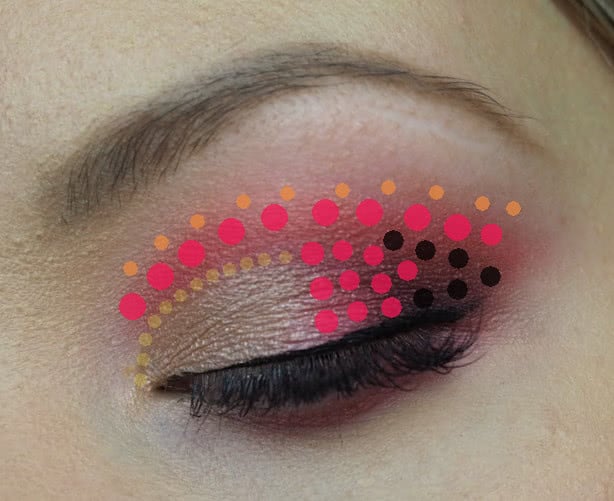
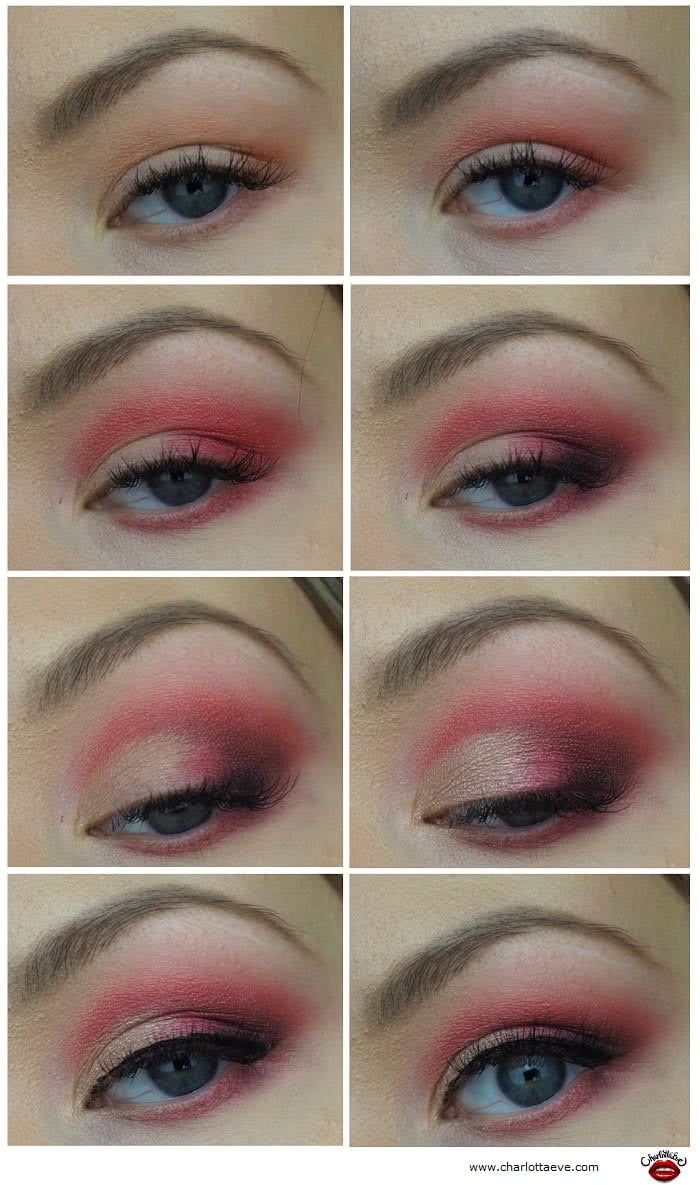
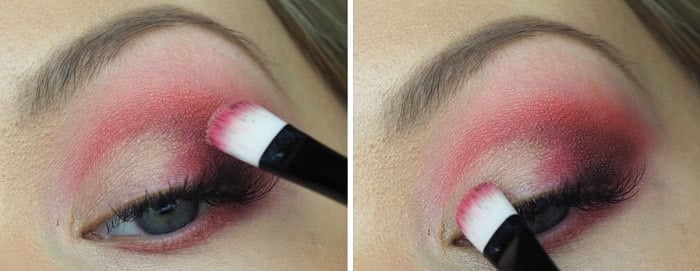
Step 1: First, apply a light warm brown shade on your lower lash line and on your crease-area as shown in the photo. Take a darker shade and deepen that color. This is your eye shadow ‘base’. Blend these colors well.
Step 2: Apply a bronze and a golden shade on your lid, half and half. Pat it on to get the most pigment.
Step 3: Apply some light shimmer in your inner corner and line your eyes.
And that’s that!
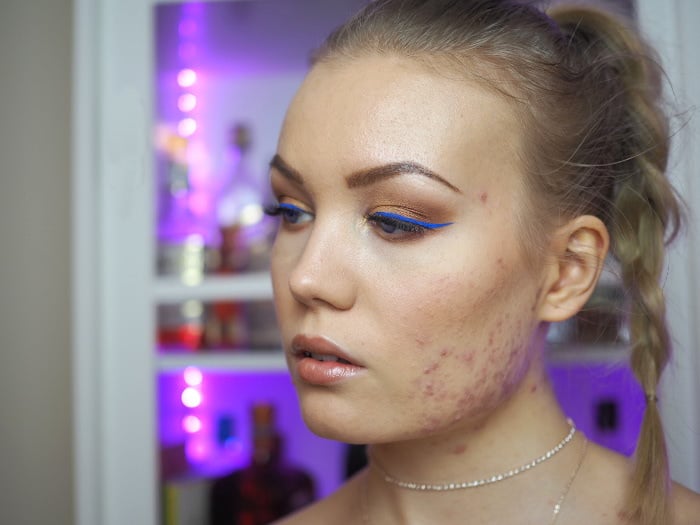
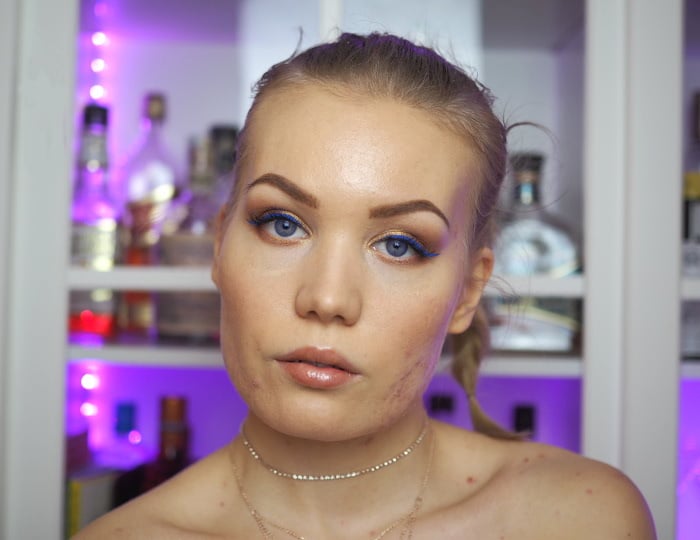
This makeup and my photo with the visible acne/scarring got a lot of likes on my insta (@charlottaeve). I’m still proudly wearing my imperfect skin – and didn’t want to edit it for this tutorial either. Makeup is about so much more, than being perfect. For anyone suffering from acne: don’t let it stop you from playing with makeup and enjoying it.
PRODUCTS
Urban Decay Primer Potion Original
NYX Perfect Filter Palette, Golden Hour
NYX Vivid Brights liner, Sapphire
Brows
Holika Holika Wonder Drawing Skinny Eyebrow, 02