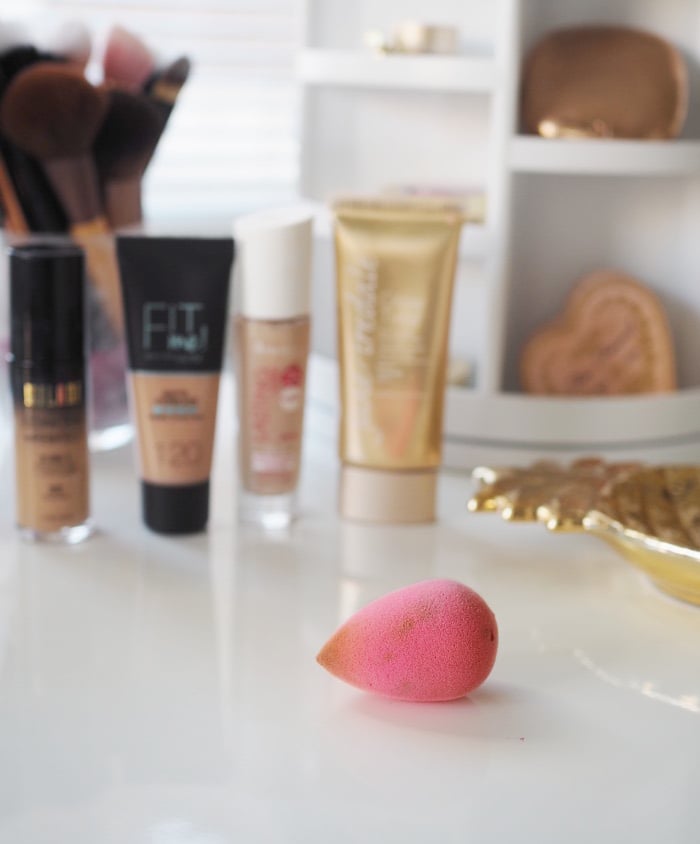
You need to try an egg-shaped makeup sponge. Really.
I always apply my foundation with a makeup sponge. Yet I’ve never written about beauty sponges here on my blog, even though it’s the ultimate makeup trick.
Okay, sure. I might have mentioned the beauty blender here and there. But since using a makeup sponge for makeup application is the key element in doing my makeup and making my base look beautiful and flawless – I think it needs a bigger spotlight.
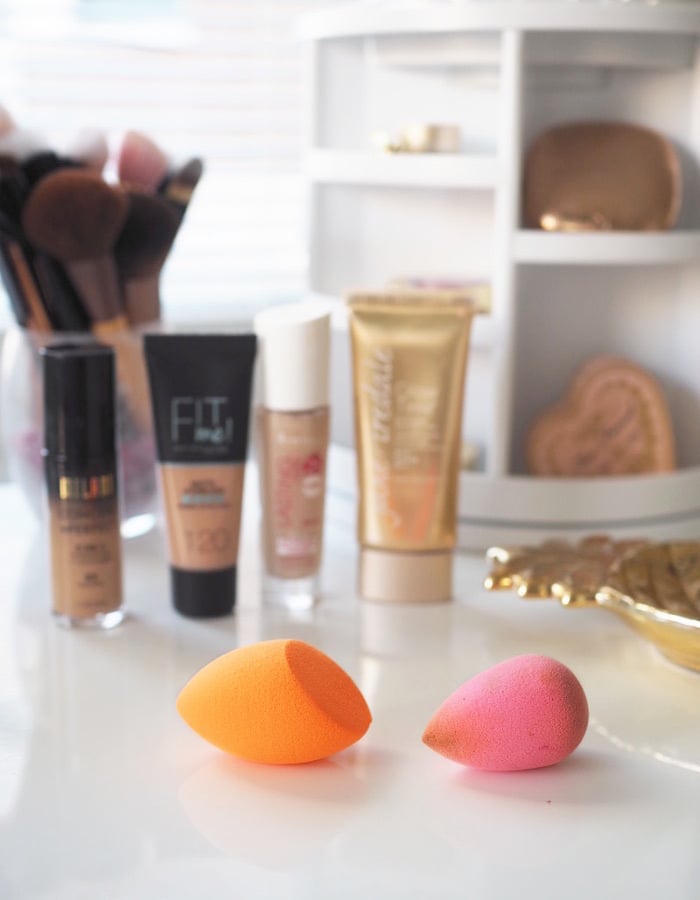
So today, I’m gonna convince you to try it. And I have two makeup sponges for you to consider: the original beautyblender and Real Tecniques’ miracle complexion sponge.
Why should you try a makeup sponge in the first place?
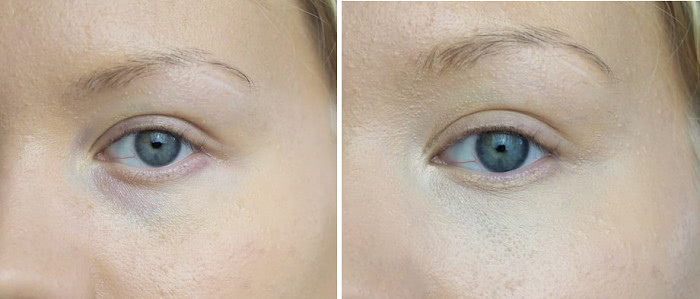
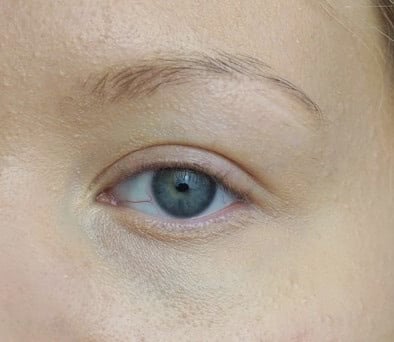
Easy: because it blends the foundation for you. A damp makeup sponge thins out the foundation just a tiny bit, making it spread evenly all over the face. The best way to create a beautiful base is to layer your foundation in thin layers. And with a makeup sponge, you can do just that.
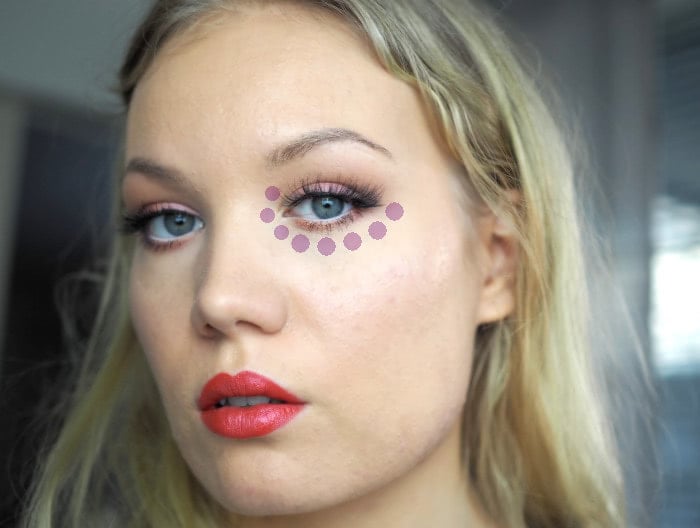
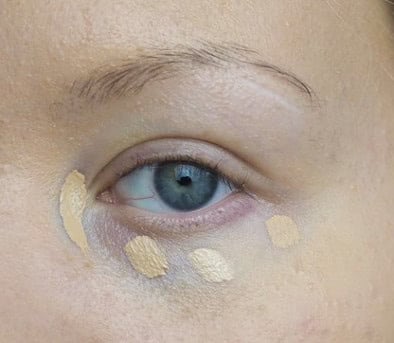
Besides applying foundation and a concealer – you can also use makeup sponge for any cream products: contour, highlight and blush. A contour made with cream color and a makeup sponge looks very natural – and again, blending is very easy with it.
And last, but not least: you can even apply powder with the sponge. It actually makes the powder melt to your foundation, making it everything, but cakey. Just try it once!
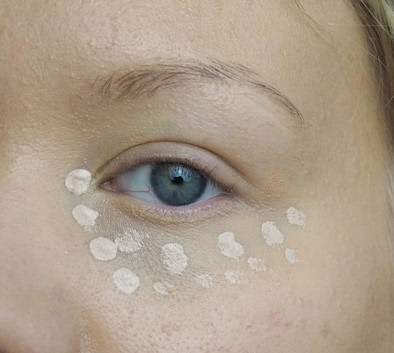
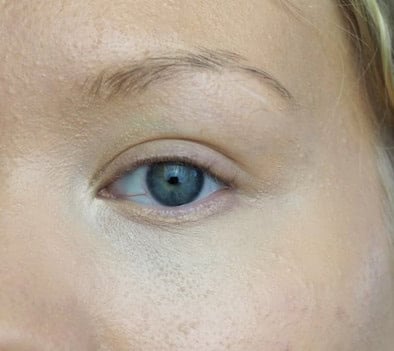
An egg-shaped makeup sponge is the perfect shape, because you can use the pointier end under your eyes and for details – and the wider end to distribute foundation quickly all over your face.
Obviously you can also try different ways to use the sponge: if your foundation is very thick, you may want to use a very damp makeup sponge. Or if your foundation is quite sheer, you can dampen your makeup sponge, but squeeze it almost dry. For example: I think Estee Lauder’s Double Wear foundation was made to be applied with a very damp makeup sponge. Then again some lightweight BB-cream requires a not-so damp makeup sponge. Either way, it’s essential to use a makeup sponge – it just makes the base so much better.
What else should you know about makeup sponges?
One makeup sponge lasts roughly for about three months. It’s not as long lasting as makeup brushes, but the fact that I still prefer sponges instead of brushes tells you just how necessarily they are.
In order to keep it in good shape and hygienic, you need to wash it. I recommend washing it after every use. It sounds like a lot of work, but if you wash it after every use, there’s not much to wash, so it’s very quick and will only take you a minute. My worst nightmare is a makeup sponge, that hasn’t been washed in months, and is just laying there, in the makeup bag. Nope! Take it out, wash it, and let it dry somewhere, where it gets some air. And if it’s been in your use for a year already.. honey, it’s time to let it go.
I usually wash my sponges just with a regular marseille soap. But keep in mind, that some brands require their own soap to be used, so that the sponge lasts the time it is supposed to last.
So.. there are a ton of makeup sponges out there. Which one to choose? First of all, I want to say that it does make a difference, which brand you choose. I have tried some horrible ones, usually the cheapest. If your experience is with a cheap egg-shaped makeup sponge and you don’t like it: chances are that it’s just bad. A good makeup sponge should feel soft, quite lightweight and easy to use.
Try either one of these!
*adlink
The original beautyblender
The hype around the original beautyblender is real. I can’t even count how many beauty blenders I have gone through.
It came first, it conquered and it will forever stay as a classic – at least in my books. It is the perfect size, you can get it in different colors (not that it really matters) and it makes applying foundation or concealer so much easier.
Pros
+ Great quality
+ Perfect size for the whole face
+ Feels soft and airy on the skin
+ It’s very lightweight
+ Cute colors
+ It’s the ‘real deal’
Cons
– It’s quite pricey (almost 20€ for one)
– It should be washed with beauty blender’s own soap – if you use some other too harsh soap, it may not last as long
Shop on amazon:

Real Techniques Miracle Complexion Sponge
I can’t hide my excitement with this one – it is currently my favorite makeup sponge. I was a bit skeptical about it at first, especially after using beauty blenders for so long. But now I have to admit it: it’s an awesome option for the beautyblender. It’s slightly bigger than the bb, making it not as convenient for details. It comes in one color: orange. But it makes applying foundation, concealer and other makeup products so much easier and it provides a beautiful base.
Pros
+ Great quality
+ Perfect size for applying foundation
+ Feels soft and nice on the skin
+ Very affordable (~ 5€ for one! That’s fourth of what the bb costs!)
+ You can get it in two or four packs, when it’s even more affordable (~16€ for four!)
Cons
– It’s a bit clumsy for details, such as applying concealer under your eyes
– It’s not as lightweight and airy as the beautyblender
Shop on amazon:
*Miracle Complexion sponge
So there are my two favorite egg-shaped makeup sponges. Have you tried either one of these? Is there something that’s even better? Let me know in the comments!