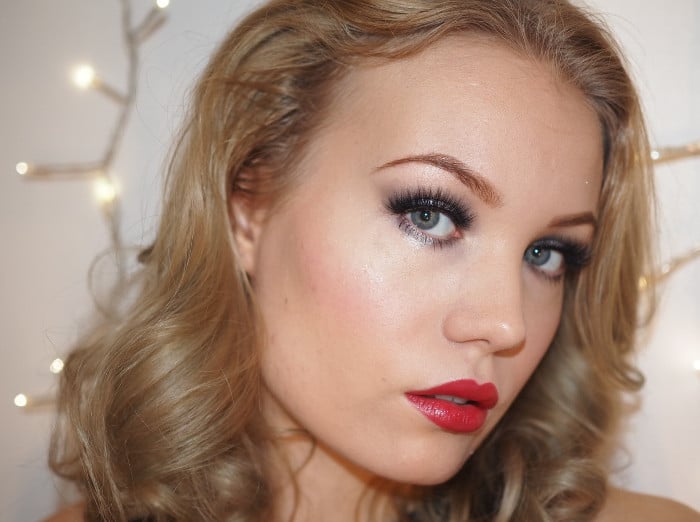
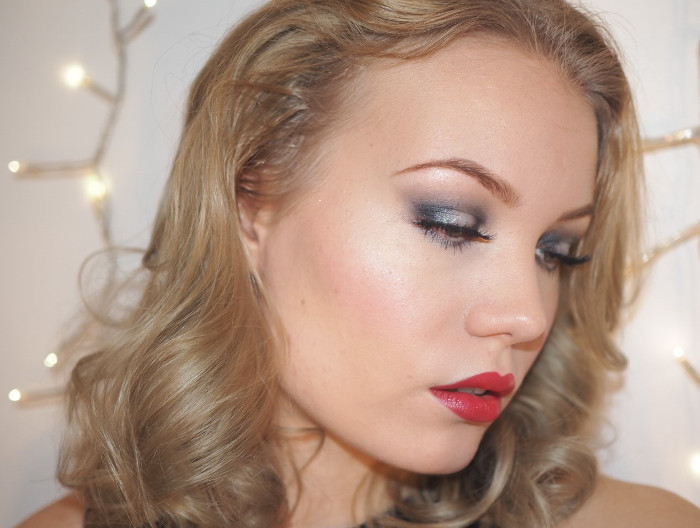
I named this makeup Christmas Party Makeup since it’s December and there are a lot of pre-Christmas parties right now. Now is the time of glitter, silver, gold and red! In this makeup I used silver and glitter on my eyes but you could replace the colors with brown and gold. I usually do my brows using a different color, but here I wanted to try a new product on them and it ended up being a warm brown. Works amazingly well with greyish eyeshadow though, doesn’t it?
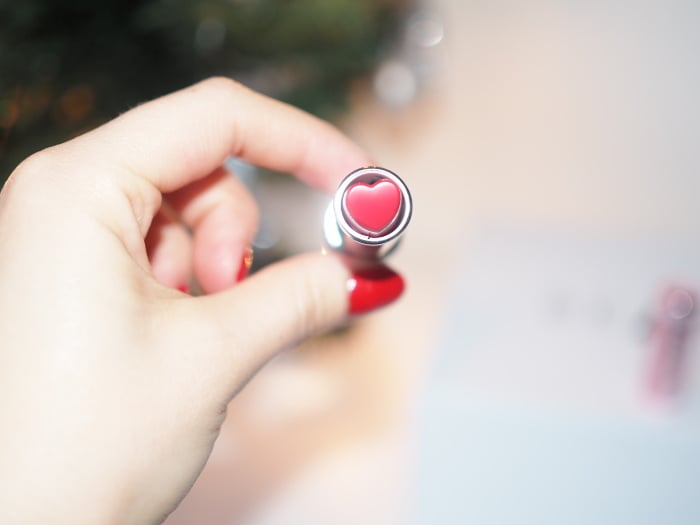
The classic red lip is made with a new lipstick from Holika Holika. It might just be the cutest thing ever since the applicator is heart-shaped! I haven’t tried Holika Holika products before but I’m convinced now that I’ve tried this amazing, really pigmented lipstick and their brow pen as well as the eyeliner. All the products used are listed below as usual.
On to the tutorial! Or pictorial. I made small collages so that this post wouldn’t drown on pictures. If you want to skip the face part, just roll down to the eyeshadow pictorial.
FACE
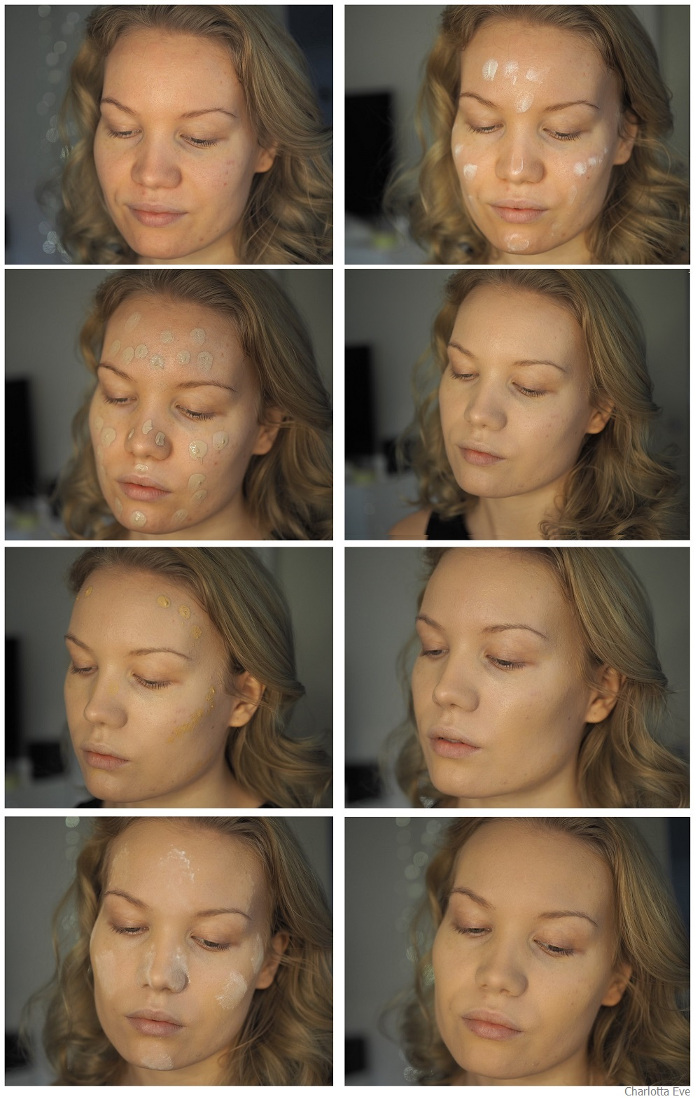
I wanted to take a photo of each step to make this tutorial extra easy to follow.
First picture is before makeup. Then I applied the primer. Then I applied my BB-cream in two different shades. First is the lighter one which goes all over my face and especially on the center of my face. I actually applied a bit too much here (the struggle of taking photos and doing your makeup at the same time is real!) but you can see clearly where I applied it. After that I was a bit pale so I warmed my face and did a bit of a contouring with a darker shade. Then I set the foundation with powder – again you can see how much (or how little) I used the powder. Last picture is after primer, foundation and powder.

I wanted to use the same shade on my cheeks as I did on my lips. So I applied the lipstick as blush using my fingers. Whenever you’re using a cream blush you should apply it before powdering the face – just to get it to blend easier. I actually forgot this and powdered my face before but I managed to work it out. I always smile when applying blush so I can see the highest point of my cheek and then I apply the color right there. I have a square face so that’s where the blush goes on my face.

I did my brows a bit differently since I tried a new product. The Holika Holika brow pen applies quite heavily so I softened the lines using a brow brush. The difference between before and after brows is huge!
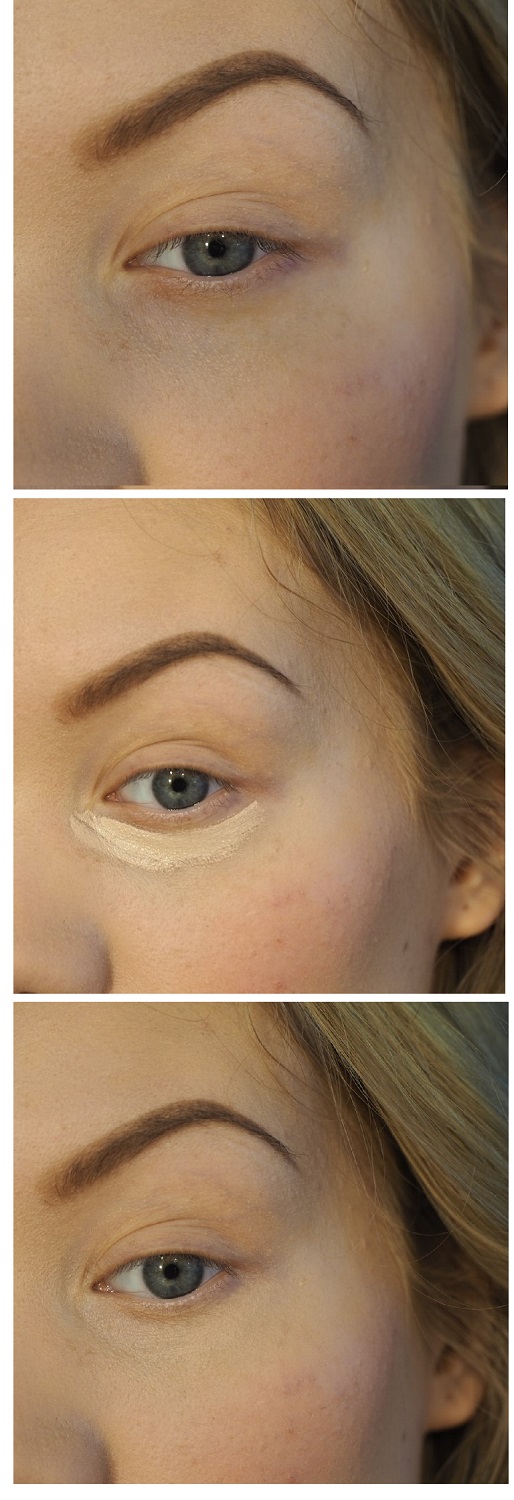
NARS Radiant Creamy Concealer is magic.
LIPS
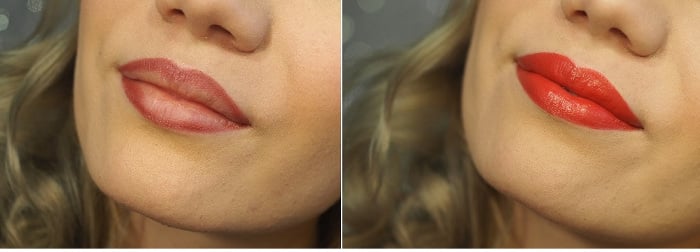
I lined my lips first to help with the lipstick application and to make it stay on longer. Then I applied the lipstick using a lip brush.
EYES
THE CLASSIC HALO EYE
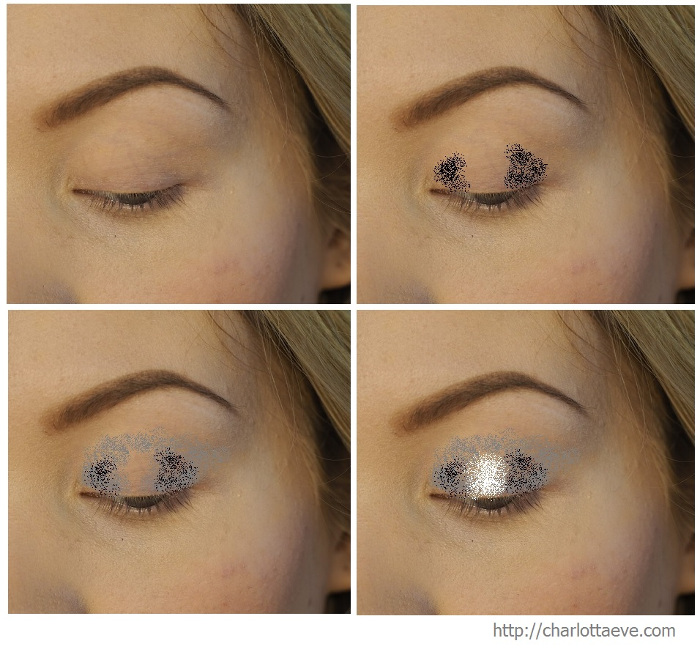
Here is a small pictorial made with paint to show you exactly what we’re trying to do. We’re creating a halo eye which means the center of the eye is where the lightest shade goes. So you actually apply dark shadow not only to the outer edge of your eye but also just above your inner corners. And with my eye shape I wanted to blend the outer edge a bit but if you want the shape to be more round you can skip that.
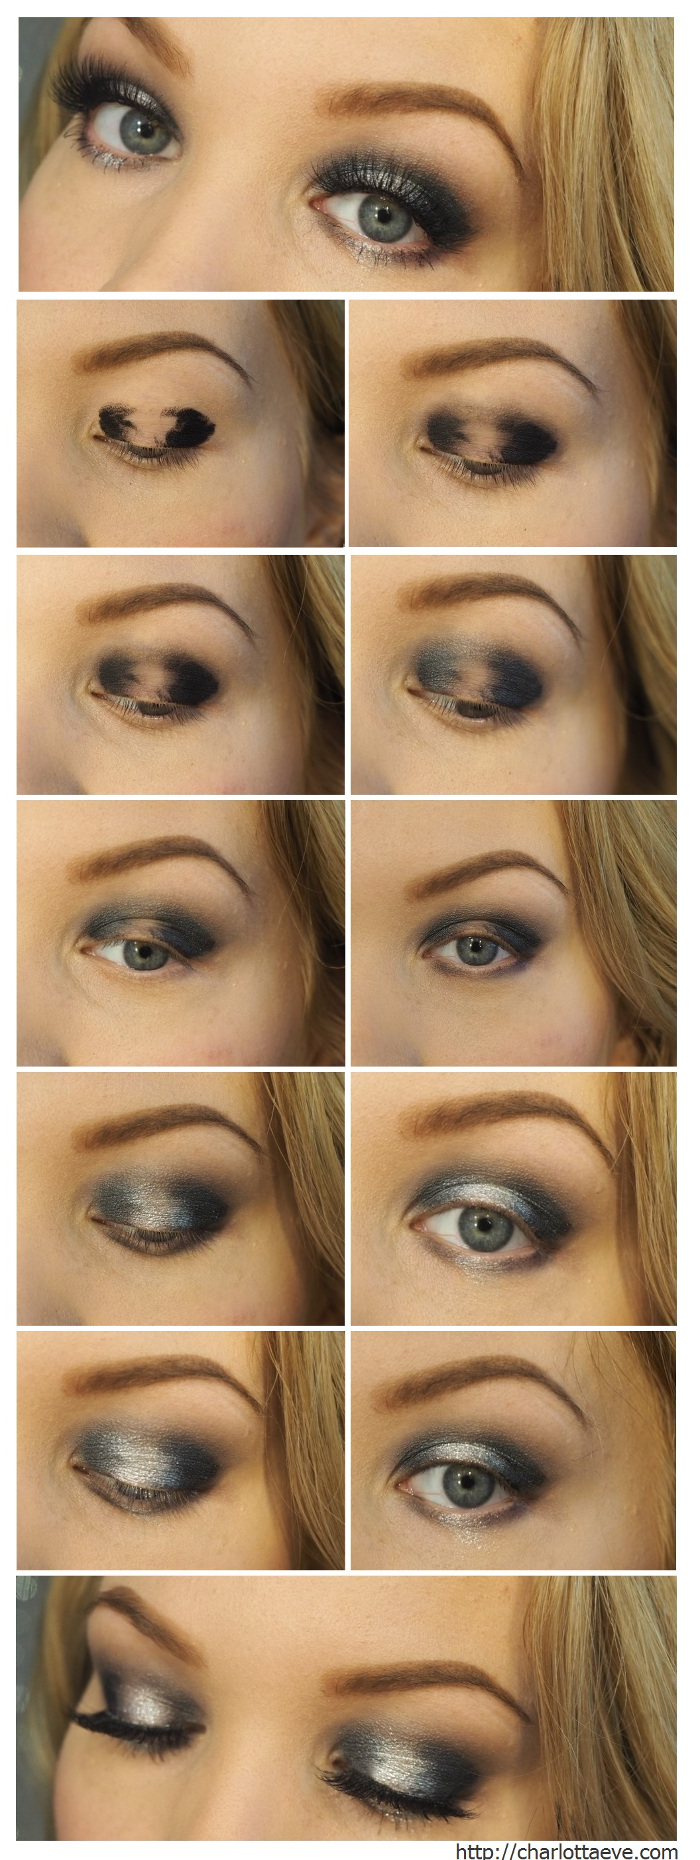
I used the black eye pencil as a base for my halo eye. You want to blend that out quite quickly ’cause it dries out fast. However it’s just a base so don’t worry too much about it being perfect. I applied a dark grey eye shadow to the same areas I applied the black pen. Then I blended carefully.
I applied a grey eye shadow on top of the dark grey shadow and blended it out so it goes on higher than the dark base (check the paint version if you feel lost). Then I applied the same grey shades on my lower lashline – leaving a gap right in the middle for the silver and glitter. Then I applied the silver at the center of my eye using just my finger and a tapping motion. Then I applied the glitter on top of that. Then it’s up to you if you want to use just mascara or add lashes!
With lashes and all ready!
Thanks for visiting my blog and checking this post out. Let me know your thoughts on the comments below! Oh – and happy December the first.
PRODUCTS (adlinks)
MISSHA M BB Boomer
MISSHA M Perfect Cover BB Cream 21, Light Beige
Innisfree No-Sebum Mineral Powder
NARS Radiant Creamy Concealer in Vanilla
Urban Decay Primer Potion
Holika Holika Jewel-light Waterproof Eyeliner 01
Zuii Organic Bombshell Palette
Sleek Vintage Romance Palette (the silver shade)
Zuii Organic Shimmering Powder in Blossom (glitter)
Missha Fan Volume Mascara
Eylure lashes 157
Holika Holika Wonder Drawing Skinny Eyebrow 02
Rimmel Lipliner 007
Holika Holika Heartful Moisture Lipstick RD808