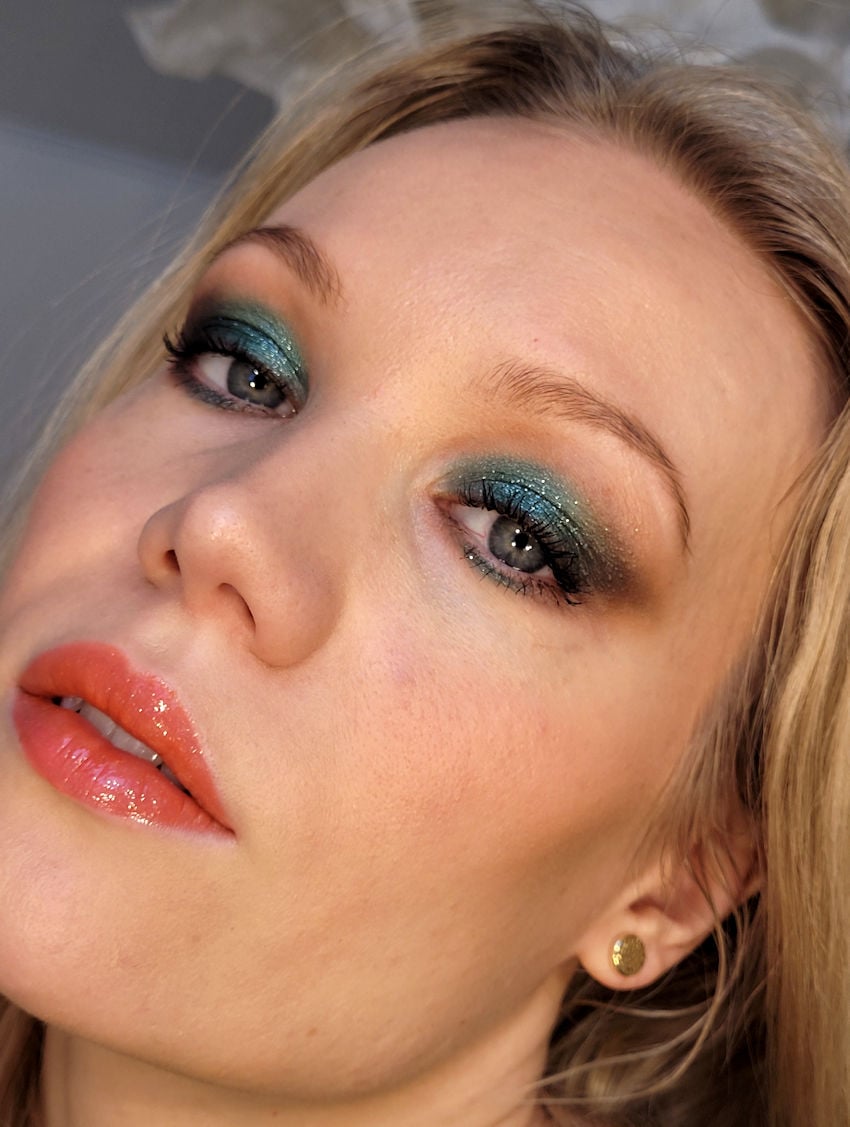
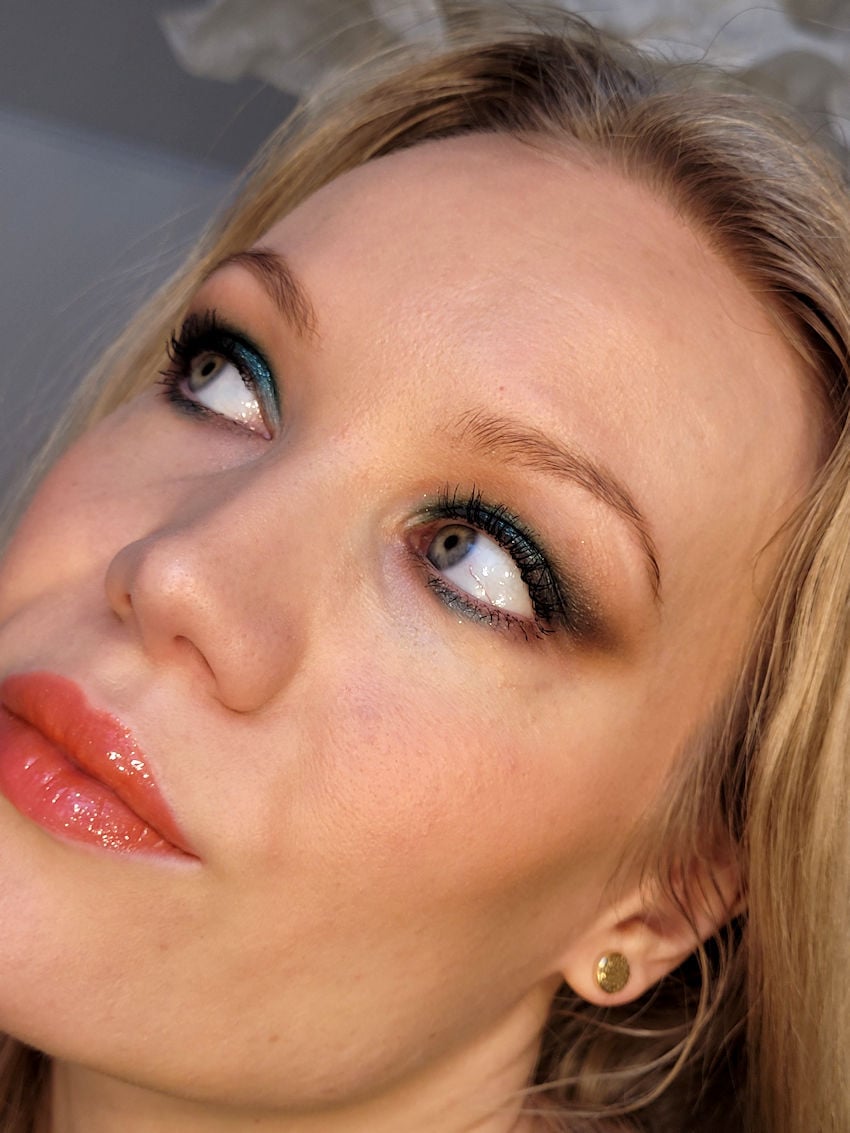
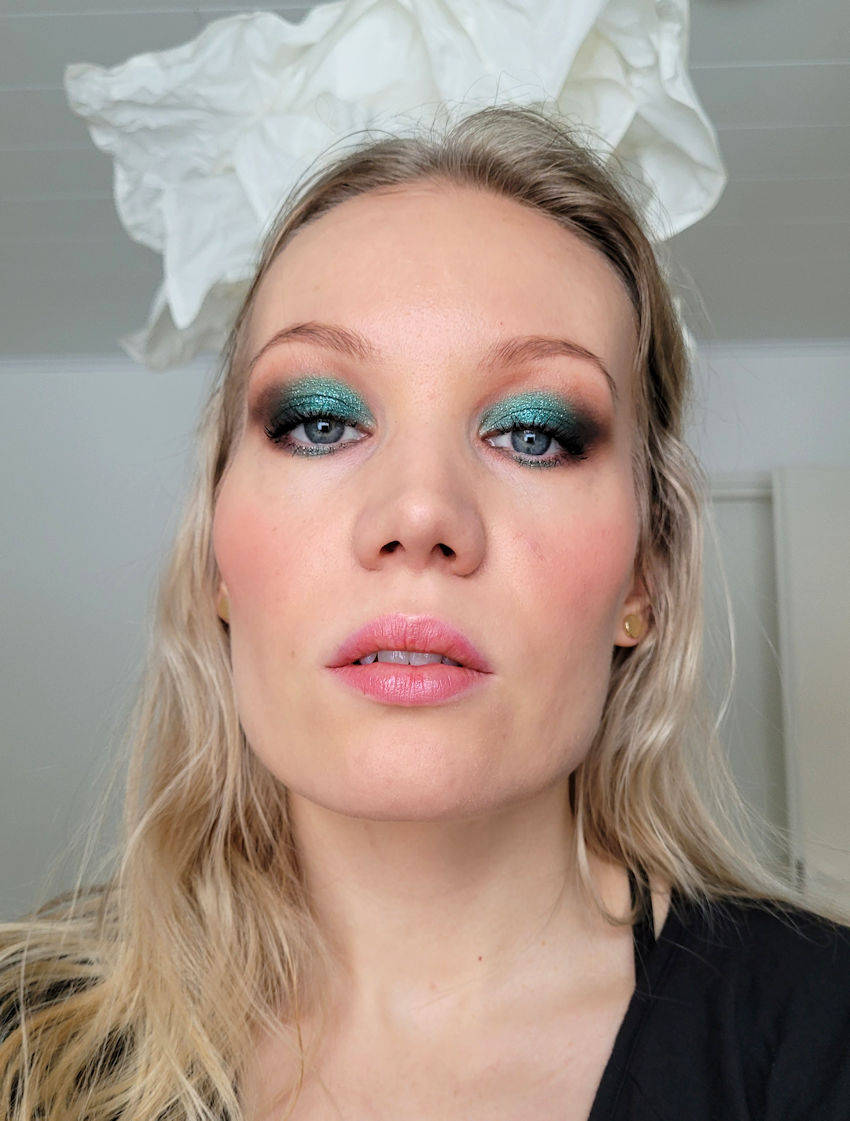
To me, having deep set eyes means I can get creative and bold in my eye makeup. I love dark and sparkly looks. As the year comes to a close, I find myself gravitating towards rich green hues with a hint (or a bucketful) of sparkle. If you also enjoy a bit of color in your eye makeup, try this bold look!
The pictorial is for deep set eyes, but if you change where you apply the eyeshadow, you can create the look on any eye shape. I’ve listed some products at the end, but I can already reveal you that that sparkle comes from YSL Sequin Crush in the shade Bold Blue.
Naked Wild West Eyeshadow palette has all the colors you need for this look. Perfect every day palette with pops of colors to switch into glam mode as well.
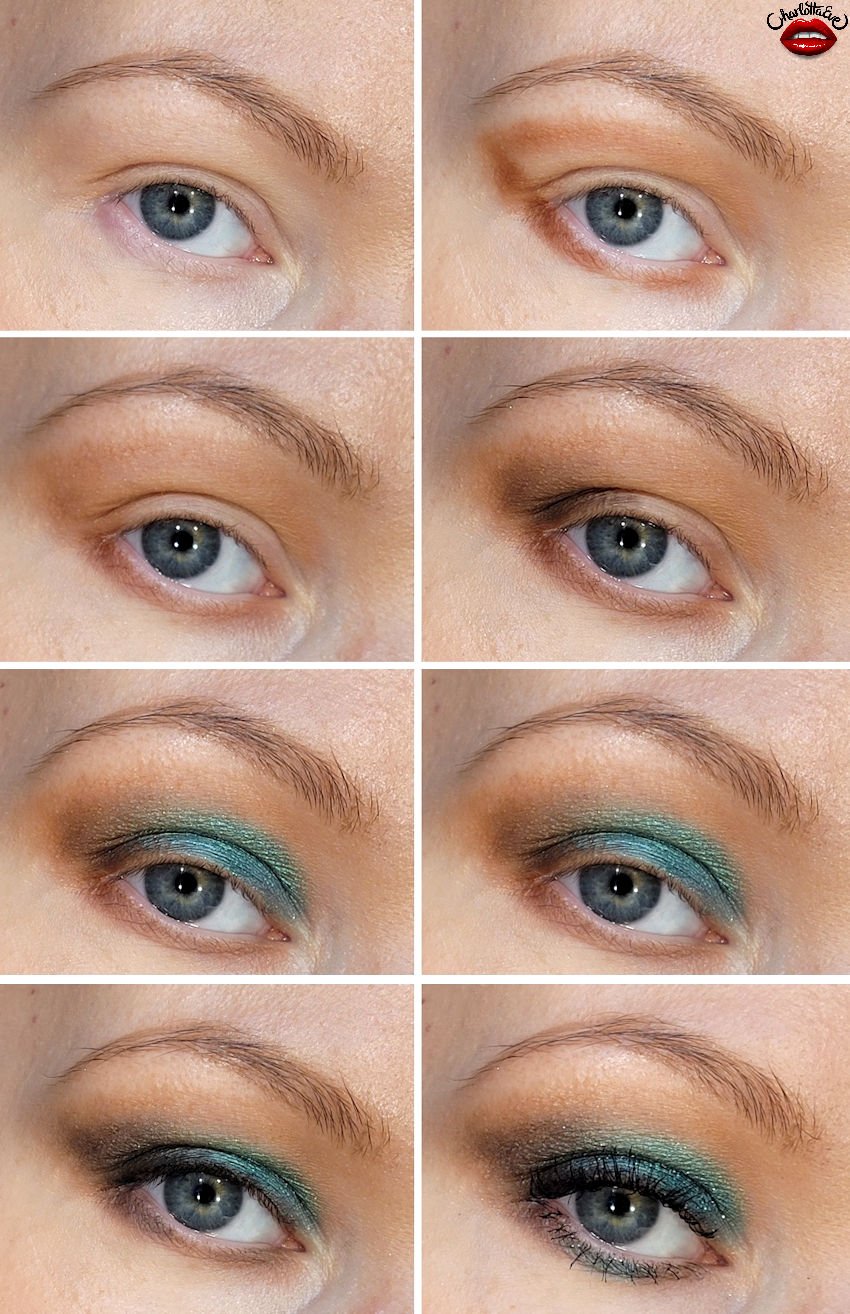
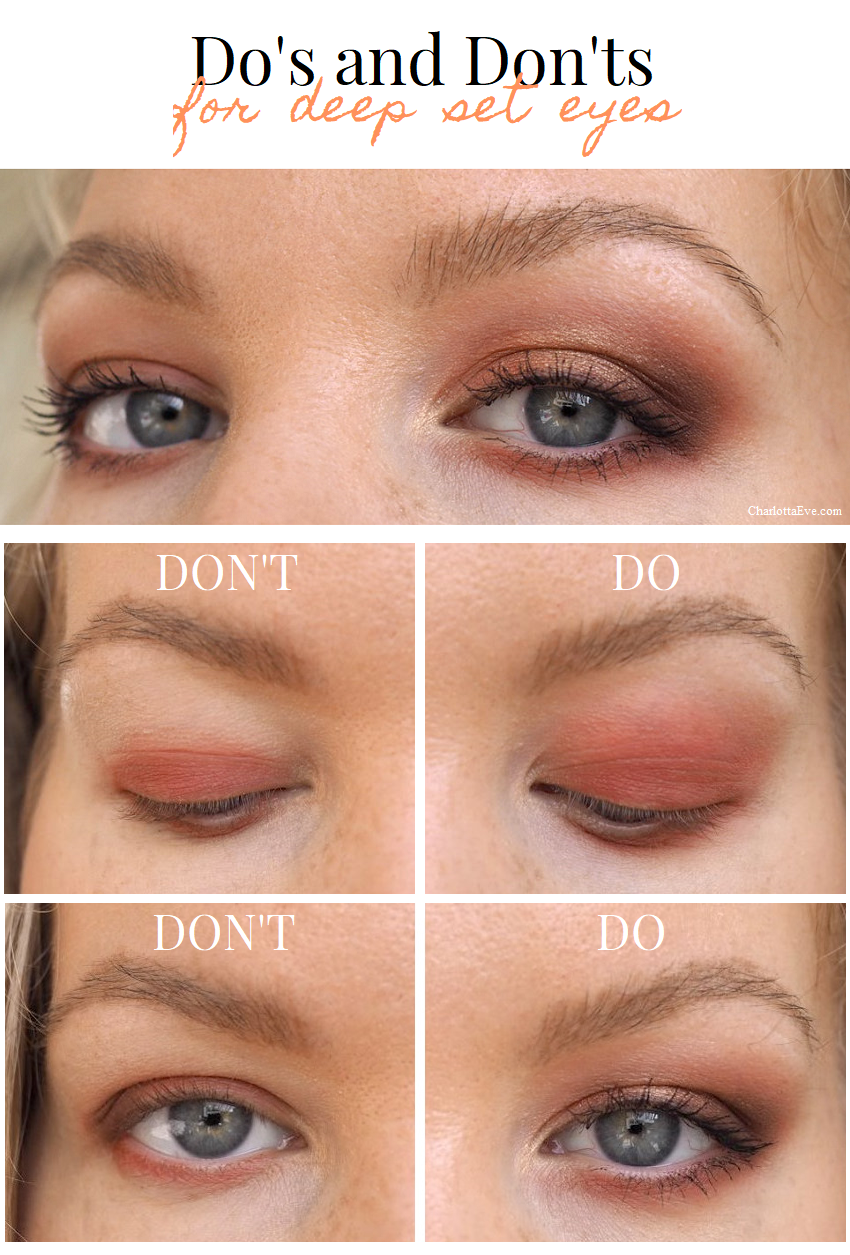
I’ve done quite a few tutorials for deep set and hooded eyes, but this time I thought I could also show you what not to do. Showing you side by side the “dos” and the “don’ts” can be helpful in mastering your eyeshadow technique!
I was actually inspired to do this tutorial when I saw a magazine cover with a model who had very deep set eyes. Her makeup (in my opinion) was not done right and it emphasized the hood and overall was not very flattering. Inside the magazine there was an interview and a photo of her without makeup. I noticed that her eyes didn’t look that deep set on the no-makeup photo and she actually looked better without the makeup (again, my opinion). It just goes to show how powerful makeup can be. It’s all about working with what you got and knowing what works and what doesn’t.
And to be frank, I actually have made a lot of makeup mistakes, when it comes to my eyes. And I’m gonna go through those mistakes now, step by step!
Do’s and don’ts for deep set eyes / hooded eyes
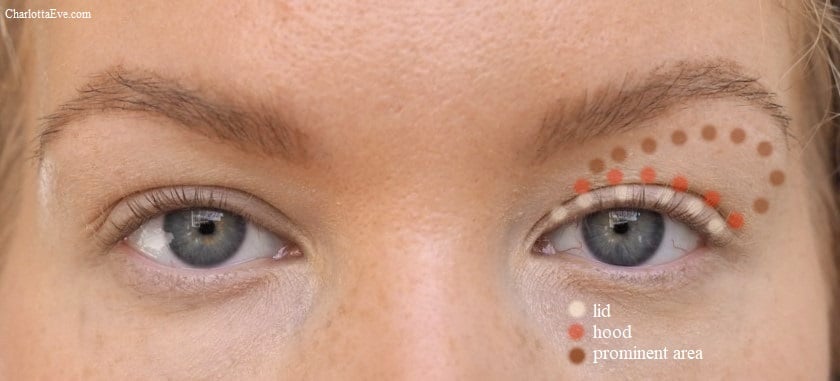
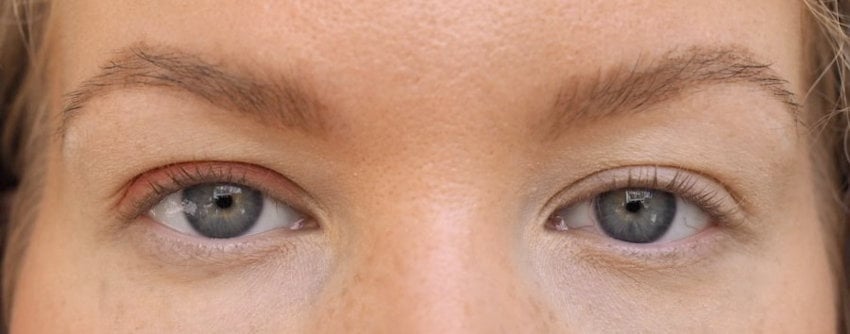
So here are my eyes. I have a bit of visible lid space (shown with white dots). If you have hooded eyes, you might not have a visible lid at all. Above it I have a slight hood (shown with orange dots), where my skin droops on my lid. This is also my crease. But in my eyes the most noticeable feature is the big prominent area (shown with brown dots), which pushes forward above the hood. And I like to shade that to balance my eyes a bit. So instead of shading my actual crease, I imagine my crease is somewhere in that prominent area and I do my makeup accordingly.
Let’s go through some do’s and don’ts for deep set eyes.
Don’t apply dark eyeshadow only on the visible lid
See what this does to my eye? It sinks it in even further. And see what else happens? The hood and the prominent area appears even more prominent. The contrast between my skin and that dark eyeshadow is quite big, making my hood and prominent area come forward even more (because they are a lighter color).
Do keep your eye open when applying your eyeshadow
The most important thing for both deep set and hooded eyes is this: keep your eye open while applying your shadow! The whole idea is to hide the hood so you need to apply the shadow both on top of the hood and slightly above it. Enough so, that your eye gets a nice lift. Keep your eye open so that you can see how high you need to lift the shadow, in order it to show a little (and work!). I might bring it even further than that, since I have so much real estate.
Don’t just line your lower lid with a dark eyeshadow – Do take advantage of that space and smoke it out!
Here might just be the reason why people are afraid of a smokey eye. When done wrong, it makes the eye appear smaller – exactly what happened here. By lifting up the shadow and smoking out that lower lid, my eyes look huge and more round!
Do lift up the eye by darkening the outer V
This trick actually works for downturned eyes too. It’s all about lifting up the outer part of the eye in a V-shape towards the end of your brow. Now how to find the right spot? I keep my eye open, look straight ahead determine where I need to add that shadow in order to get a nice V-shape. You can compare the side by side photo and you can see the spot, where I should have lifted the shadow. It needs to be lifted on top of that hood.
Do use shimmer to your advantage
This might just be personal preference, but I like to emphasize my visible lid space by adding a touch of light shimmer there. It also rounds up my eyes. Another reason is that I’m not looking to change my eye shape – just make the most of it. When I don’t have makeup on, you can see my lid (even though it’s small). So with makeup I also like it to be enhanced.
And that’s about it! I think the biggest thing is to really look at the makeup, eyes open, eyes relaxed. Is it doing what it should be doing (enhancing your eyes and giving them a lift? Or are you sinking your eyes even deeper with a bad technique? Hopefully this post gave you some ideas and clarity on doing makeup for deep set eyes.
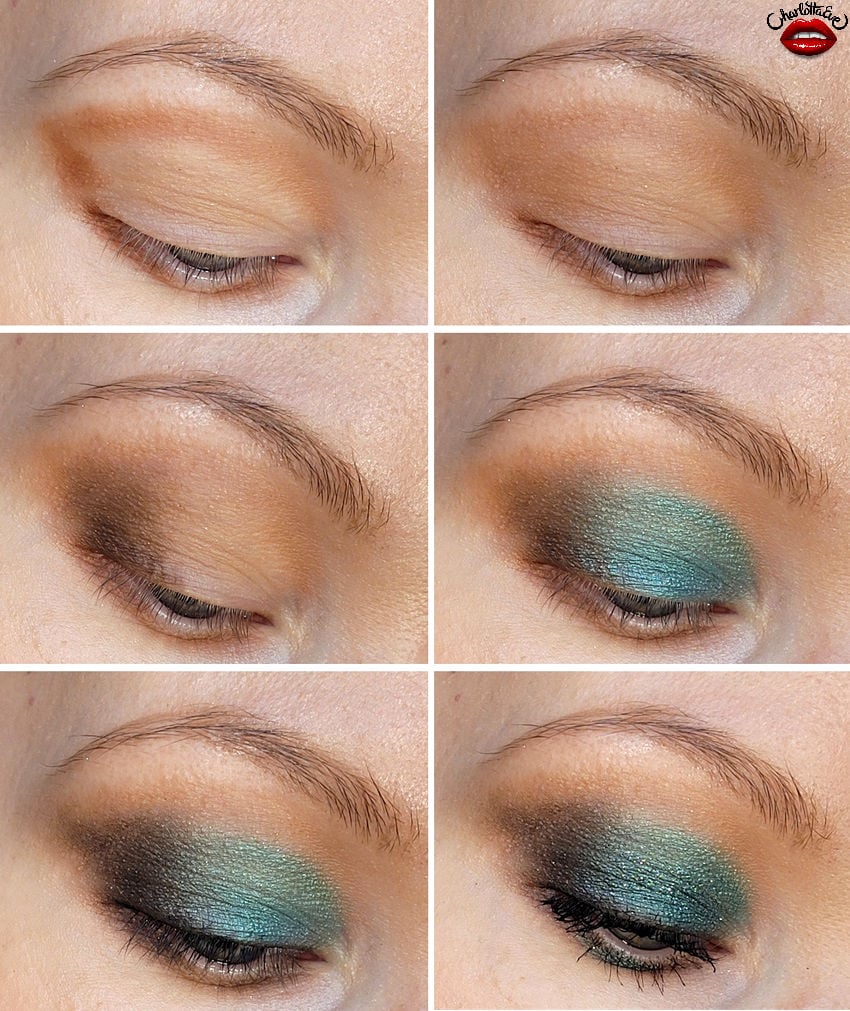
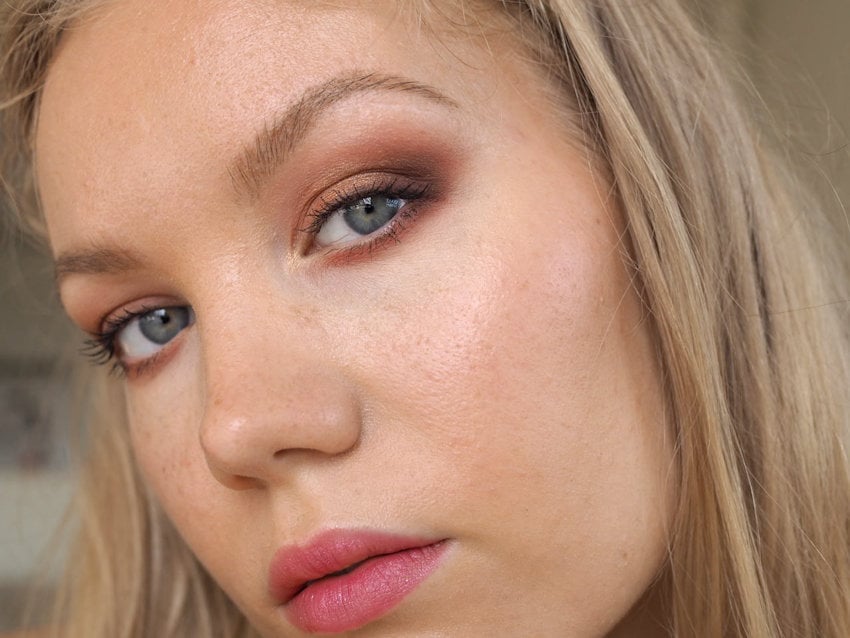
Reddish brown makeup for deep set and slightly hooded eyes
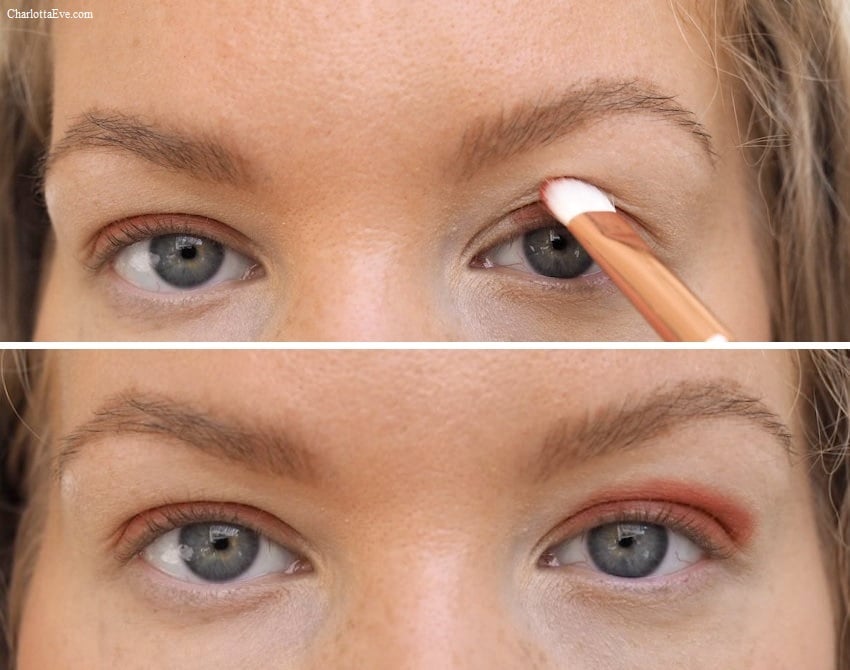
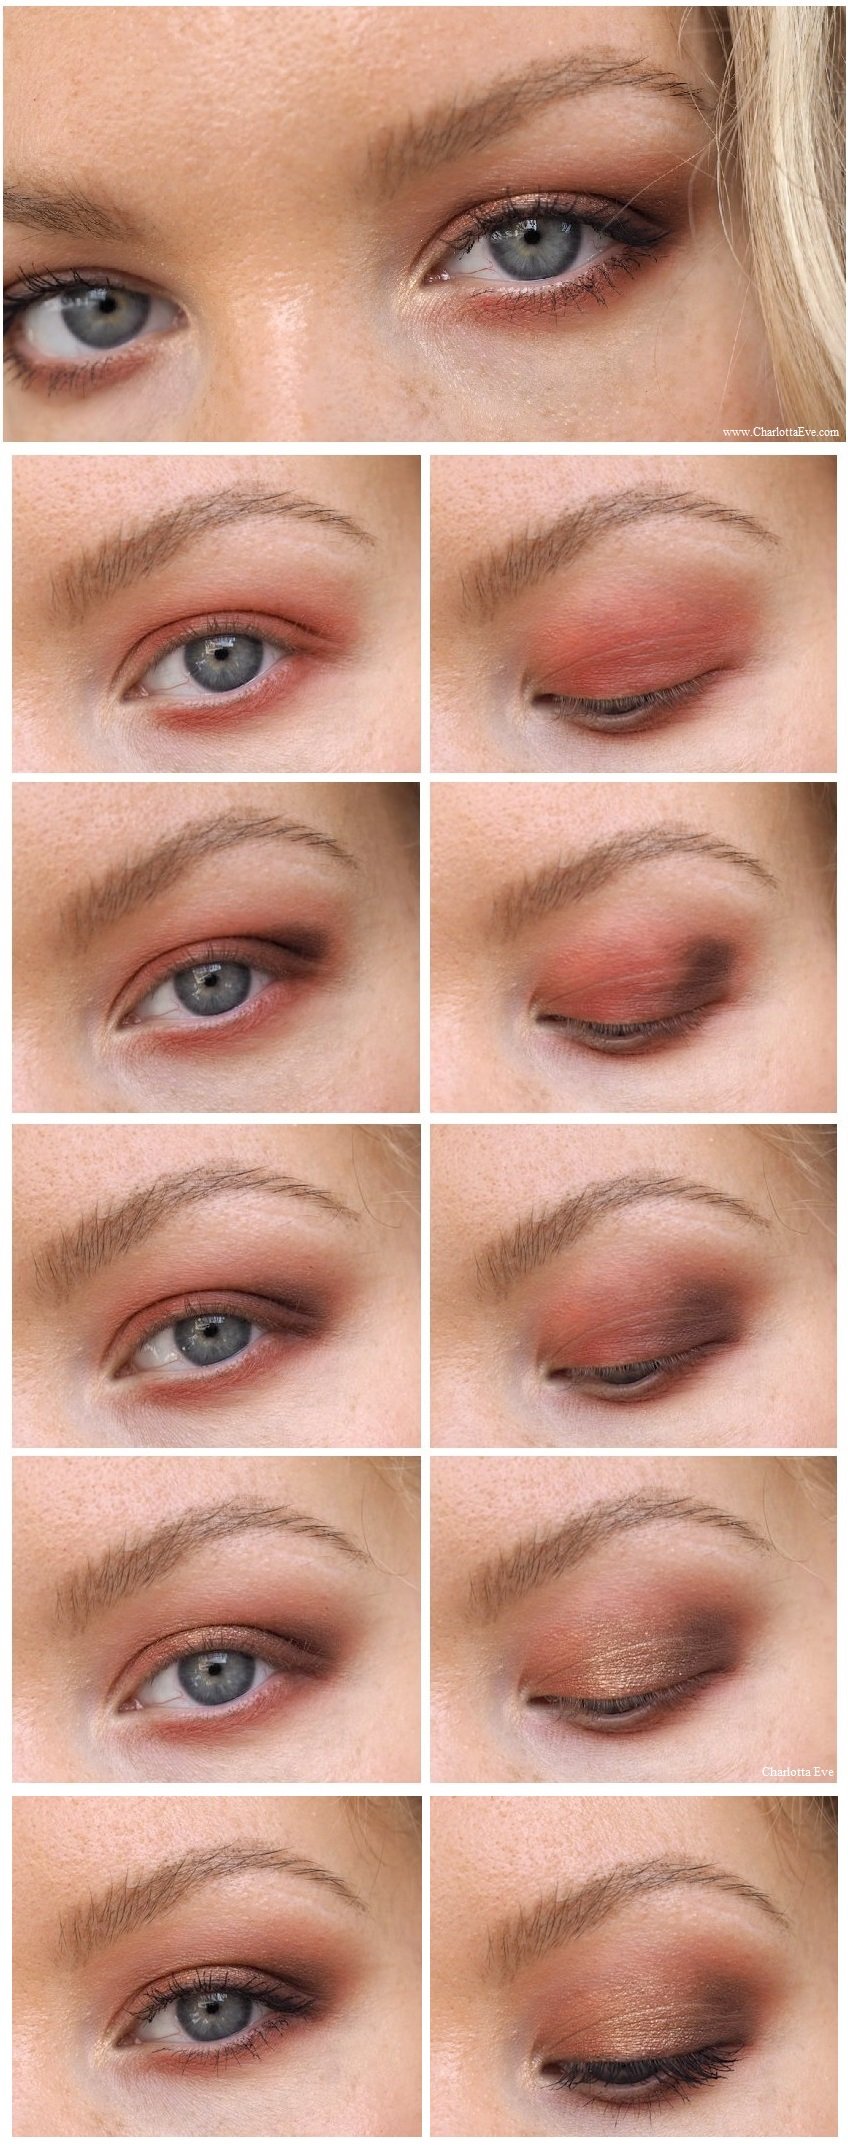
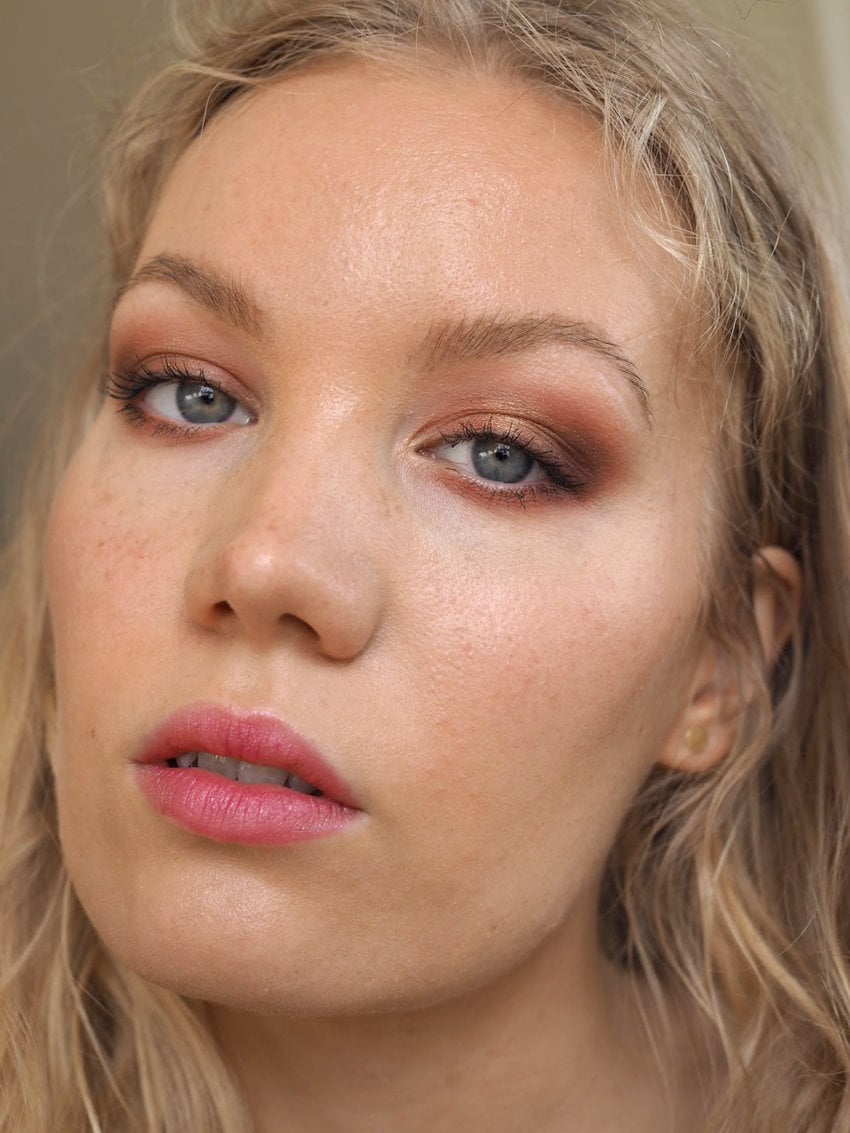
So now that you know all the tricks, here is a warm reddish brown eye makeup tutorial.
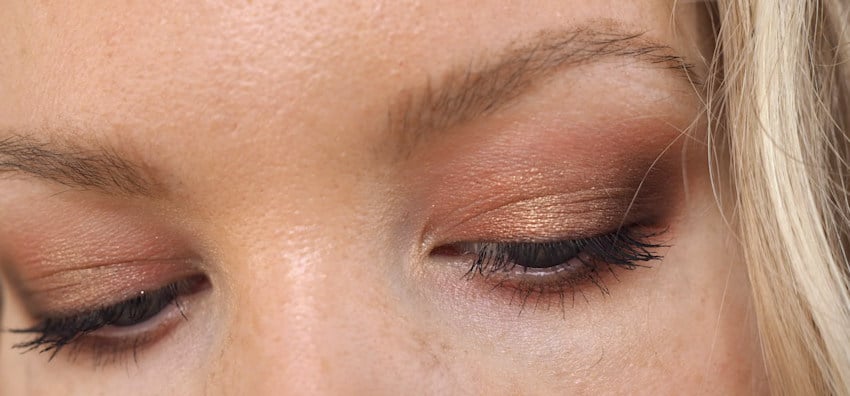
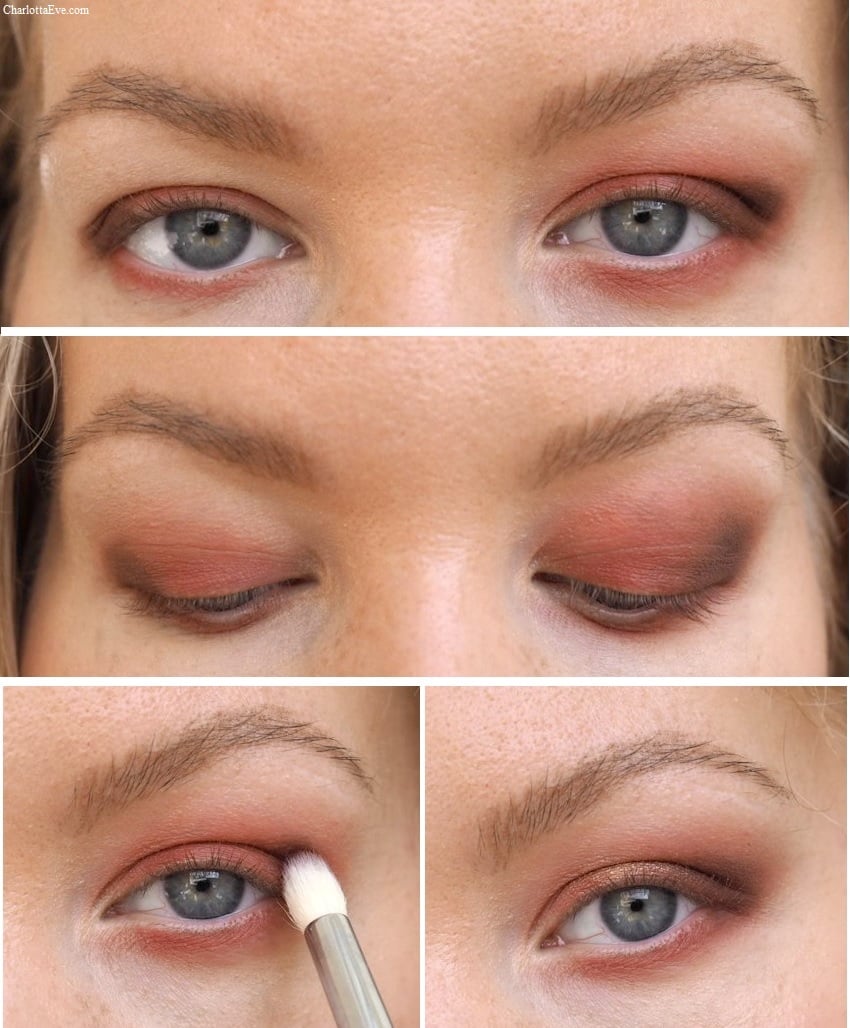
Prime your eyes and add a matte color all over the eye. Bring it as high as you need to, in order to hide the hood and in my case, the prominent area. Blend the edges so that it’s nice and smokey.
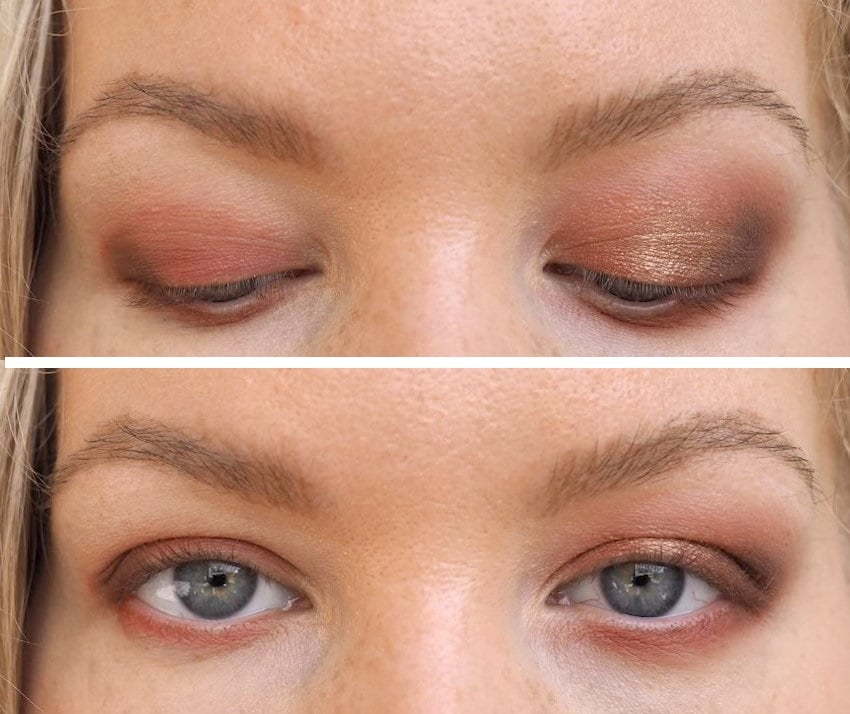
Deepen the outer corner in a V-shape, so that your eye gets a nice lift. A matte dark color will be fine for this. Blend.
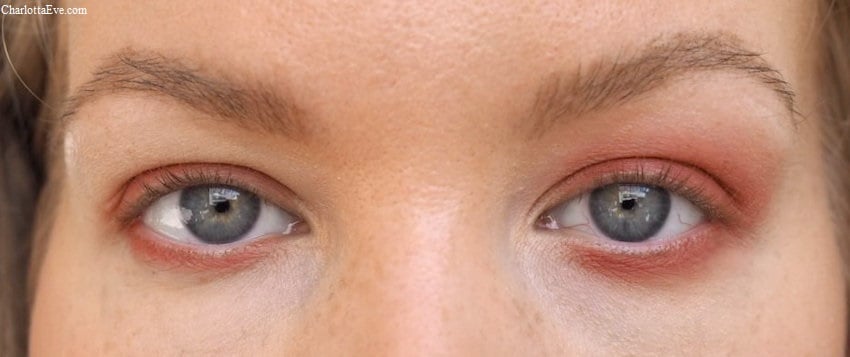
Add a touch of shimmer right on the center of your lid, where it’s visible when your eye is open.
Line your eyes lightly and add mascara. All ready!
Now when it comes to the makeup products, three things help you succeed: primer, eyeshadow and brushes. I use the classic *Urban Decay primer, just because it makes my eyeshadow stay the whole day and night. For eyeshadows, I like ones that have enough pigment, but are still blendable. Three of my most used eyeshadow brands are Too Faced, NYX and Illamasqua. In this particular tutorial I used a Morphe palette, which I also like quite a bit.
This website uses cookies to improve your experience. We'll assume you're ok with this, but you can opt-out if you wish.Accept
Privacy & Cookies Policy
Privacy Overview
This website uses cookies to improve your experience while you navigate through the website. Out of these, the cookies that are categorized as necessary are stored on your browser as they are essential for the working of basic functionalities of the website. We also use third-party cookies that help us analyze and understand how you use this website. These cookies will be stored in your browser only with your consent. You also have the option to opt-out of these cookies. But opting out of some of these cookies may affect your browsing experience.
Necessary cookies are absolutely essential for the website to function properly. This category only includes cookies that ensures basic functionalities and security features of the website. These cookies do not store any personal information.
Any cookies that may not be particularly necessary for the website to function and is used specifically to collect user personal data via analytics, ads, other embedded contents are termed as non-necessary cookies. It is mandatory to procure user consent prior to running these cookies on your website.