I’ve been full of inspiration lately and when I received some new products in the mail (as pr-samples) I couldn’t wait to play with them. In many of my tutorials I’ve been using more expensive products and palettes, so this tutorial is made with more affordable (but lovely) brands.
I actually used mainly just four products + lashes and mascara. All the products are listed at the end of this post. The big star here was definitely the NYX Beauty School Dropout palette though, which can be used on face, eyes and brows.
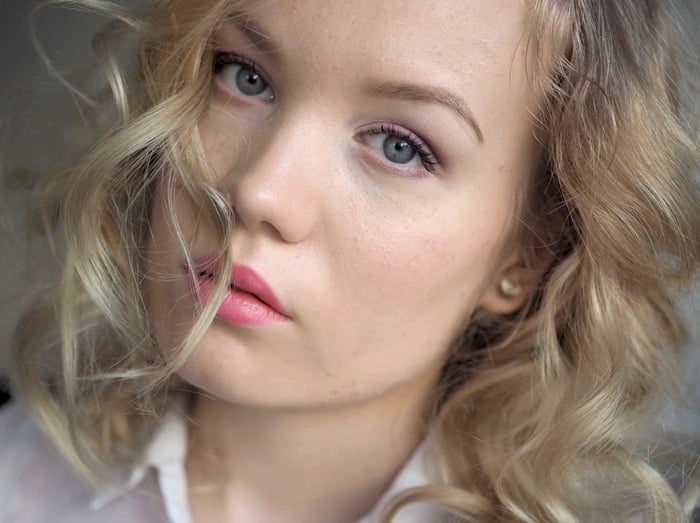
This look is a fun way of using some color without going all crazy. Let me know what you think!
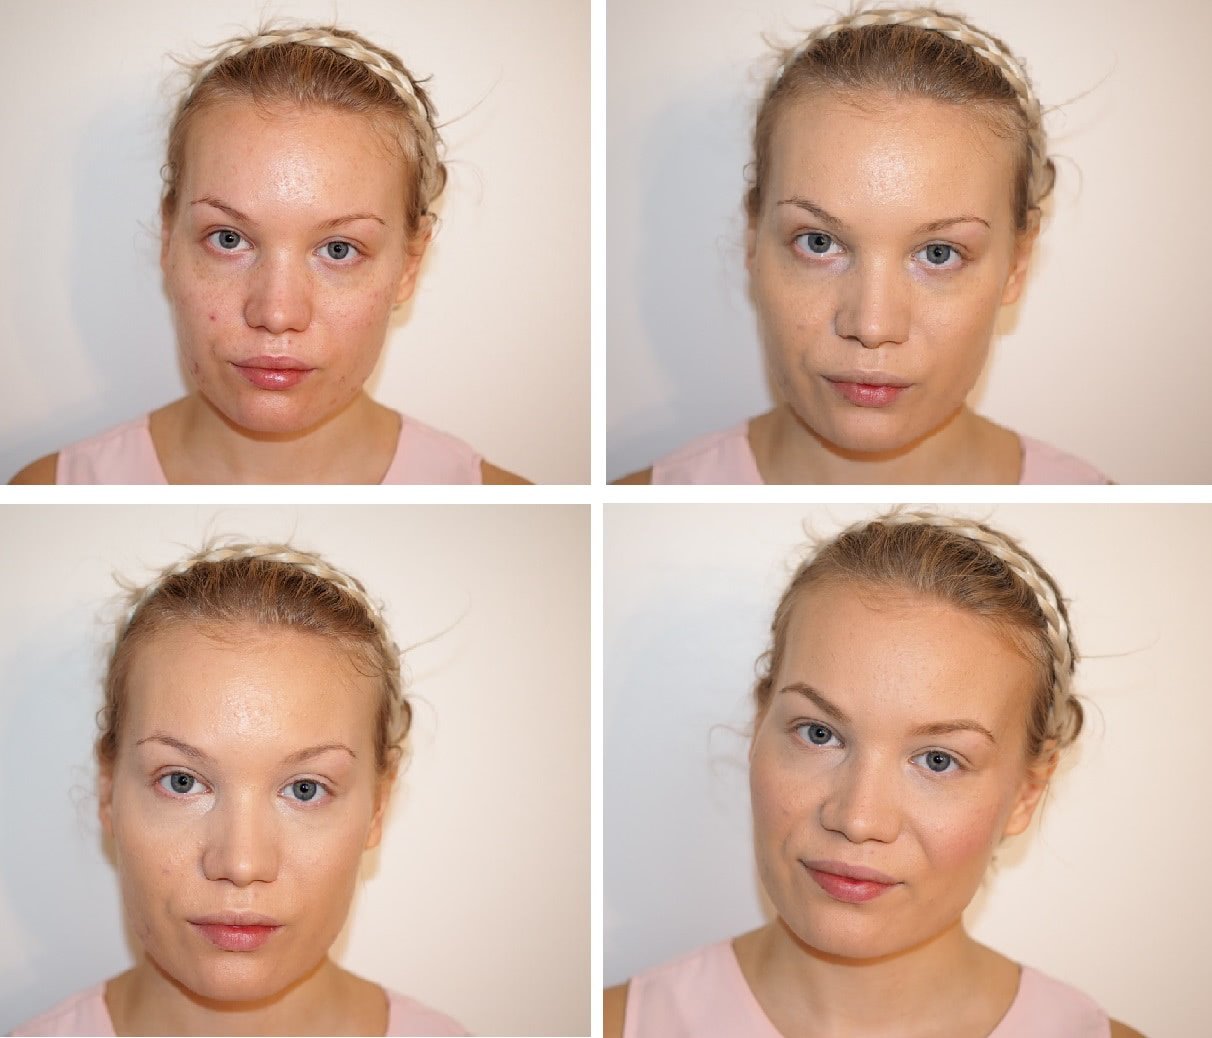
- Apply the foundation using a damp beauty blender. Milani’s foundation has concealer in it too so you can use it as your concealer too. I applied one layer to my whole face and then did some spot-concealing. I applied it under my eyes too and a touch of another concealer on top of that for my eyes. Set the base lightly with a powder.
- Contour, bronze and blush. Below is a photo where you can see where I applied those three things. When using a full coverage foundation it’s important to bring some color to your face so be sure to apply a touch of bronzer and/or a blush at least, if you’re not into the whole thing.
- Fill in your brows using a brow brush and suitable powders for your tones. I mixed grey, light brown and a darker brown color from my NYX palette.
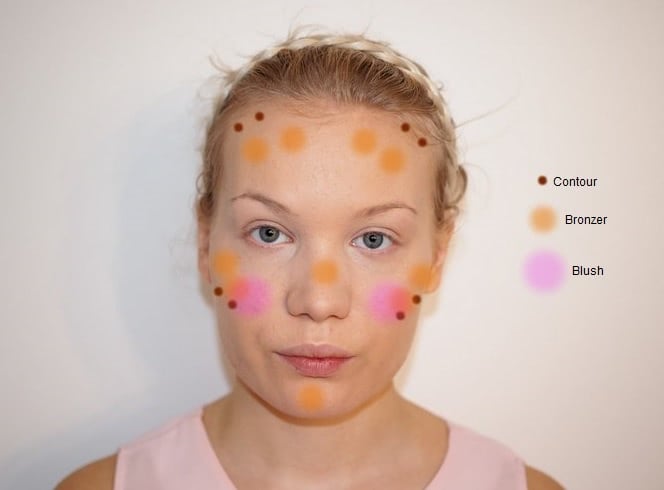

Contouring is for sculpting: creating shadows on your face and emphasizing for example cheekbones as I did here. That’s why you should use a matte shade. Bronzer is for warming up the face and making it look a bit tanned. It can be a warm color with some shimmer. Blush makes you look young, fresh and healthy.
- Apply primer and set it with a powder.
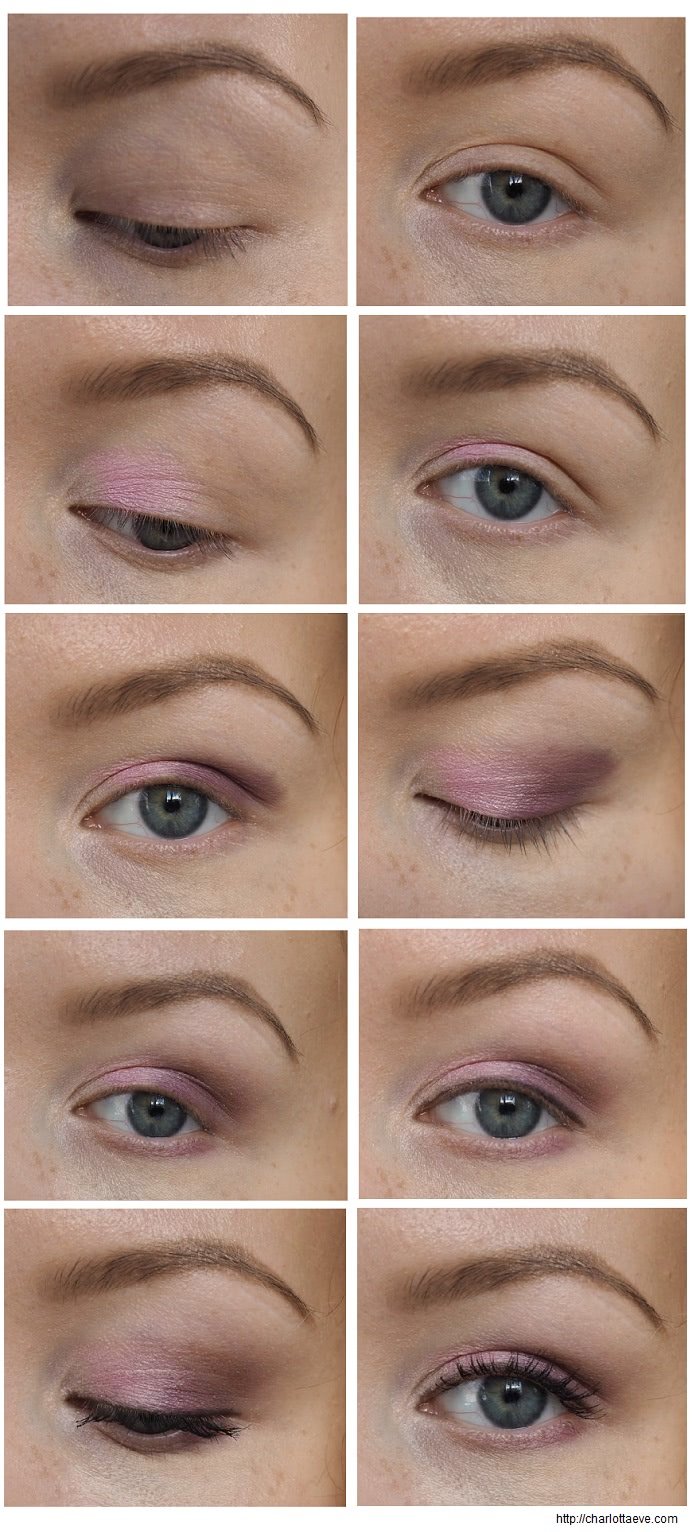
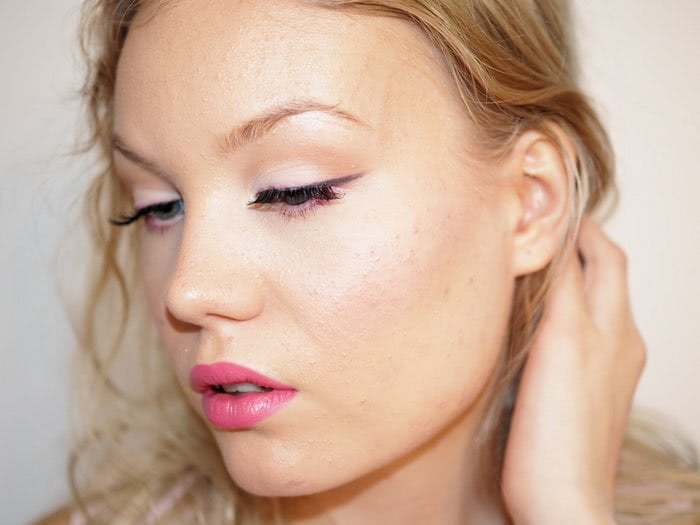
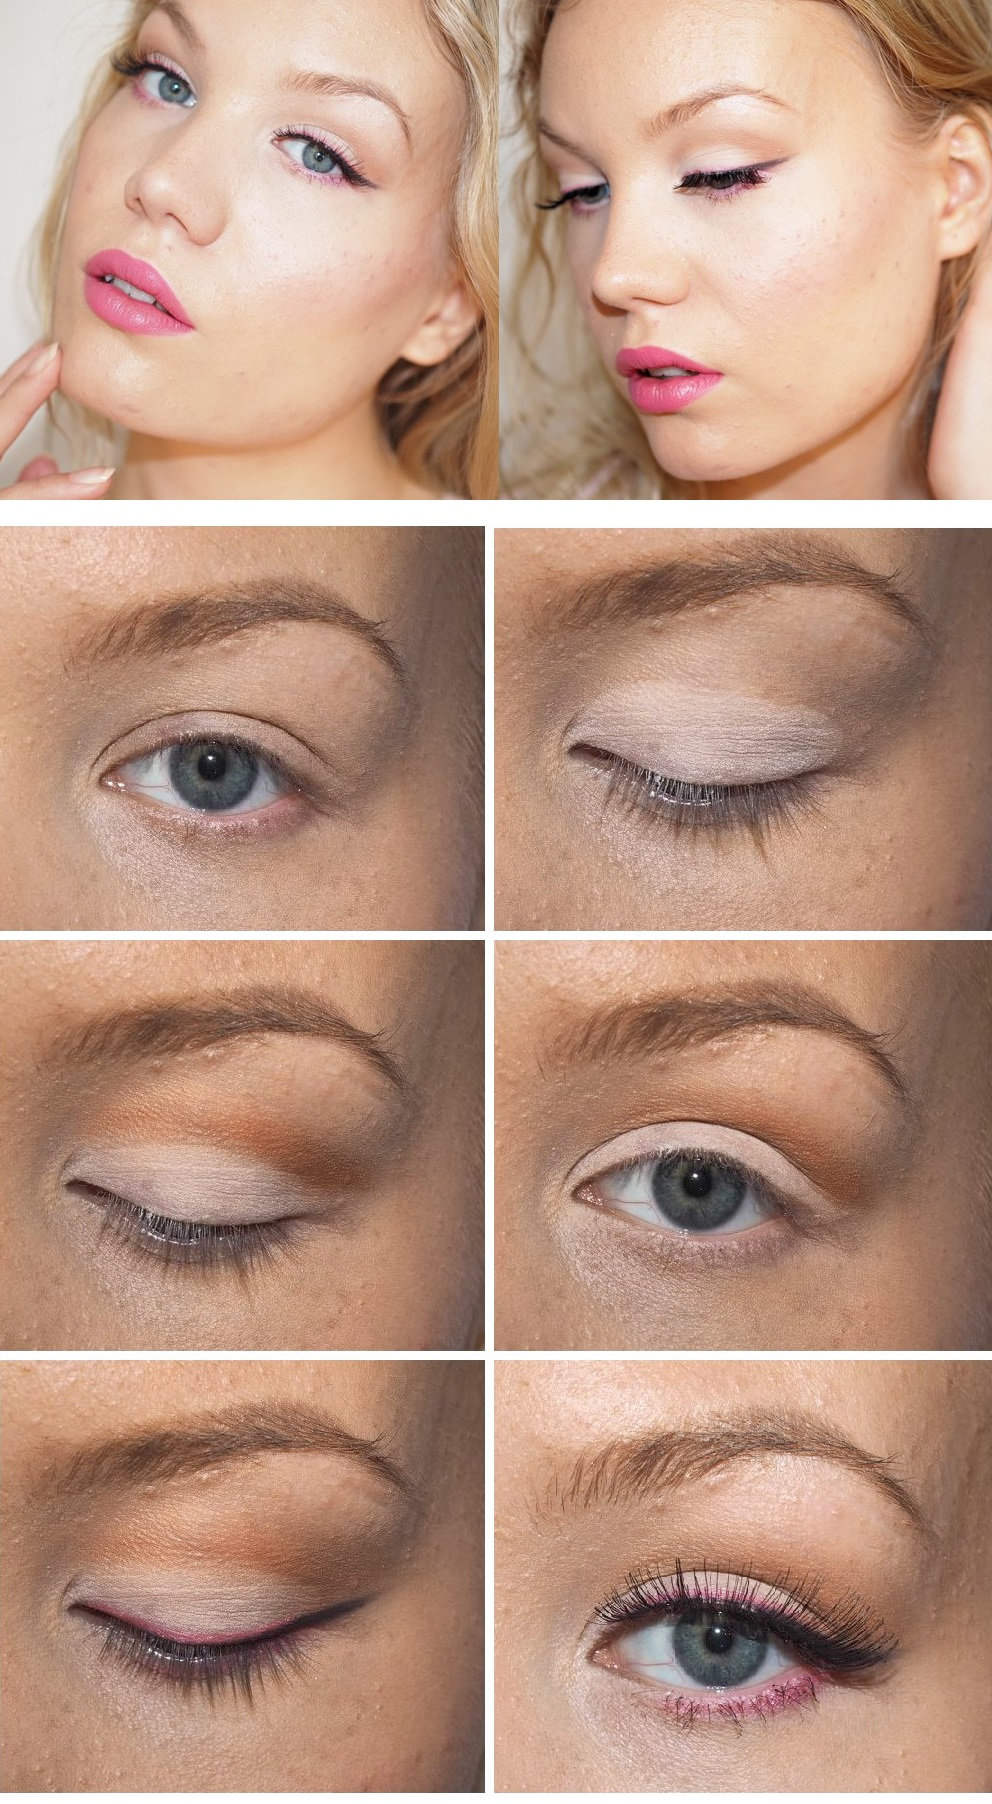
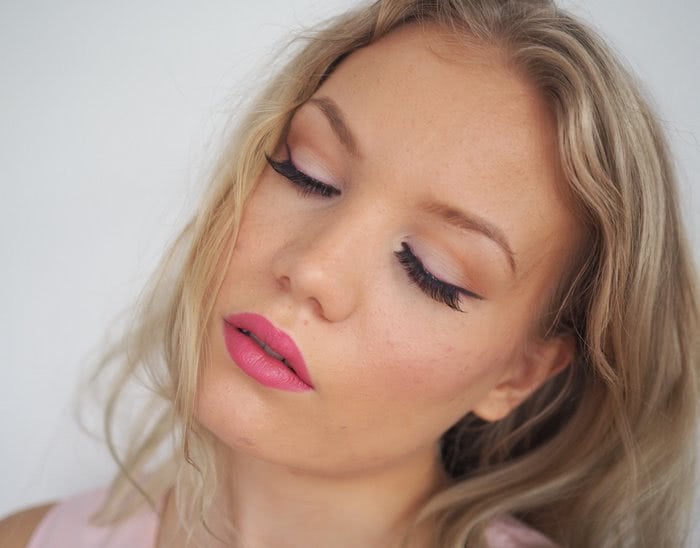
- Apply white eye shadow to your lid and on your inner corner. Use tapping motions to make it intense.
- Cut the crease. First use a lighter shade and sketch the right shape. Blend well.
- Darken the crease with a darker color. Try to keep the line between white and brown clean(ish), blend carefully upwards.
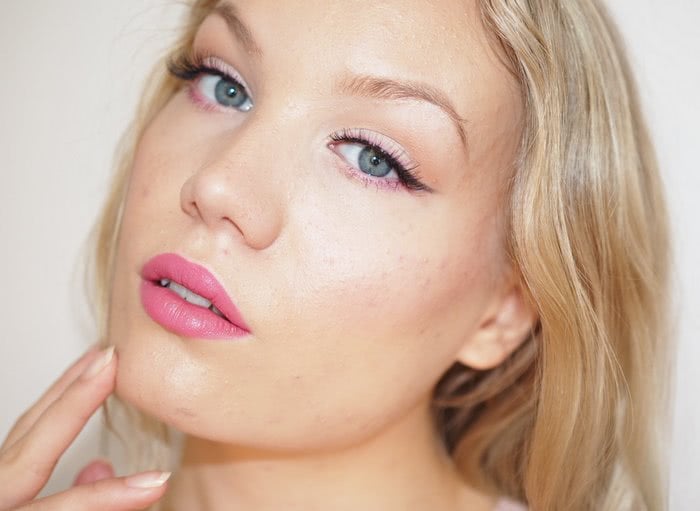
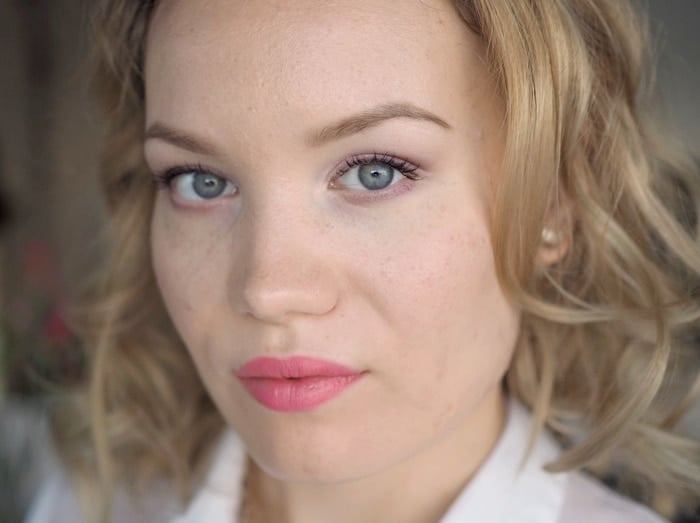
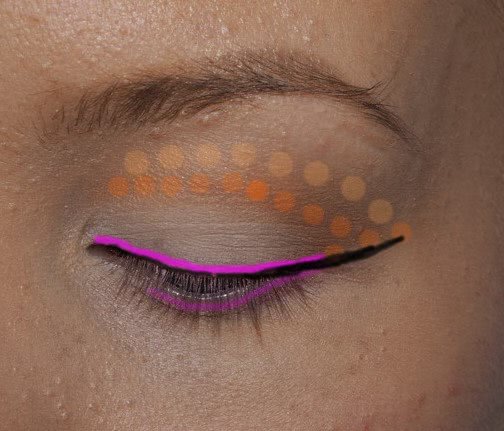
- Line your lash line with pink eye shadow. Apply the pink on your lower lash line as well, that’s where the pink should be the brightest.
- Create a wing using a wet brush and black eye shadow. The black hides a bit of the pink on your lid, but that’s the idea. It shows a bit though and looks cool (wow, such creativity, much artistic).
- Apply a mascara and or lashes of your choosing.
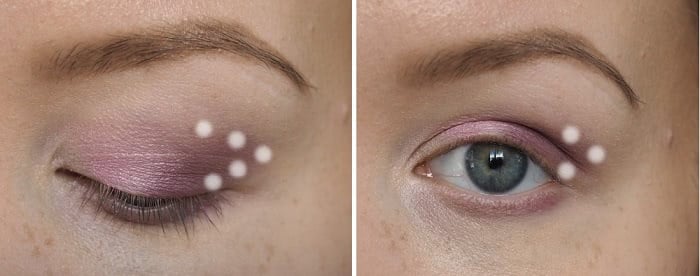
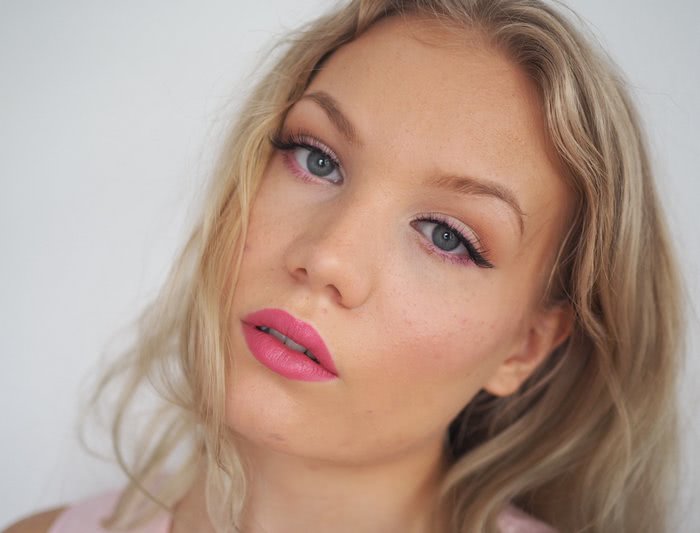
I made a little paint-version, where you can maybe see better the color placement. I blended the brown crease colors upwards kinda like a cat eye. I also blended it in the outer corner just so that it almost meets the white lid color.
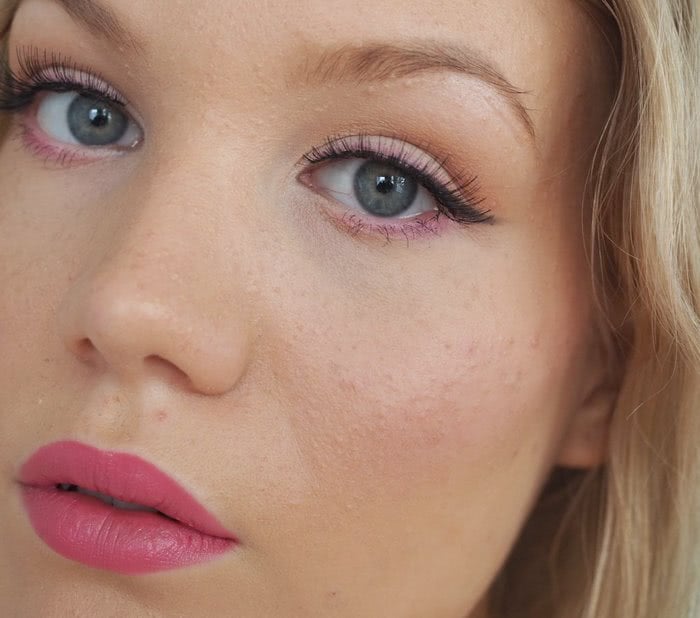
Finish the look with a pink lipstick. This was my first time wearing Milani’s Fruit Punch, but I think I’m already a bit obsessed.
*adlink
PRODUCTS
*Milani Conceal + Perfect 2-in-1 Foundation Concealer, Natural
NYX Beauty School Dropout Freshman palette
*Milani Baked Blush, Delizioso Pink
*Milani Color Statement Lipstick, Fruit Punch
*NARS Radiant Creamy Concealer, Vanilla
Innisfree no sebum mineral powder
Duroy lashes, 415
What looks would you like to see next?