I love Halloween. It brings some fun into October, making the wait for Christmas a bit more bearable. When it comes to Halloween makeup, I adore all the skull looks and new creative ideas. Still I find myself more comfortable in something less.. scary. Something, that is wearable and still looks like my face.
This makeup is perfect for Halloween – it’s dark and dramatic but still pretty easy to do (no fake skin or blood or special makeup skills needed). I did this tutorial in video form – let me know what you think! If you like it, you can subscribe to my youtube-channel here.
P.S. This eye look is also perfect for the weekend! Pair it with nude lips and you’re done.
I’ve said this before and I’ll say it again: eye shadow is tricky, because we all have different eye shapes. When you are doing your makeup, you should always adjust the makeup for your face – be it eye shadow or something else. I already have a tutorial (click!) for hooded and deep set eyes, which is my eye shape. But I want to continue the series with other eye shapes as well.
Today I’m talking about protruding or round eyes and how to work with them.
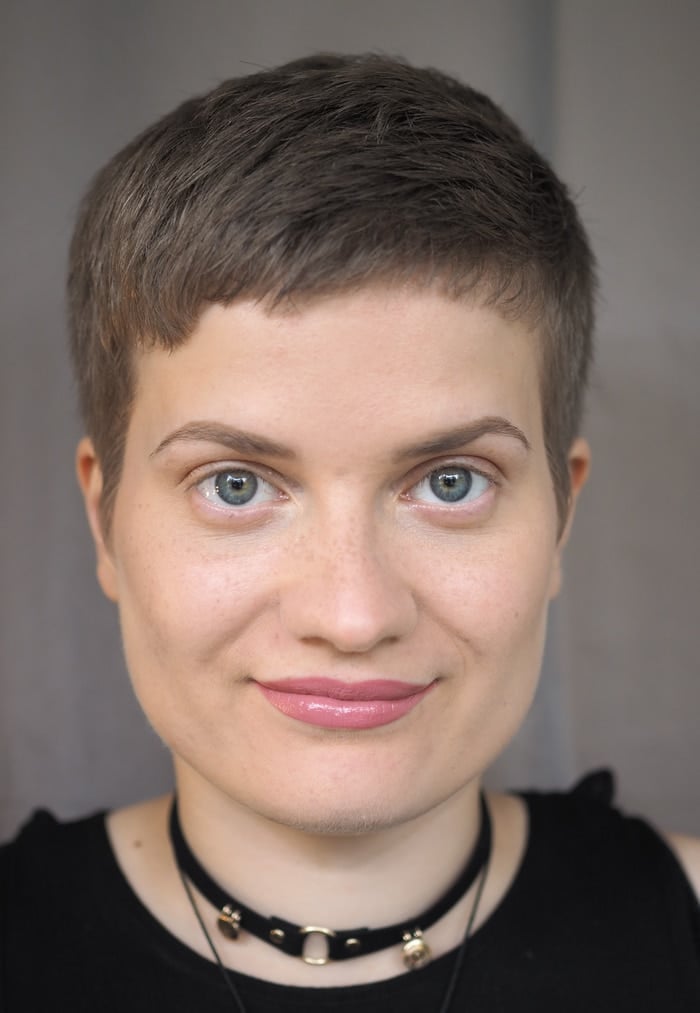
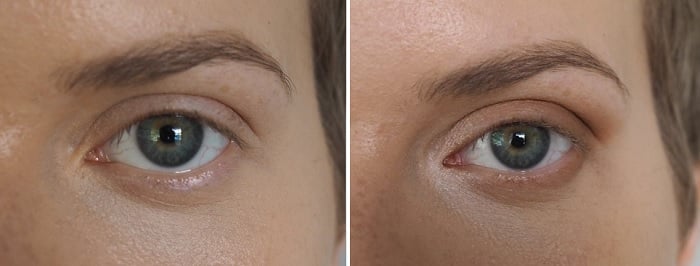
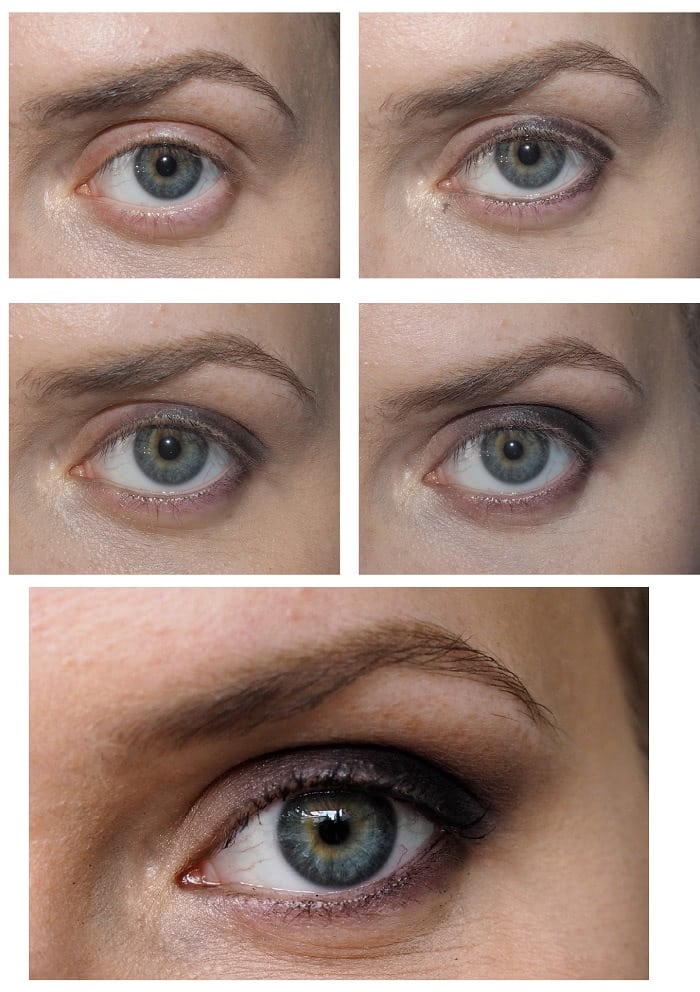
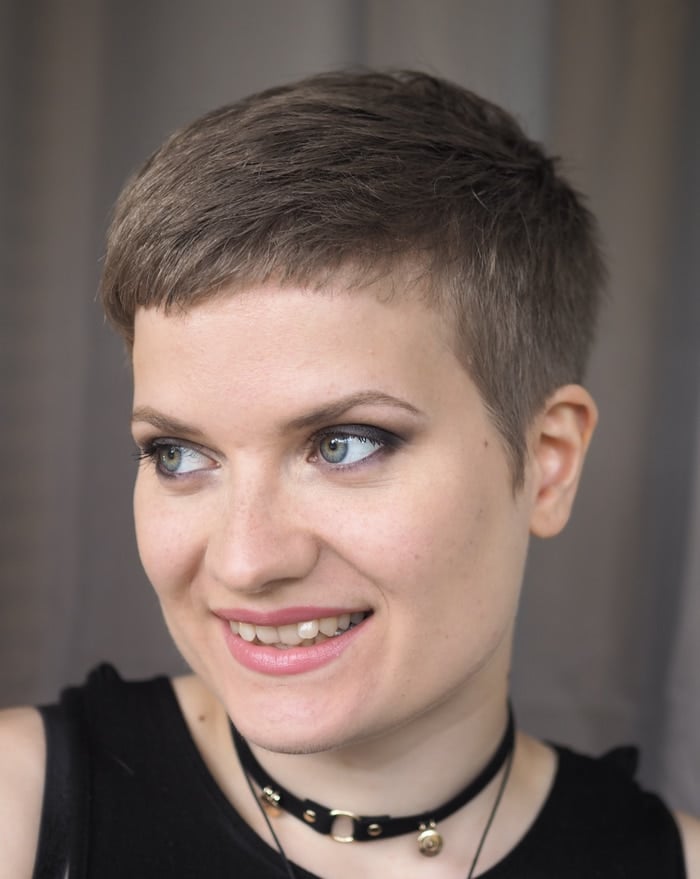
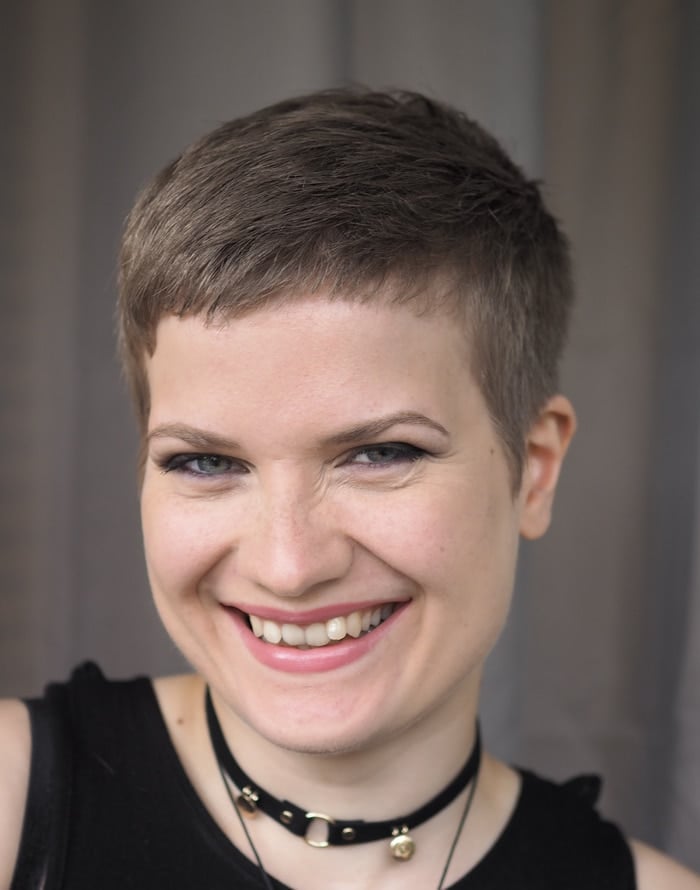
Here is my gorgeous sister. She has protruding eyes, which are beautiful. They appear quite big and round so when I’m doing her makeup I balance them a bit and make them look a bit wider – more almond shaped. And since the eye shape makes the eyes look quite big – there is room to make the eyes appear a bit smaller with makeup.
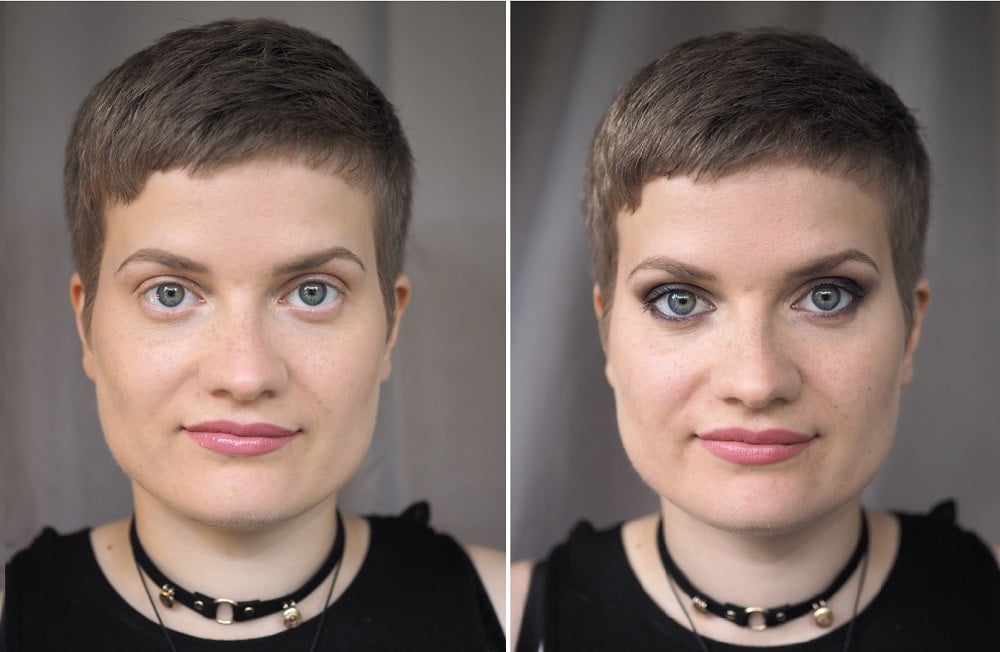
Here is a before and after – see the difference?
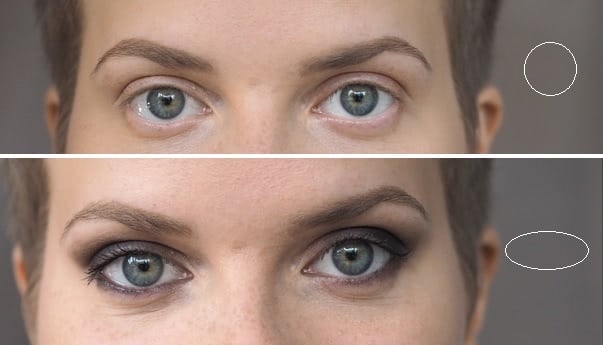
Shoutout to my friend paint, who helped me do this tutorial. No, but really. You can see the difference quite clearly here! Without makeup the eye looks round and clearly protruding. After makeup? They are more almond-shaped and balanced.
How to: Makeup for protruding eyes
The basic shape
Here is the basic shape for eye shadow. This elongates the eye and makes it more almond shaped. What is important here, is that you don’t bring the eye shadow too low on the lower lashline. You want to make it as close to the lashline as possible and even to the waterline. That way the makeup gives posture to the eye and doesn’t emphasize the eye bag that naturally occurs with the eye shape. You want to add eye shadow to the whole lid area, that is visible, when the eye is open. Also you should bring the eye shadow up in the outer corner, kinda like a cat eye.
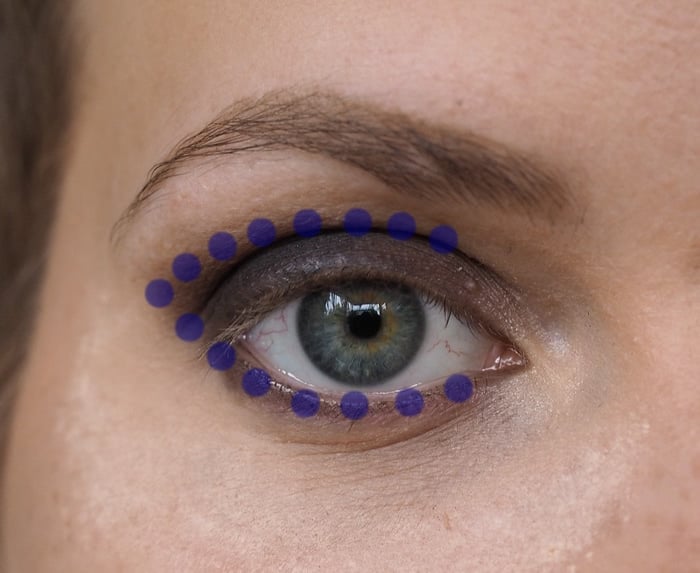
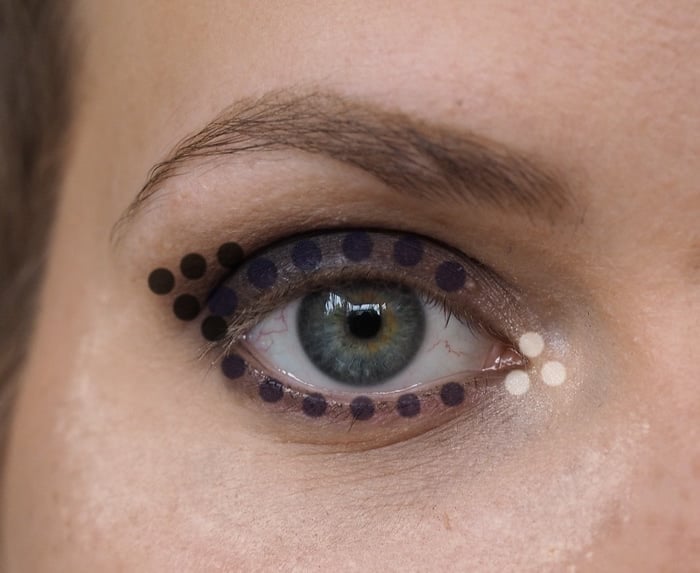
Contour & Highlight
Yes – contour and highlight is a thing in eyeshadow too. It’s about creating shadows (contour) and bringing light (highlight) to the eye. With protruding eyes, you should contour the round edges – if that makes sense. Those blue dots show you, where you should apply a darker eye shadow. It balances the eye and makes it look – well, not so protruding. The black dots show you where to apply the darkest shadow to create the almond-shape. The white dots show you where to apply light. Basically you’re pulling the eye from the inner corner and the outer corner with makeup, if that makes sense.
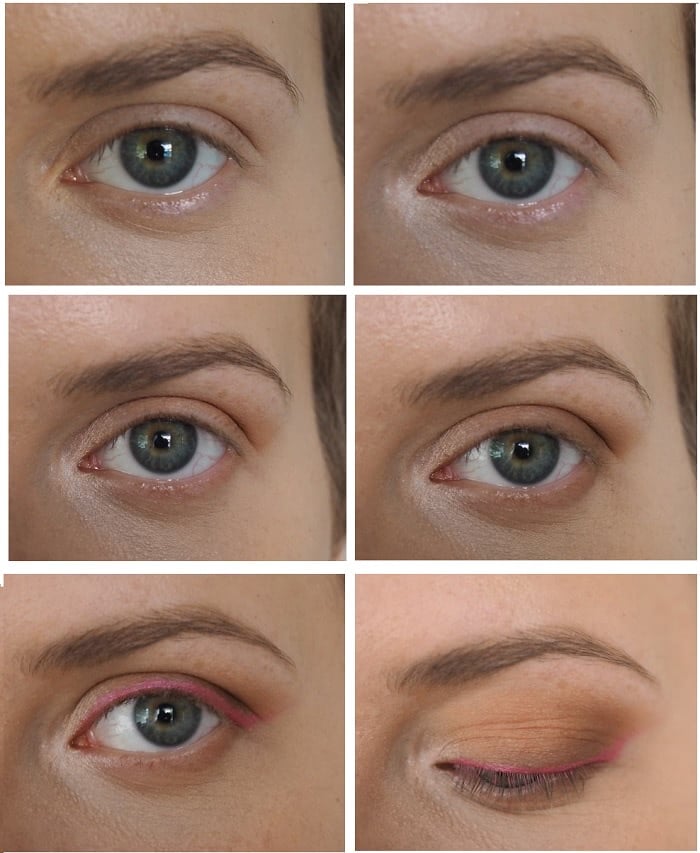
Here is a before and after, following these rules:
Eyeshadow tutorial for protruding eyes
See how just the light inner corner already shapes the eye? Crazy, right!
Quick tut:
Add light shimmer color to your inner corner.
Apply a matte brown shade all over your lid and line your lower lashline with it.
Darken the outer corner with a darker matte shadow.
Line your eyes and flick it on the outer corner.
Mascara and stuff.
Smokey eye for protruding eyes
If you have protruding eyes – you have to try a smokey eye! It’s made for your eye shape. Normally a smokey eye can make the eyes appear bit smaller, but with this eye shape it just looks amazing.
Start by lining the eyes with black liner. Line the waterline too and the lashline. Smoke it out. This doesn’t have to look pretty at this point – it’s just a base for the shadow.
Apply dark eye shadow to the lid and blend it. Lift the eyeshadow from the outer corner to a V-shape. Blend. With smokey eye it’s easiest to take some colour, blend it out and then take some more colour, blend again, etc. You can also start with a lighter shadow or use a transition shade to get the black blend in better to the skin.
Apply some eye shadow to your lower lashline as well, but keep it nice and clean. Don’t blend it too low. Apply some light shimmer color to the inner corners. Apply mascara and you’re done!
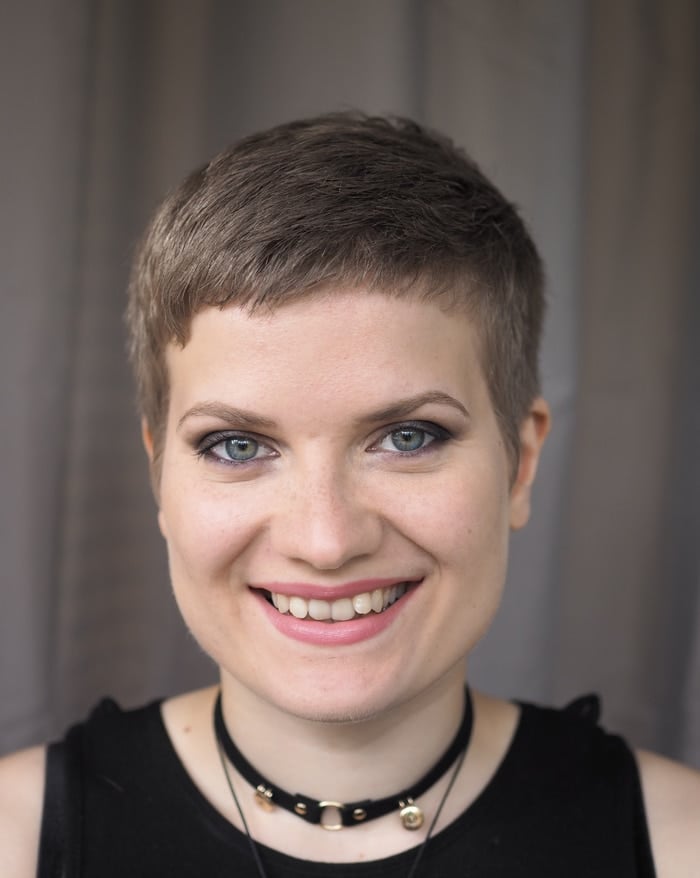
I hope this post was helpful to you. Thank you Janika for being my model!
This website uses cookies to improve your experience. We'll assume you're ok with this, but you can opt-out if you wish.Accept
Privacy & Cookies Policy
Privacy Overview
This website uses cookies to improve your experience while you navigate through the website. Out of these, the cookies that are categorized as necessary are stored on your browser as they are essential for the working of basic functionalities of the website. We also use third-party cookies that help us analyze and understand how you use this website. These cookies will be stored in your browser only with your consent. You also have the option to opt-out of these cookies. But opting out of some of these cookies may affect your browsing experience.
Necessary cookies are absolutely essential for the website to function properly. This category only includes cookies that ensures basic functionalities and security features of the website. These cookies do not store any personal information.
Any cookies that may not be particularly necessary for the website to function and is used specifically to collect user personal data via analytics, ads, other embedded contents are termed as non-necessary cookies. It is mandatory to procure user consent prior to running these cookies on your website.