Skin update – Taking birth control pills for acne

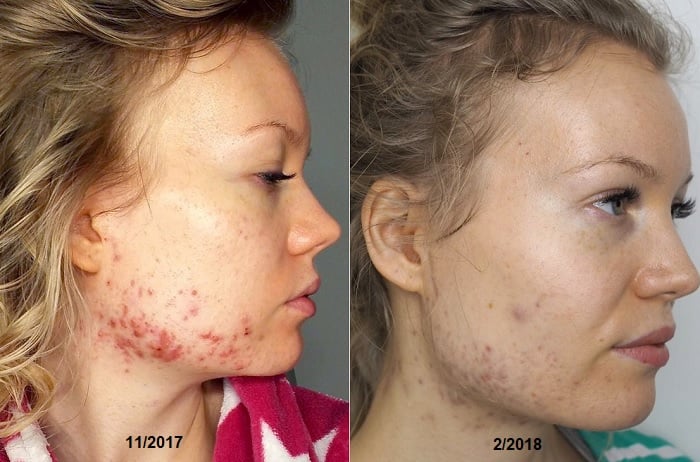
It’s already been over three months, that I started to take birth control pills again for my acne. I thought it would be a good time to show you the results.

Looking at these photos and my skin, it just goes to show how slow it is to treat acne. No treatment is quick – especially when the acne is as bad as it was with me. It takes a long time for the skin to heal properly and it takes a lot of patience. However, the pills have been working for me, as I had anticipated, since I’ve already gone through this once as a teenager.

The pills I take are called Cypretyl and they are the strongest one (I think). They are especially made for acne.

hormonal acne birth control pills
Hormonal acne. This was my skin in November – it was even worse than in this photo, but this is the best photo I could find. Then this is my skin now, in February.

So how does my skin look and feel now?

Well, most of the acne is gone. I say most, because there are still some stubborn ones. Not so much on my face anymore – and the ones on my neck are also kind of fading – but the part that is healing the slowest is my back. But it is healing too. And no, I don’t have any pictures of my back acne, I haven’t documented it here. I trust that showing you my bare face is bad enough. Haha.

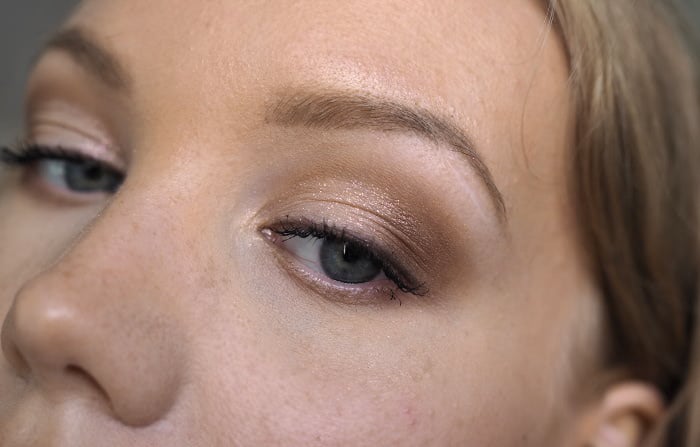
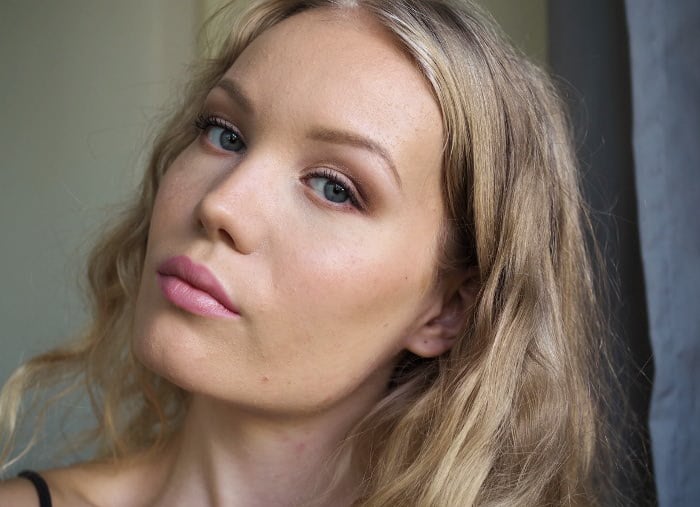
Obviously for these photos I got a new zit on my face, but believe me when I say that it’s rare nowadays. Even though my face might not look like it in the photos, it’s so smooth. Honestly, I still shiver when I think about my acne at it’s worst: it was super painful and applying makeup or lotions or removing makeup or touching my face in any other way hurt.

acne scars
My skin now, after taking birth control pills for three months. Active acne is gone (besides a few zits) and all that’s left is scarring, which is fading pretty quickly.

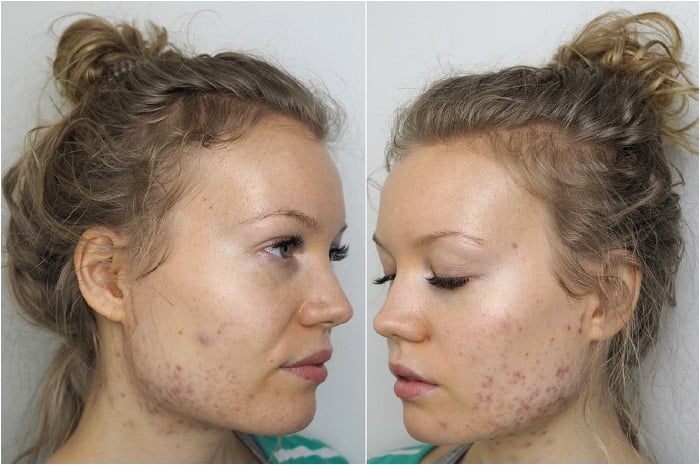
My acne scarring is fading pretty quickly too. I was a bit scared about that part. At first the scars were so red and I could feel that my skin was uneven on those areas. But day by day they have faded and it’s getting easier and easier to hide them with makeup. And as I said, my skin feels smooth. So I’m pretty optimistic that I will have a good-looking skin by Summer. This year I need to be even more careful with sunscreen though  – my skin has gone through a lot and is sensitive to sun damage right now.

The pills don’t only take away acne. They also adjust the skin type a bit. My skin is not as oily as it has been before, it’s more of a dry combination skin now, especially since the weather has been super cold here. Treating my new skin is fun – it can take more lotion and it doesn’t break out as easily as it did before.birth control pills for acne

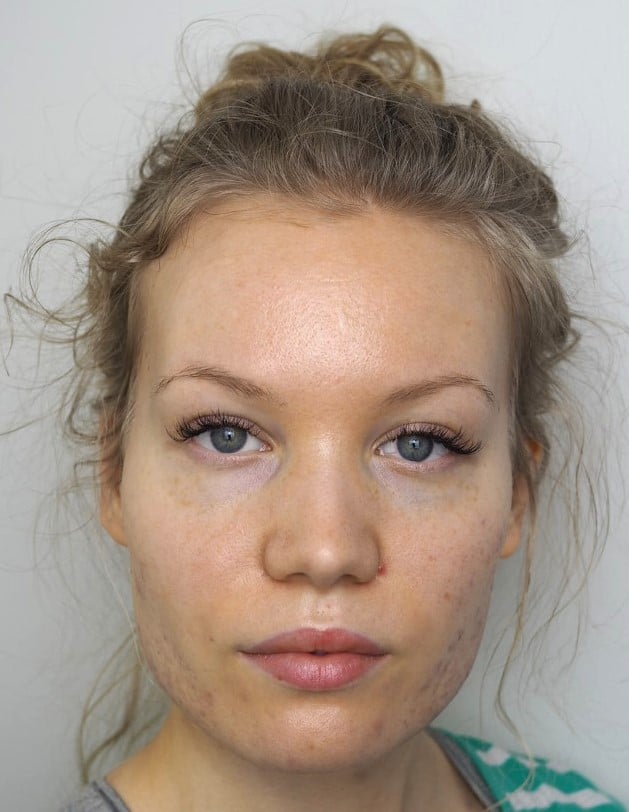
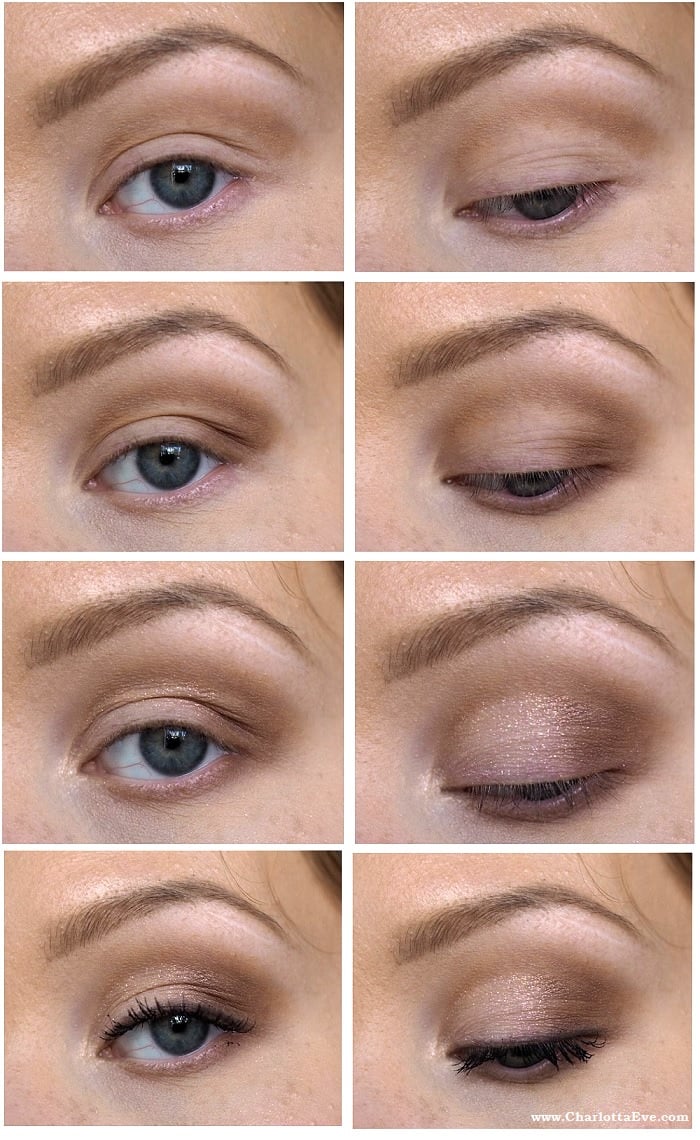
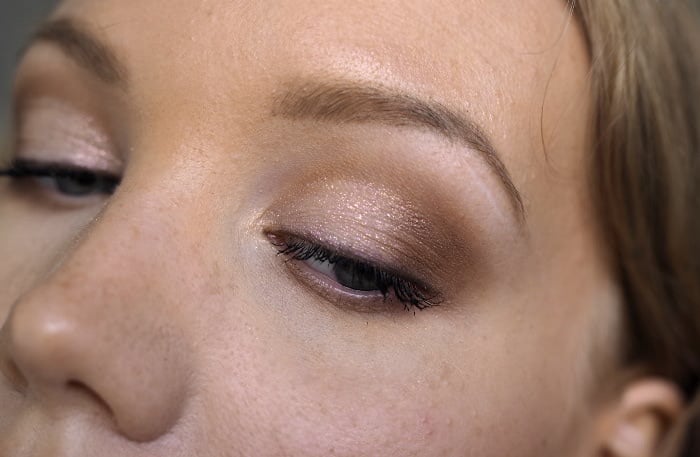
Altogether I can say that I am super happy with my skin. Making the decision to start taking birth control pills again was hard and I had some regrets in the beginning, but right now I feel like it was the right decision. I had forgotten how it feels to have my skin back. Even though I worked on my confidence during acne, I still feel more confident now that it’s not that visible and startling anymore. And one of the things I am super happy about, is that I also have found my love of makeup again. Having acne I just didn’t even feel like wearing anything on my face and nothing seemed to look good on me. And taking makeup photos for blog posts was torture – when I tried to take photos of my makeup the only thing taking all the attention in the photos was my red, bumpy acne. Well, no more.

I am so relieved, happy and feeling a lot more like myself.

This journey has also affected my skin care routine, and treating those acne scars is super important – so I will update you about that soon.

Any other acne victories? Or are you still searching for the cure? 
However it is – I hope your skin gets better too and I send you a lot of hugs, because I know how hard it can be to battle acne.

The ultimate makeup trick for hooded & deep set eyes

hooded and deep set eyes eyeshadow


Guys, I have breaking news.

It’s about eyeshadow application. I finally learned the trick on how to apply eyeshadow to my deep set/hooded eyes. My eyes have a very little of visible lid space. Just a small gap. So applying the dark eyeshadows on the ‘crease’, as typical, has never worked for me. Actually, the typical rules in general haven’t really worked for me. With deep set or hooded eyes – you have to do things a little differently.

And even though I’m a professional I’ve struggled with my own eye shape. Getting it sometimes right, but most of the time just kind of shooting in the dark, not understanding the logic behind my actions. Okay, I made it sound super serious. But it is! It’s life and death here – eyeshadow, life and death.

So let’s get to the visual part of it. I’m gonna teach you exactly how to apply eyeshadow for hooded eyes, deep set eyes, monolids or just for eyes, that have a little of visible lid space. This trick is also a bit universal, so it works for anyone, who wants to make her/his eyes appear bigger.

And might I just add, humbly of course, that this is the best eye shadow trick I have shared on my blog so far.

makeup blog hooded eyes

The ultimate makeup trick for deep set or hooded eyes

Forget about the crease

As you can see, with my eye shape, my crease is super low. Those grey dots in the first picture show you my crease. I’ve parted ways with it a long time ago – deepening my actual crease just makes my eyes look smaller and even though my eyes are just the right size, I don’t want them to be any smaller. So, forget about the crease.

eyeshadow trick for hooded deep set eyes eyeshadow trick for hooded deep set eyes

Follow your natural bone structure

How to apply eyeshadow for any eye shape? Follow your natural bone structure – just like you do with contour and highlight. It’s no different from that really! It’s all about playing with the natural contours of your eye and putting the shadow where it naturally occurs. Which, in this case, forms right below my brow bone. These photos are a bit dark on purpose, because I wanted to show you the natural shadows that occur on my eyes. I marked it with grey dots in the second picture.

find your brow bone

Find your natural shadow – it’s right below your brow bone

To get this absolutely right, you need to find the exact spot. You can find it with your finger – you can feel where the bone ends and the eye sinks a little. Or you can go to a room, where the lighting is a bit dim and see, where that shadow forms on your eye. You can see it super clearly that way, as you can see from these pictures. Lately I’ve actually taken my makeup brush, walked to our hallway (where it’s that dim lighting) and drew on that eyeshadow exactly where that shadow hits me. Then I’ve just gotten back to my makeup table – it makes the eyeshadow application so much easier, once I have those ‘boundaries’ on.

The reason this makes any eyeshadow look better, is because it looks more natural. Since we’ve been following our natural bone structure, the makeup kind of looks as if it belongs there. Right? Even the blending looks softer this way – almost as if the bone structure would give it an extra boost (spoiler alert: it does).

ultimate eyeshadow trick

Here is a close up to show you exactly the trick. See how high you can actually pull up the eyeshadow? It’s nowhere near that natural crease or fold.

ultimate makeup trick for hooded eyes

Now here is a very simple eye shadow tutorial using this trick.

Simple eye shadow tutorial for deep set & hooded eyes

hooded eyes makeup trick tutorial

  1. Contour the eye by following your natural bone structure. Use a matte shade. Create the ‘crease’ where a natural shadow occurs. That is where your color should be the darkest. Fill in the color in the outer corner and blend well, so that the contour looks soft and nice. Apply some color to your lower lashline as well, but it keep it subtle (unless you like the drama).
  2. Apply the lid color all over the lid all the way to the fake crease. Blend the edges carefully, so that, again, it looks soft and nice. But don’t let the shimmery color (if used) get to your crease area, because that color should be matte.
  3. Apply the inner corner highlight, liner, and mascara. I did a soft blended liner with black eyeshadow.

hooded and deep set eyes eyeshadow hooded and deep set eyes eyeshadow


The best eyeshadow palettes
*Norvina palettes
*Urban Decay Naked Palettes
*Too Faced palettes

The base for my eyeshadow is always*Urban Decay Primer Potion. It keeps the eyeshadow locked in place all day.

The best eyeshadow brushes
*Zoeva
Zoeva is my absolute favorite brand for brushes. They’re high quality and make blending so easy!
*Coastal Scents 22 brush set
There are also affordable brushes, that are great. This set is what I bought for myself as my very first brush set and I still use it a lot.

I hope this post was as helpful to you, as it was for me to figure out this thing. Let me know in the comments! 

And hey – happy Valentines’s day! I’m gonna do a little date night thing with Risto, eating dinner at home in a candle light. So cheesy, but so lovely.

Scroll to top