Extensions damage your lashes & other lash extension myths

lash extensions

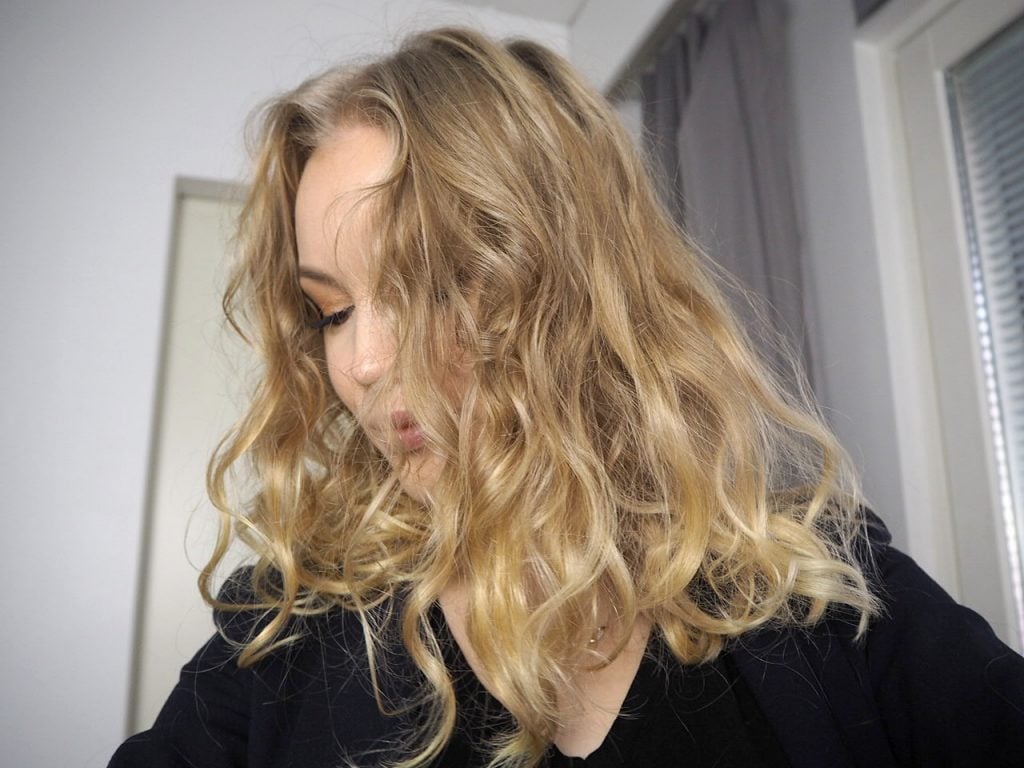
In a collaboration with Kosmetologi Viivi

A while back I met with my lash tech and my friend Viivi for a breakfast. We talked about beauty – obviously – and the big topic was lash extensions and the myths revolving around them. Lash extensions are pretty common nowadays, but there are still some weird rumors or beliefs, that don’t necessarily have any truth in them. As a professional, it’s pretty often that you hear these things, that someone’s cat’s cousin’s sister overheard in a circus (not exaggerating at all here).

So here are the five most common lash extension myths – let me know if you come up with anything else or if you have questions regarding lash extensions. The comment box is open.

Links to products are adlinks.

lash truths

Lash extension myths

Myth 1. You don’t need to wash your lashes

One of the most common misbeliefs is, that you shouln’t wet your lashes, let alone wash them. It’s true, that you shouldn’t wet them 24 hours after having them done, but that is just for the glue to dry properly. After that you need to take care of your lashes and wash them daily.

You should wash your lashes daily with a cleanser specifically made for lash extensions. Foam cleansers are the best, because foam can easily get between your lashes and right between your lid and your lashes. Sebum, dirt and makeup can easily build up and that can cause infections. Washing your lashes helps to keep them hygienic, nice-looking and if you have volume lashes the fans stay beautifully open.

I use Chrissanthie Eyelid Cleanser, which I mix with water so it becomes a foam. It’s great for my sensitive eyes. Using this cleanser my lashes have stayed beautiful and clean.

Chrissanthie is approved by eye doctors and it’s hypoallergenic. It’s also proved to help treat blepharitis, which is known to be connected with lash extensions. The symptoms for blepharitis are red and swollen lids, pain, lema and the feeling of having something in your eye. The cleanser also contains tea-tree extract, which helps to clean excess oils, so that your lashes can stay on longer.

volume lash extensions

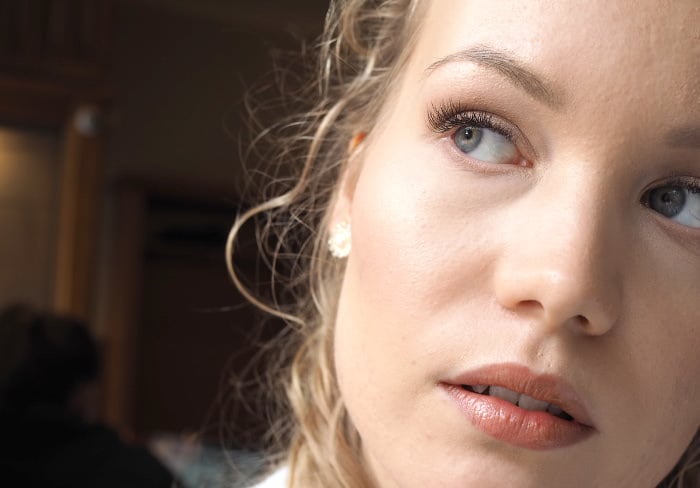
Myth 2. Lash extensions look unnatural 

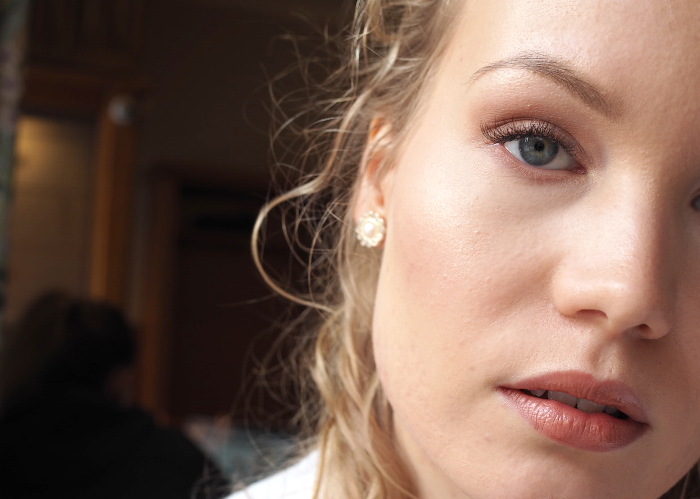
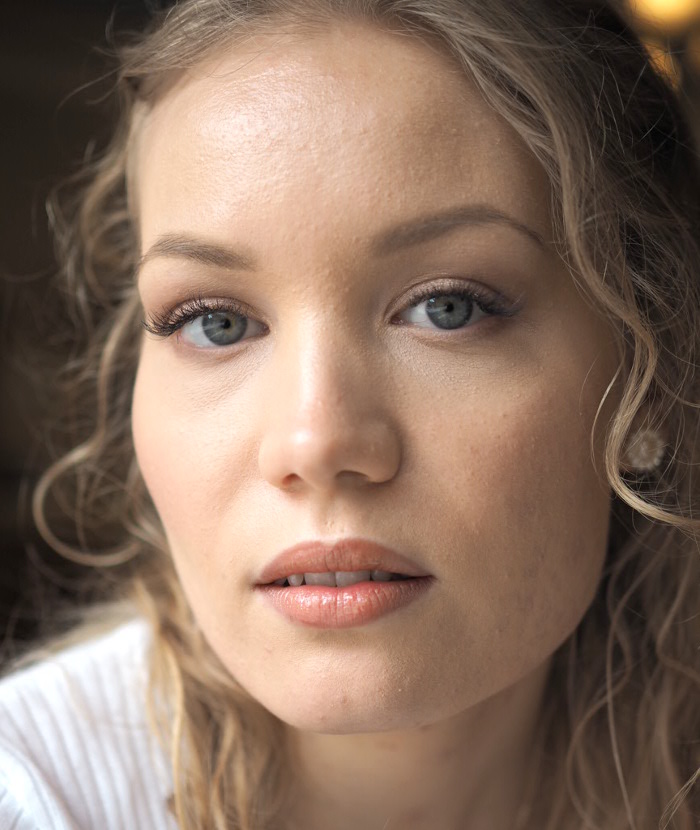
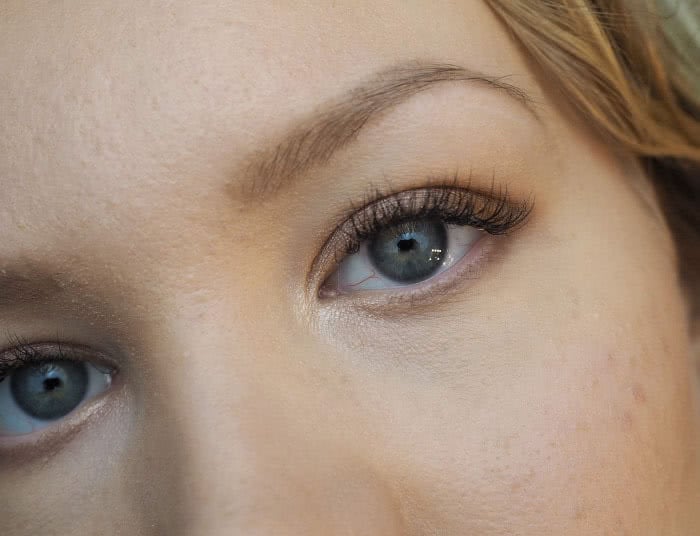
Nowadays you can get very pretentious, doll-like lashes, which easily lets us to think that all lashes look unnatural. When in reality lash extensions are always custom-made, suited for everyone’s personal taste.

Volume lashes are more voluminous than classic lash extensions. However, the fibres used in volume lashes are super thin, so that they can look even more natural than classic lash extensions, if installed lightly. You can for example only insert volume lashes to half of your lashes, or dye your lashes and have some extensions installed to them. That way your look is very natural, but you don’t need to wear mascara. You can also mix classic and volume lashes, which is what was done to my first set, which I wanted to look quite natural.

My first set, which was quite natural. You can get even more natural than this, obviously.


Myth 3. Lash extensions damage your natural lashes

This is probably the biggest reason to choose a good lash tech and not always look for the cheapest price. It’s always sad to see lashes, which have – well, first of all – been cheap, wrongly installed and in worst case scenario, ruined it’s owner’s whole lash row.

When lashes are installed correctly, they shouldn’t damage your natural lashes. Your own natural lash thickness and length should be taken into consideration before choosing the right style and fibers for you. The fibres should be max. 3 mm longer than your own lashes, in which case they don’t cause damage. You can have longer lashes for a shorter time, but if you wear long lashes for a long time, they might weigh down your lash roots.

Another important note is, that your lashes shouldn’t have too much glue in them. If your lash tech has used too much glue, they can feel heavy and it can glue your lashes together. Then your individual lashes might not have room to fall naturally and grow back. Lashes (done right) should feel comfortable and light.

However, if your lashes are damaged and shortened, you can seek help from lash serums, which help your lashes to heal and to grow. You can also use lash serum while having extensions (given that it’s suitable for lash extensions), at which time it strengthens your lashes and helps to keep the extensions on even longer.

One that is very effective, and also suitable for extensions, is RevitaLash Advanced lash serum. Revitalash treats lashes by giving them moisture, flexibility and shine while actually making them longer. It also prevents your lashes from becoming brittle or breaking. This is the serum I’ve used myself and it does really work.

lash extensions myths

Myth 4. Lash extensions cause allergy.

People can become allergic to anything. You can also become allergic to lash extensions; to the glue, tape or gel pads used in installing the extensions. So if you experience any symptoms, the reason might not always be just the glue. For example, I’m a bit allergic to gel pads so Anu uses tape in my case. You should talk with your lash tech about any allergy symptoms before straight up removing them.

Here as well it’s extremely important to have the extensions installed correctly. Glue shouldn’t touch your skin and the lashes shouldn’t be glued shut to your lids, which in some cases can cause very bad allergy. I’ve seen these kind of cases myself, back when I did lash extensions, and it was awful to see swollen, red lids, when the extensions were far too close to the lid.

Lash extensions should only be installed to healthy eyes.

lash extensions

Myth 5. You can’t have lash extensions, if your lashes are too straight, short, your eyes are hooded or your eye shape is difficult

As a rule you can install lash extensions to every kind of healthy eyes and lashes, no matter the eye shape or lash size. So if you don’t have any sicknesses or some problem with lash growth, you can have a pair of beautiful lash extensions. Also – you can’t have too straight or too curly lashes for extensions. Lash extensions can be used to shape your eyes or to create an effect where eyes can appear closer or farther apart from each other. You can mix different curvatures and for example lift the corners of your eyes. Or if your eyes are very deep set, you can use curved extensions and natural volume set to widen your look.

Thank you Viivi for a nice morning, for helping me with this text and of course for my lovely lash extensions.

If you live in Helsinki, you can buy Revitalash and Chrissanthie straight from Viivi. In other cases, check the links I added in the text.

Do you use lash extensions?  

Naturally curly and wavy hair 101 – Curly hair routine

naturally curly wavy hair blog

What does it mean to have naturally curly and wavy hair? How to know if your hair is naturally curly? Or maybe you’ve always known you had naturally curly hair, but did you really know, what potential it has?

This post is dedicated to naturally curly or wavy hair. I have gathered some tips on how to treat it and how to get the best out of your curls, without any heat. I also shared my curly hair routine.

More often or not, you hear about this one particular problem: your hair is both curly and straight. It’s like a weird mixture of these two. Or it gets more curly around your face – you call them your baby hairs and they have a will of their own.  Or maybe you’ve noticed, that on a holiday, say, on a tropical island, your hair is more curly than usual – no use in straightening it.

I’m here to tell you, that your hair is naturally curly and you are just treating it all wrong!
I’m here to tell you, that your hair is not necessarily just randomly curly at some points – it is actually curly, once you give it what it needs!

*adlink

how to treat curly hair

How to know, if your hair is naturally curly?

Deep down you probably know that your hair is and has always been curly. You just haven’t really given it a much thought. But once you do – I’m telling you – there’s no going back.

One of the things, that give curly hair away in a second, is getting it wet. You notice it almost instantly. The wetter your hair is, the curlier it gets. Right? You come out of the shower, squeeze the excess water out, and see it. Curls.

Another thing, that’s a bit annoying, but in a way a relief, is that curly hair hates hair brushes. Once you brush a curly hair, it doubles in size. No, actually it triples. It gets huge and frizzy and just awful. It loses all of it’s definition. But don’t worry, I have a better solution to a brush.

Also, curly hair is dry. It’s dry by default. But don’t worry, it doesn’t need to look dry.

Curly hair is dry, it doesn’t like to be brushed, and it loves water. 

These things can sometimes be a bit tricky to pick up, because if your hair is full of products not suitable for curly hair – silicone in particular – your hair might lose some of it’s curls and behave, well, not like a curly hair. Or if your hair is super damaged, the curls can be a bit damaged too.

But by following these tips, your curls will recover and you’ll find that your natural curls are beautiful just the way they are.

How to treat your curly hair the right way

Be gentle on your hair – skip the heat

As I said, curly hair is dry by default. So be gentle with it! Stop with the straightening and curling irons. They will damage your hair and your curl patterns, at least in the long run.

Remove sulfates and silicones from your routine

I hate to go into ingredients, but I have to. I was a bit hesitant to try a sulfate and silicone free routine at first, and to recommend it to you guys, but now that I have, I have to say it’s made a big difference. The reason why this is recommended is simple.

Why go silicone free?

Silicones aren’t necessarily a bad thing, but there is a reason they are not recommended for curly hair. Most silicones are not water-soluble, so if you’re using a mild shampoo, it might not wash away all the silicones. And silicones can build up. Once they build up, they can weigh down your curls, diminish definition and straighten out the curls. So it’s just easier to go silicone-free.

Common silicones:
Cetearyl Methicone, Cetyl Dimethicone, Dimethicone, Dimethiconol, Stearyl Dimethicone, Amodimethicone, Cyclomethicone/Cyclopentasiloxane, Trimethylsilylamodimethicone

And hey – even without silicons, the conditioner I use (that is *Briogeo Curl Charisma Conditioner), manages to untangle my hair and make it silky smooth.

If you do use products with silicones, choose ones that contain less them. And if you’re using products with silicones, you need a shampoo that gets rid of the silicones too, which then needs to be, well, not that mild. Which gets us to the next guestion:

Why go sulfate free – and why should you choose mild shampoos?

Sulfates are detergents and they are used a lot in cosmetics as cleaning and foaming agents.

It is recommended to treat curly hair with sulfate-free products. Why? Because sulfates are considered quite harsh, and they can strip your scalp and hair from it’s natural oils. And those oils are actually useful and they protect your scalp while giving moisture to your hair.

Common synthetic sulfates:

Sodium Lauryl Sulfate, Sodium Laureth Sulfate, Sodium Lauryl Sulfoacetate, Sodium, Lauroyl Isoethionate, Sodium Lauroyl Taurate, Sodium Cocoyl Isoethionate, Sodium, Lauroyl Methyl Isoethionate, Sodium Lauroyl Sarcosinate, Disodium Laureth Sulfosuccinate

Natural sulfates:
Sodium Coco Sulfate

I’ve noticed, that natural sulfates are slightly more gentle for my scalp. At least they have worked better than synthetic ones. But they can still be too harsh. However, if you’re not scared of sulfates, you might look for natural shampoos that contain sodium coco sulfate. Just wanted to note that here, because I started my curly hair journey with a shampoo containing that.

curly hair progress with curly hair method

TIP!

The easiest way to get sulfate and silicone-free products is to choose organic products. The easiest way to check, if your product is suitable for curly hair (and is silicone & sulfate free), is this is it CG website, where you just copy the ingredient list and the site tells you if it’s CG (=curly girl) approved.

Okay – so there were some basic things. Now I bet that you’re eager to start your curly girl journey and try the simple routine. But first, you need to get rid of buildup from products you have been using before.

Before you start the curly girl routine

Before starting the naturally curly hair routine, you need to wash your hair with a clarifying shampoo once – to get rid of buildup, such as silicones, waxes and petrolatum in your hair. Then you can start your curly routine, with good results.

Note: Even if you were using mild curl-approved products, go for a clarifying shampoo every once in a while. It gets rid of build-up.

curly hair routine

Simple curly & wavy hair routine

  1. Shampoo your hair.
    Make sure the shampoo contains no silicones or sulfates. Your shampoo should be mild and nourishing, since curly hair is dry and you don’t want to strip your scalp from all of it’s natural oils – those oils also help your curls.
  2. Apply a generous amount of conditioner on your hair and untangle.
    Use silicone-free curly girl approved conditioner. You are not gonna brush your hair at all, so this is the part where you untangle your hair using your fingers and the conditioner. Then rinse off the conditioner. Cold water is recommended, but if you already live on the north pole and are not a fan of the cold vibe, go ahead and use warm water (me, always).
  3. Gently squeeze or scrunch the water out of your hair. Then use the towel and do the same thing.
    The key here is to NOT dry your hair completely – you just take the excess water out of your hair, but you still leave it damp, or actually damp+.
  4. Optional: add leave-in-conditioner, oil etc. to your hair.
    If your hair is very dry and conditioner is not enough for it, you can add leave-in-conditioners or oils after shower. Again, the products should be lightweight and preferably silicone-free.
  5. Add the curl gel, which locks the curls in place.
    Gel usually gives the best hold. Experiment to see if it’s better to apply the gel to wet or towel-dried hair. I recommend first towel drying your hair a bit. The right way to apply curl gels and creams to your hair is – you guessed it! – by squeezing/scrunching the products gently all over the lengths. Never drag them through the hair as it can ruin the curls.
  6. And then… you let your hair air dry and don’t touch it!  And if your hair is naturally curly, it will get naturally curly and dry in perfect (well, maybe not perfect) curls. For a super simple beginner routine, that is it.

squish to condish curly hair method

TIP! If you have extra time and want to get even more defined curls, you can try the squish-to-condish curly hair method. That means soaking out the conditioner instead of rinsing it all off under water. So instead of rinsing your hair, you take water to your palms and soak out the conditioner in little sections and squish it out of your hair. This can work for dry hair, since most of the conditioner is left in the hair.

This is my hair now, October 2019. It’s my natural color – and my natural curls!

My routine & products

*adlink

I follow the curly hair routine and I wash my hair abut 2 or 3 times per week. I sometimes do the squish-to-condish method. I never brush my hair and I sleep with my hair in a pineapple (high loose ponytail), so that my curls don’t get ruined, when I sleep.

So far the best products I’ve found for my curls are:

Links are to amazon, you can also shop Briogeo on *Sephora!

Shampoo – *Brigeo Co-wash shampoo
Conditioner -*Briogeo Curl Charisma Conditioner (especially good for dry hair)
Conditioner – *Schwarzkopft Mad About Waves Conditioner (more lightweight conditioner compared to Briogeo – not as moisturizing)
Gel – *Briogeo Curl Charisma Frizz Control Gel (great for beginners, very lightweight)
Gel – *Eco Styler Olive Oil Gel (very affordable, comes in a huge package!)

*Aquis towel & turban – (these towels honestly make a difference to my curls! Review here)

You can find lots of other good curly girl approved products from amazon.

naturally curly hair diffuser

Last but not least: embrace your curls! I wish I had realized this a long time ago – I would have super healthy hair and curls then. Since writing this post, I have embraced my curls and managed to grow my natural hair color back.

Here are some good curly hair sites:
https://www.naturallycurly.com/
https://www.justcurly.com/

Scroll to top