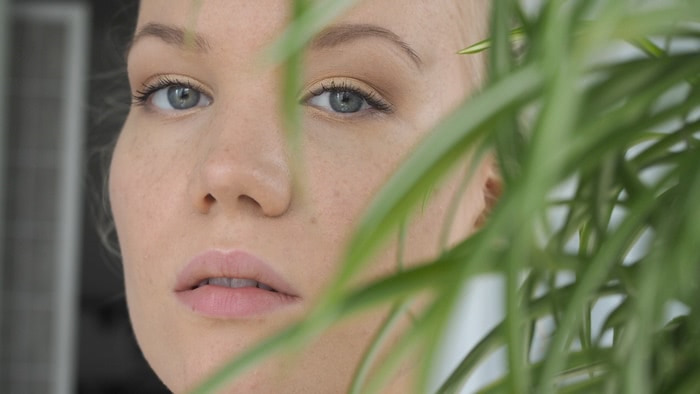
Welcome to one of my favorite places in the world: my vanity. It’s where the magic happens – where I try out new products, feel creative or drink my coffee in the morning barely managing to apply any makeup at all. It all depends on the day, really. It is a special place for me, because it’s one of my dreams come through. So all of you out there with a special dream – don’t give up hope.
As I’ve mentioned before, we organized our entire apartment last winter using the KonMari method. I talked about how it affected my wardrobe and taught me a thing or two about style on this post. But there is one area, that was pretty difficult to organize – and that was my cosmetics. I have a lot of it and I can’t really get rid of it, nor do I want to.
But that doesn’t mean, that I don’t organize it at all. I actually go through my skincare products and makeup pretty often. My makeup table setting may actually vary a little every month. I thought I could share with you my collection, give you tips on how to organize them and show you how I keep them – somewhat – in place.
*adlinks marked
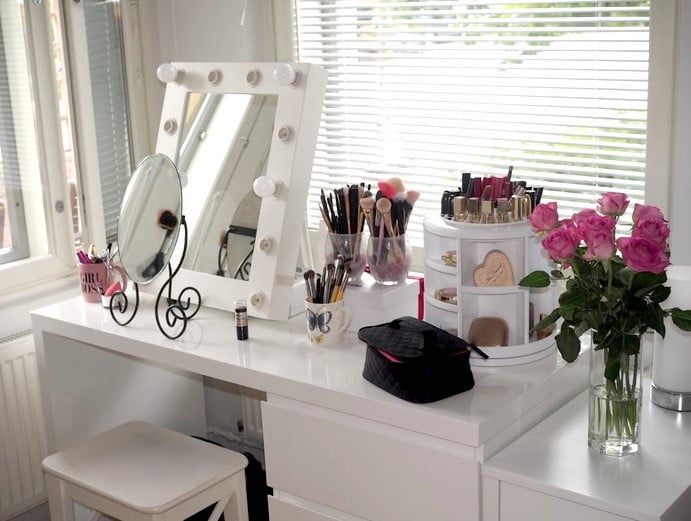
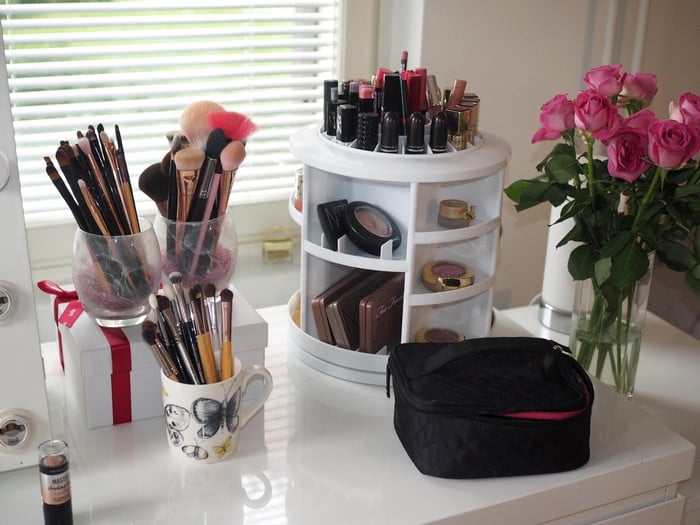
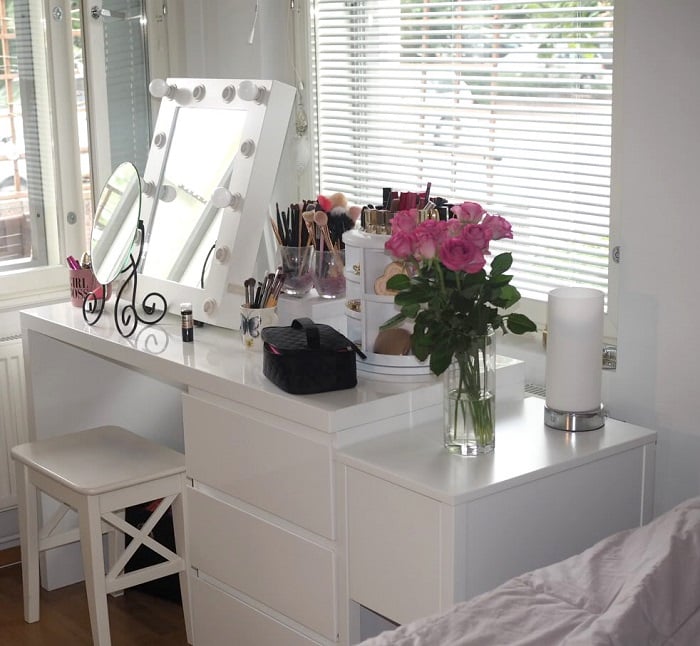
Here is my battle station!
My vanity & how I organize my makeup
Details of this rotating makeup organizer is in the end of this post, where I have links to everything as well.
Let’s take a look inside the drawers:
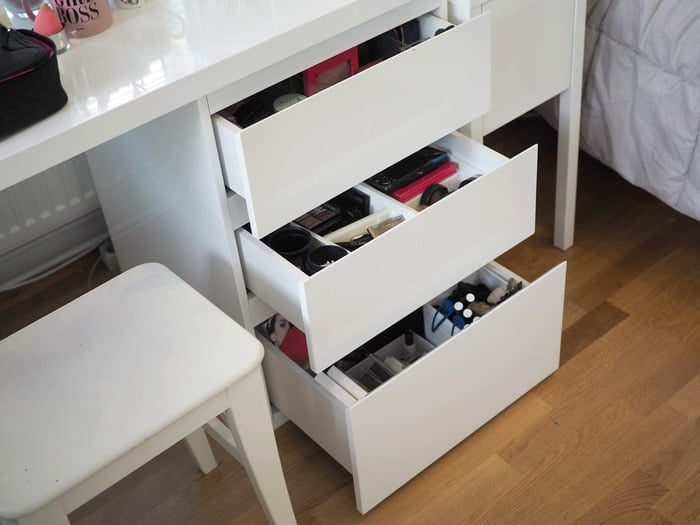
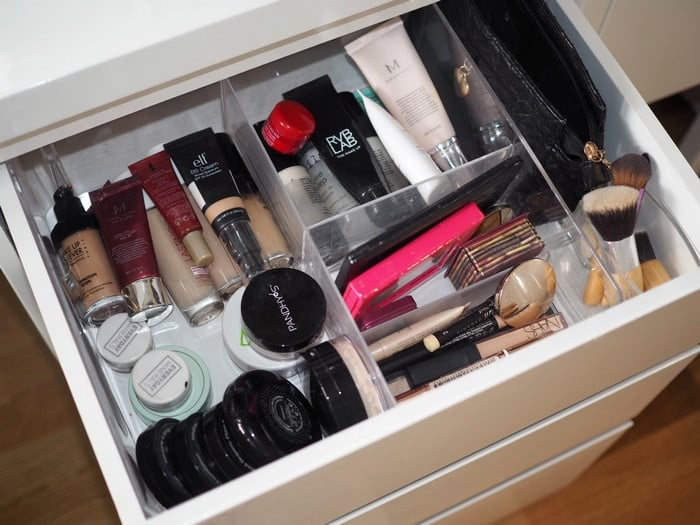
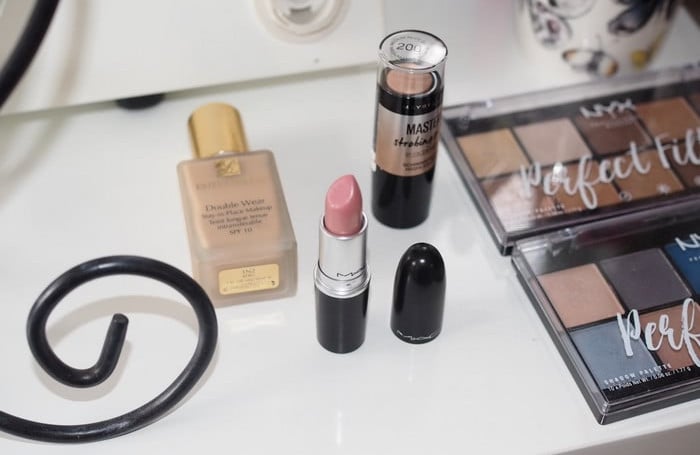
Here is the first drawer – it is where I keep my primers, foundations, concealers and some of my blushes and bronzers. Here is everything I need for a quick everyday makeup, or everything for the perfect base. The black makeup bag on the side is my storage – it’s where I put all the primers and foundations I’m not currently using (or some other extra products). On the side I also have this clear makeup organizer (that is made for Q-tips), where I keep my short brushes.
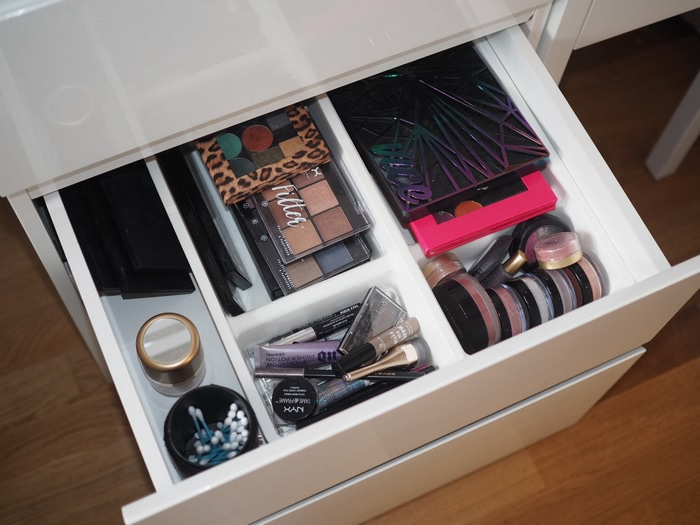
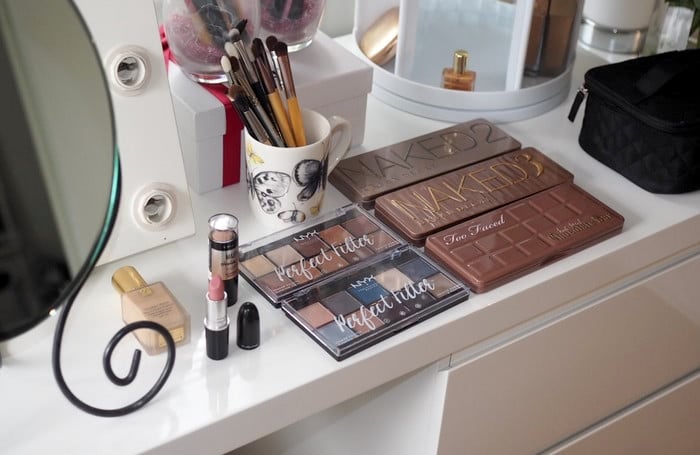
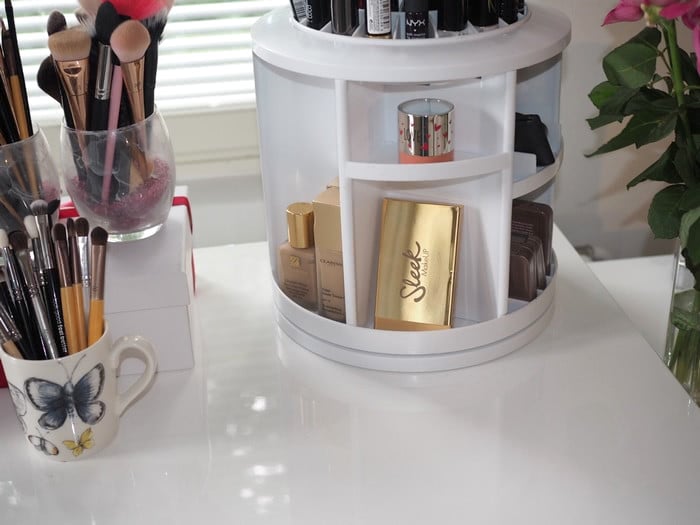
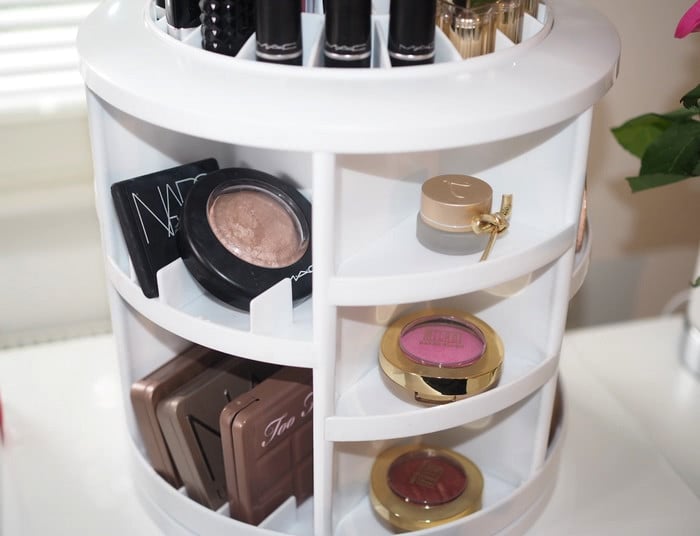
Here is the second drawer. This drawer gets me excited – it has almost all my eye shadows in it (single eye shadows & palettes), eye pencils, liners, brow products and the shimmering powders (or blushes, that are super shimmery). On the side I have more palettes (my sleek palette collection consisting of three palettes). I also keep my q-tips on the side in a brush holder. The lost puppy in the middle is my dry sunscreen.
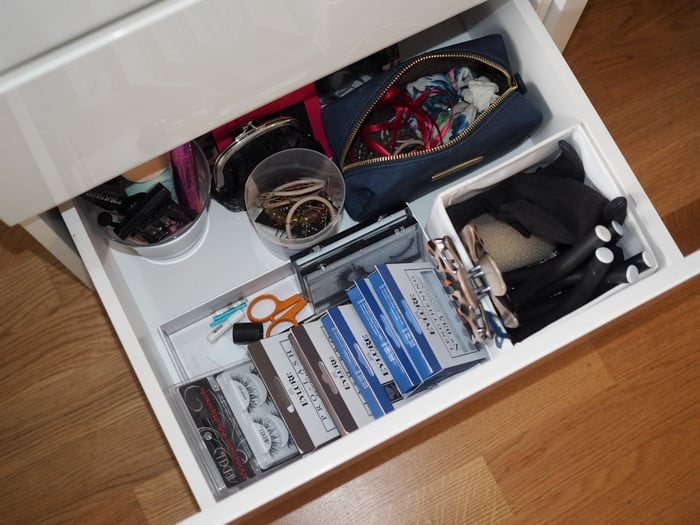
The third drawer is where I keep my lashes, extra products (back-up products of products I can’t live without) and hair stuff. I also have extra Z-palettes in here. Actually I only keep my hair “accessories” here – the rest can be found under my table in the black basket.
So, where have I bought everything? And where can you find those things?
Makeup organization tips
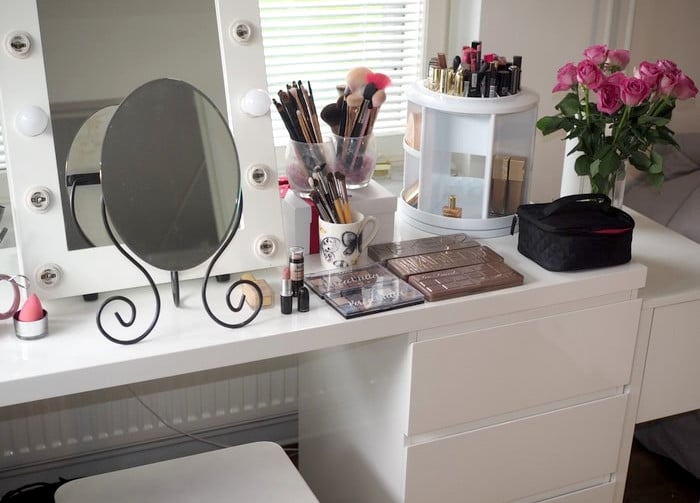
First of all, my table is from Sotka. I was gonna buy my table from IKEA at first, but then I decided to get it elsewhere, because I wanted it to be sturdy and of good quality. The stool is from IKEA though.
The big lighted mirror is from makeupmirror.com, but you can get similar ones cheaper from amazon like *this. I couldn’t live without a lighted mirror – if you’re gonna have a good battle station you need good lighting. I haven’t put all the light bulbs in, because they are so bright I would be blinded. The smaller mirror is from IKEA and that is my main mirror (I really need to get my face close to the mirror, so that I see what I’m doing).
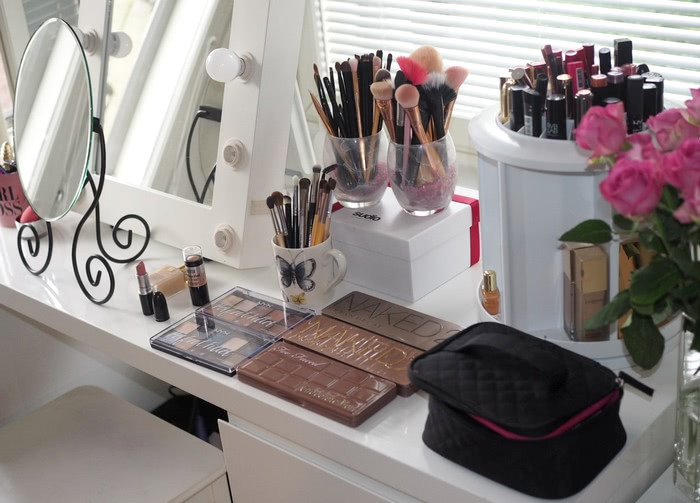
I keep my brushes on the table in glass cups and normal coffee cups. I also have pink decoration stones in the glasses, to hold the brushes better.
I organize my drawers with clear and white makeup organizers.
*Clear makeup organizers in amazon
*White makeup organizers in amazon
Besides these, I use boxes to organize stuff. The lashes are kept in an old tablet cardboard box. The extra products are kept on a glass cup. You can also see makeup bags used as organizers. In the first drawer I have extra foundations and primers in a makeup bag and on the third drawer I have my hair stuff in one.
I use a *Brush Holder Cup for my q-tips and I also may take it when I’m travelling – most of my brushes are too long for it, but I use it just as a brush holder.
Makeup organizers from amazon
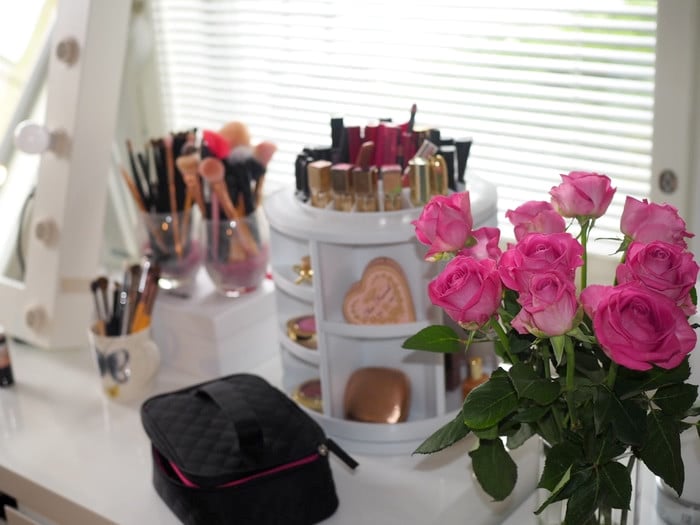
The *rotating makeup organizer is the pride of my makeup table. This is seriously the best organizer I have. I like to keep all the prettiest products here, because seeing them make me happy. I also like to keep those products here, that I use daily.
Check out amazon’s *makeup organizers
And that is everything for now. I get new products pretty often, so as I said, I actually go through my makeup pretty often. I also get bored easily and might change the setting a bit, if I feel like it. But the key elements are here – the rotating makeup organizer, acrylic makeup organizers, boxes and the mugs.
Thank you for visiting my special place!
How do you organize your makeup?