This treatment was gifted to me
Brow lamination is exactly the kind of beauty treatment I can get behind on. It’s all about making the best out of your natural features. You’re not actually adding anything – yet somehow you leave from your appointment as a total brow queen.
Beauty treatments that are semi permanent usually worry me a bit. I’m not that into microblading or eyelash extensions – or beauty treatments that change your appearance with a permanent-something. I have seen so many bad brows from either microblading or brow pigmentation, I’m just gonna steer clear from all that. Your face ages and moves and changes – that’s enough of a reason for me to not do anything too long-lasting.
But as soon as I heard about brow lamination or brow lift I was all on board. Mostly because I’m already a huge fan of Yumi Lash Lift and I knew the result would be somewhat natural, just more enhanced.

Brow Lamination – Yumi Brow Lift experience
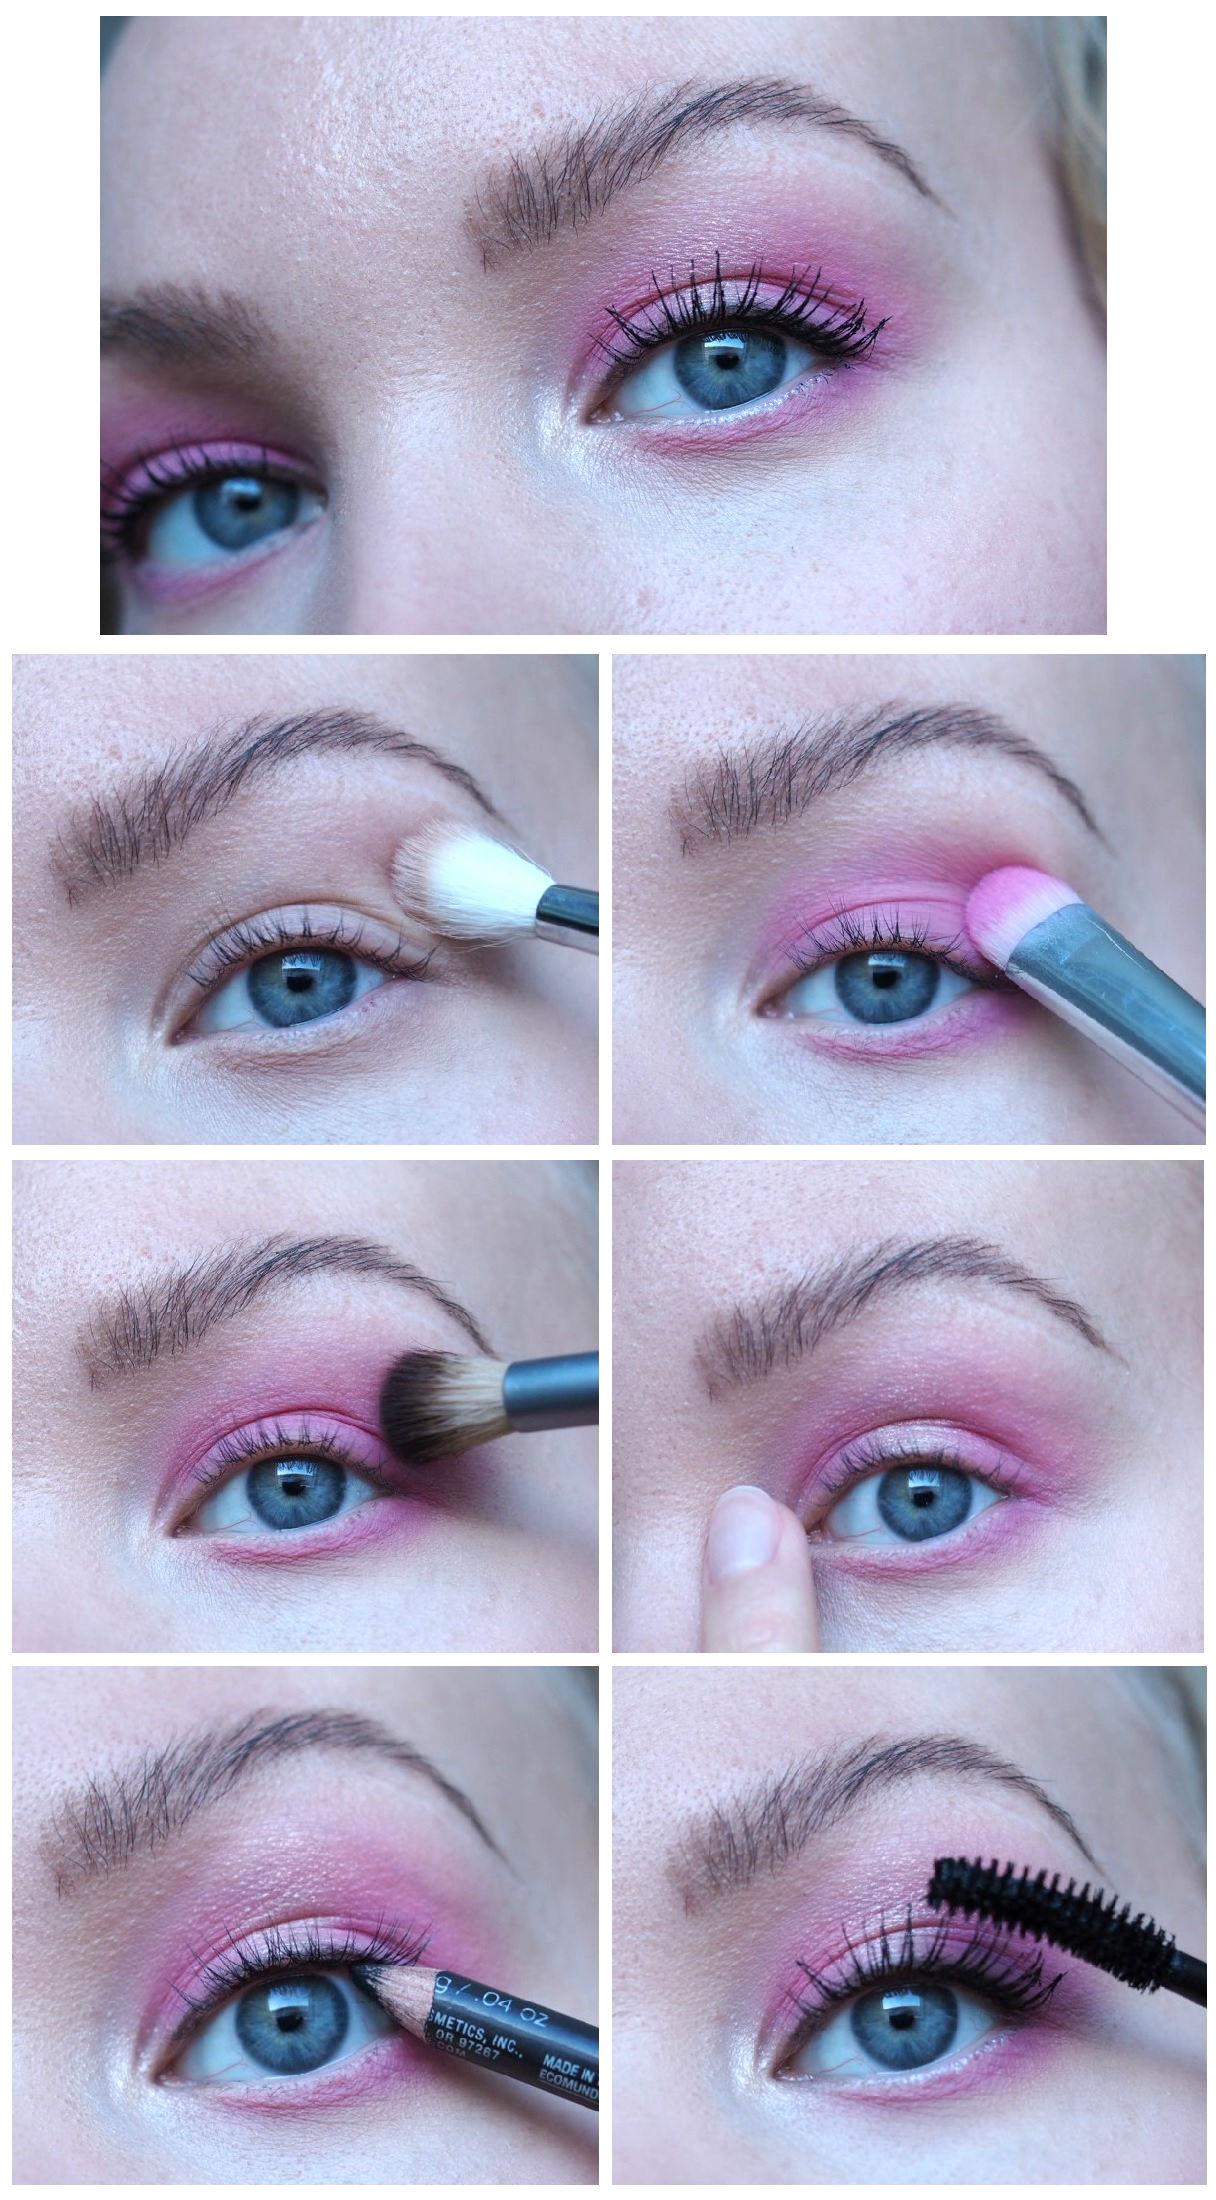
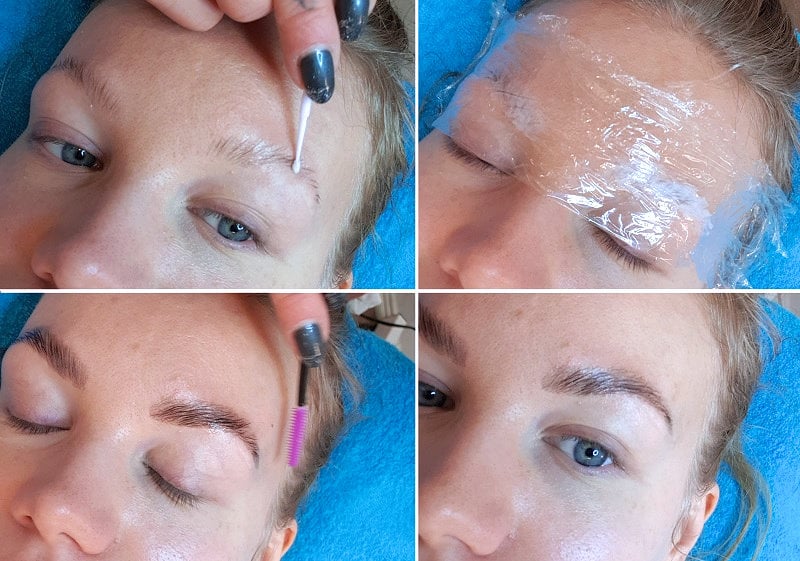
In brow lamination your brow hairs are brushed upwards and fixed so that they stay in the direction they’re put. Know those annoying brow hairs that always stick out? Brow lamination is perfect, because you can change the direction in which they grow. It’s the treatment for anyone with fluffy stubborn brows, but also for those with thin or sparse brows. I consider my brows quite thin, or normal, but this treatment gave me fluffy thick brows. The treatment also includes shaping and a tint.
The Yumi Brow Lift treatment steps:
1. LE LIFT, which changes the structure of the brow hairs, so that they can be shaped again.
2. LE FIX, which sets the brow hairs in the new direction in which they are put.
3. LE SERUM, which treats the brow hairs, so that they stay healthy.
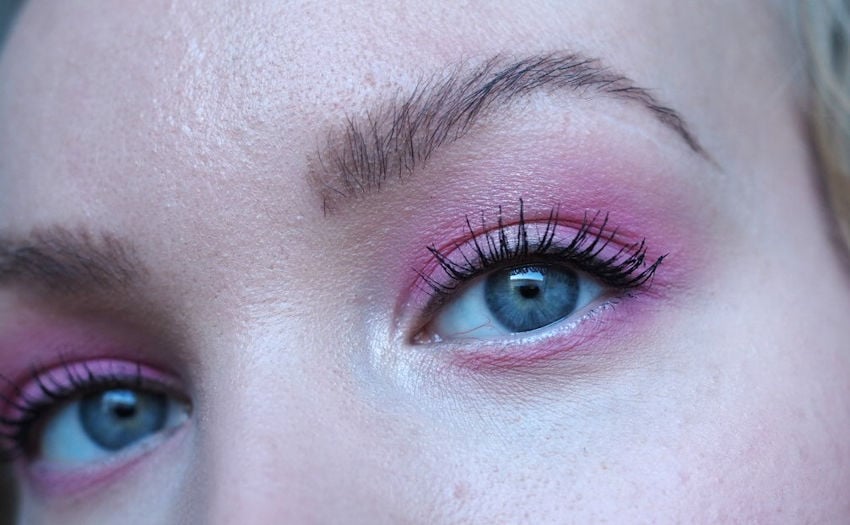
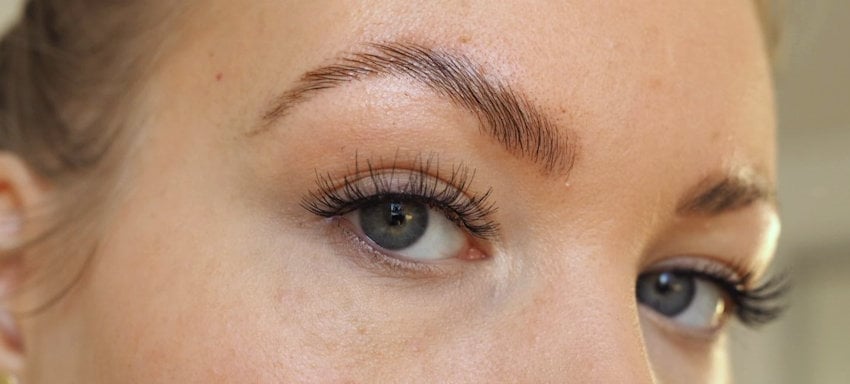
I’m gonna be honest with you: I didn’t think the result would be as striking as it was. I thought my brows would probably look tidier and slightly enhanced after the lift, but I was quite shocked to see the result. I didn’t think my brows would look this good. Right after the appointment the effect is at its strongest, because the tint tends to stick to your skin as well. Don’t be alarmed if at first your brows look a bit crazy. You should avoid wetting your brush for 24-48 hours, after which you can wash them and apply makeup and see how they settle.
I waited about 30 hours before washing my brows and after that the result was even better. I learned that after you wash the brows, you can decide how strong you want the lifting effect. Meaning, you can kind of brush your brows upwards – or to the side. When your brows get wet they obviously don’t stay up, so you need to brush them after shower. But what’s magical is that once you brush them upwards (or whatever direction) they actually do stay like that. I have a video showing you that on my Instagram Highlights (Brow Lift). I will update my Insta Stories also on how this fades off.
The brow lift eventually fades off, as your brow hairs renew. The results are always personal, depending on how quickly your brow hairs grow, but all in all the brow lift lasts for about 4-6 weeks.
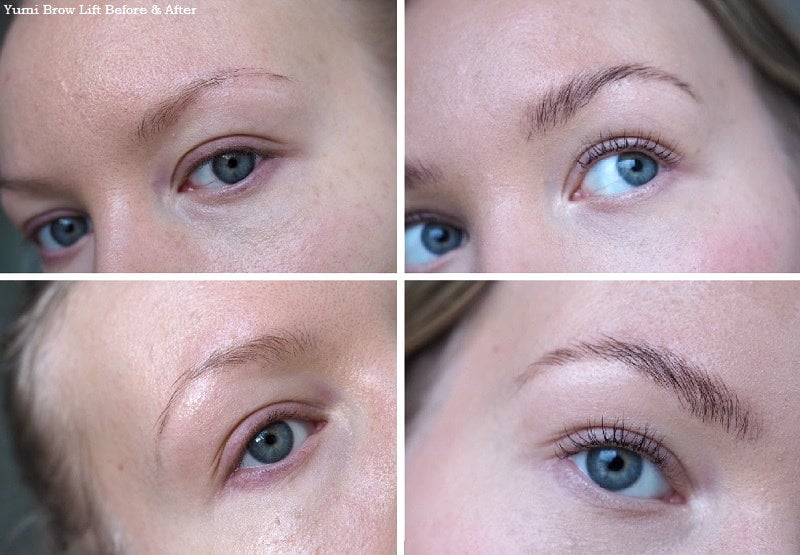
Before and after brow lamination / Yumi Brow Lift
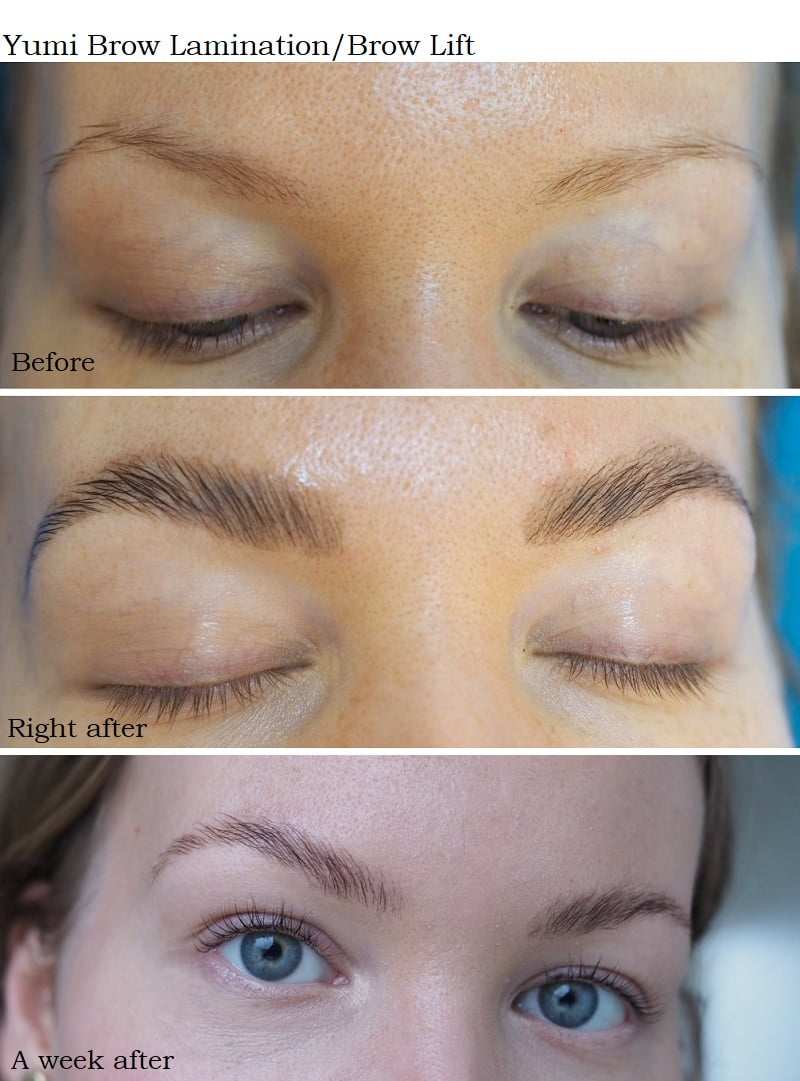
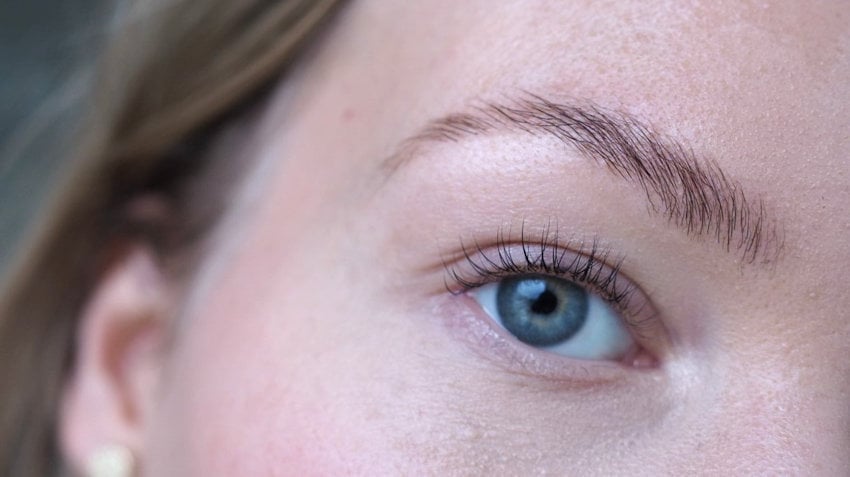
When you look at my before photo, you can see some stubborn brow hairs sticking out and growing downwards. Annoying, I know. After this treatment they have received a lift and can be brushed upwards or to the side.
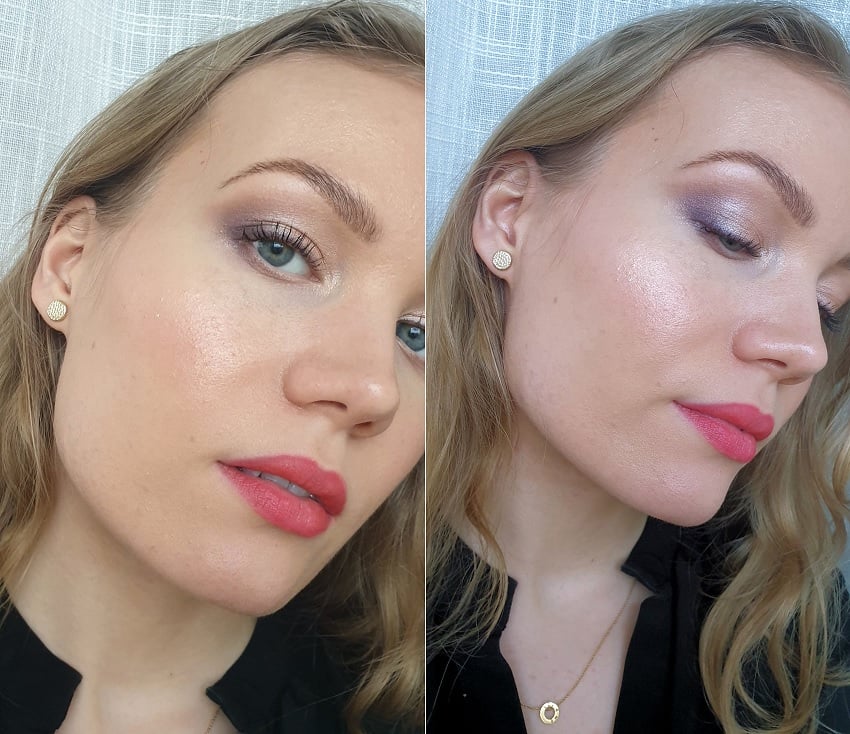
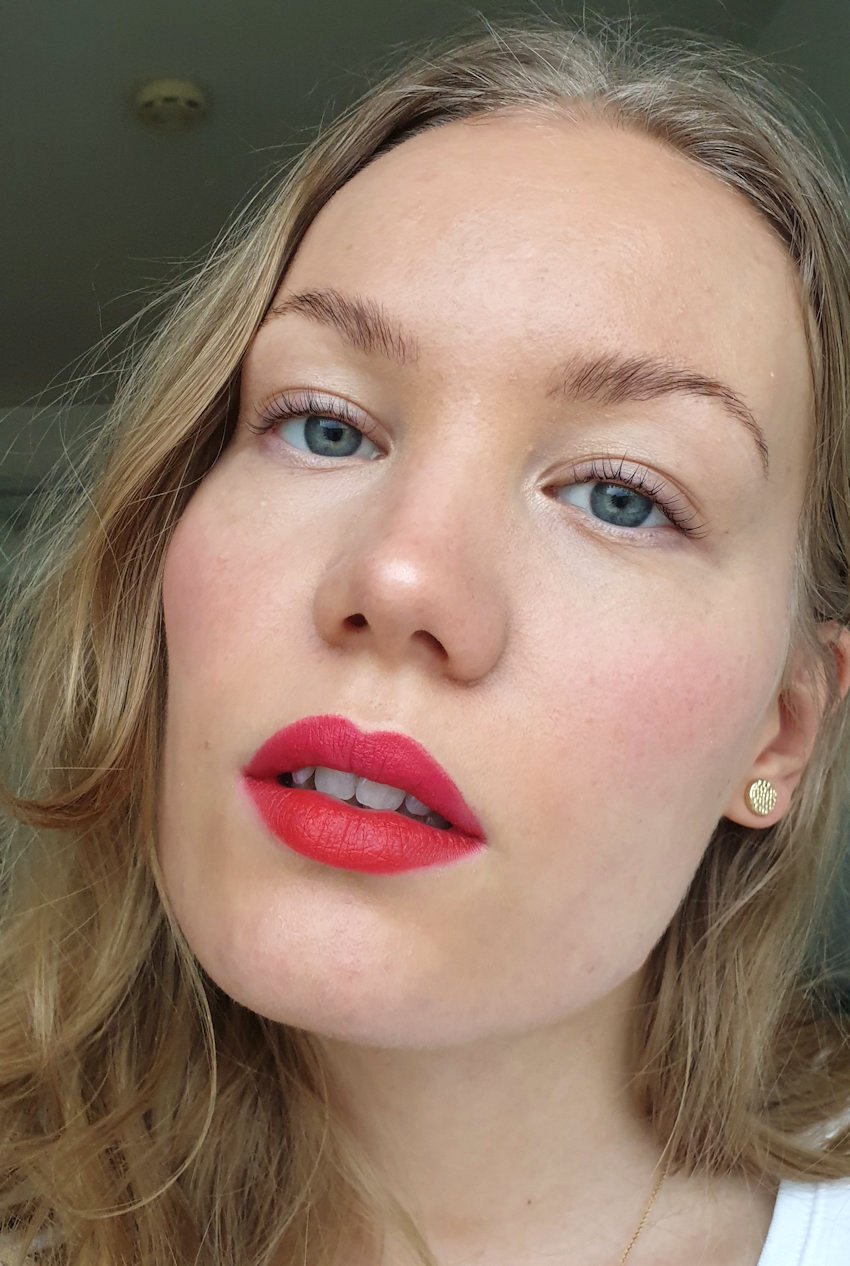
I’m already so hooked on this treatment! I haven’t been wearing much makeup on my brows, because I feel like they look good as they are. But applying makeup to them is also easy, since my brows have been shaped too. I can see myself going back to this treatment, definitely. It’s great for a holiday, for brides – or just to cheer you up on miserable in-between weather.
After treatment – Yumi Keratin Lash Lift Mascara
It’s important to take care of your brow hairs after the treatment, so that the result stays better. Perm obviously dries your hair a little, so a moisturising serum helps to keep your brows (and lashes) in good shape. This also helps the lift to stay longer in your brows and lashes. I actually went and got myself a lash lift as well, so I’ve been using this mascara in the evenings for my brows and lashes. My eyes are usually quite sensitive, but I haven’t got any reactions to this whatsoever. So I would say, good for sensitive eyes too.
Behind my brows and lashes is Viivi at Nätti Töölö. I also go to her for sugaring. A warm recommendation.
Viivin kauneushuone / Nätti Töölö
Topeliuksenkatu 7
00250 Helsinki
@viivin_kauneushuone