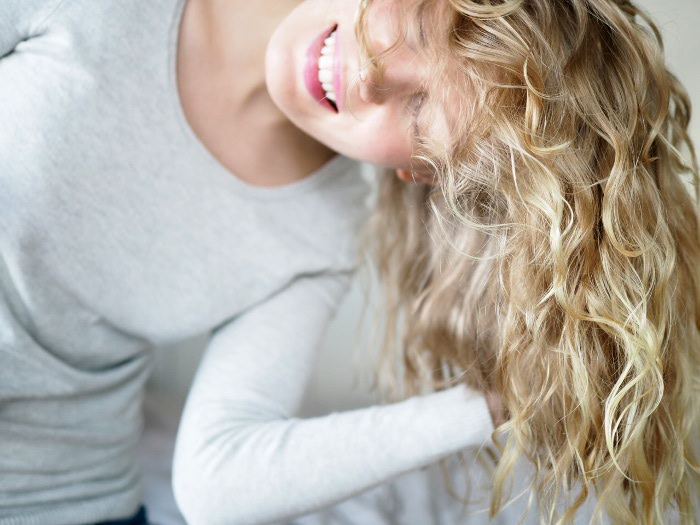
Happy Valentine’s day – a bit early. Do you have any plans? I don’t and by the look of Risto’s face when I mentioned him the day, I doubt I should plan on anything special. Besides, every day is Valentine’s day with him.
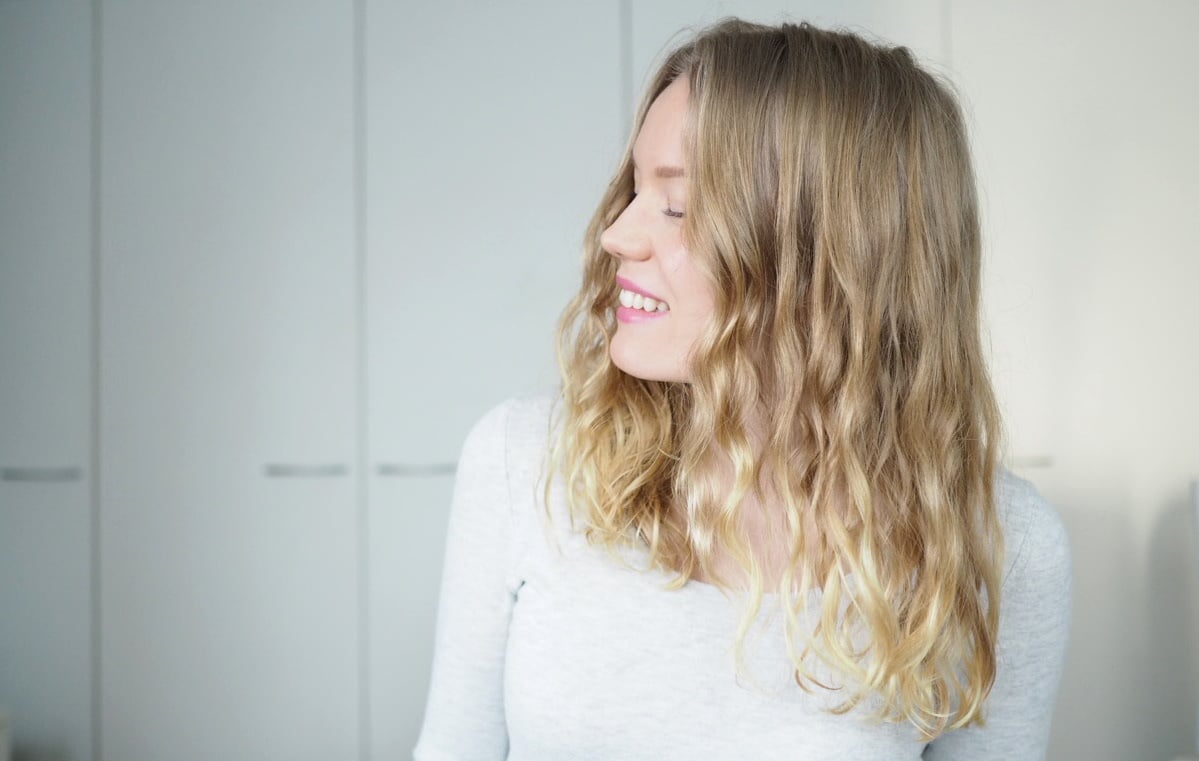
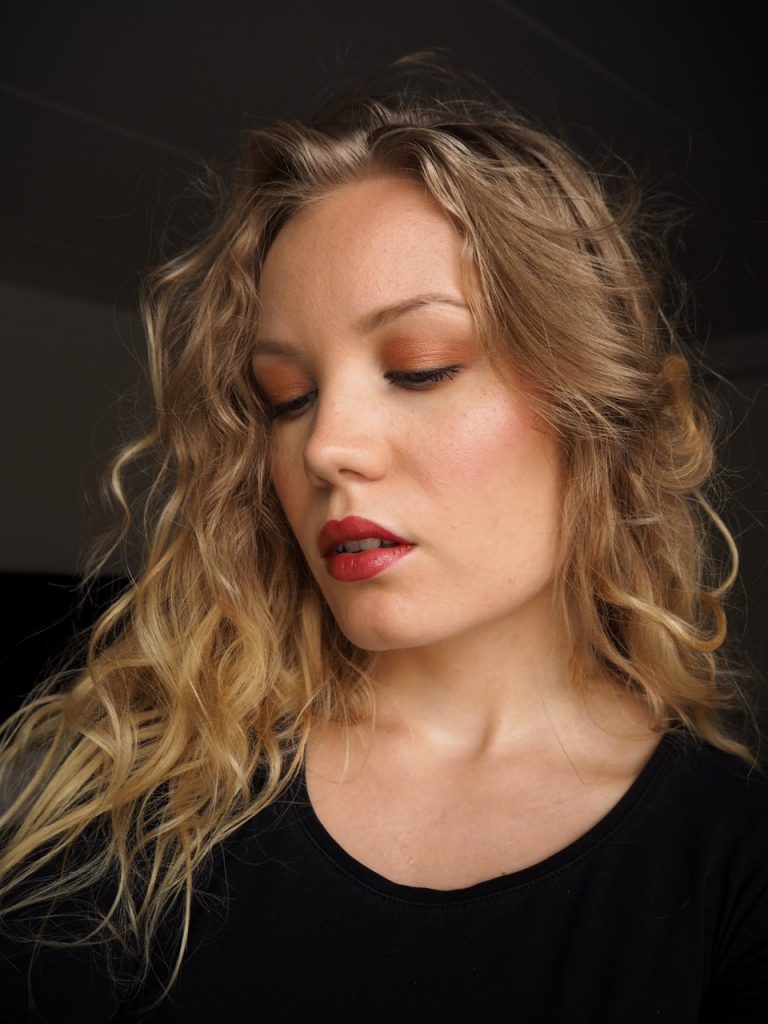
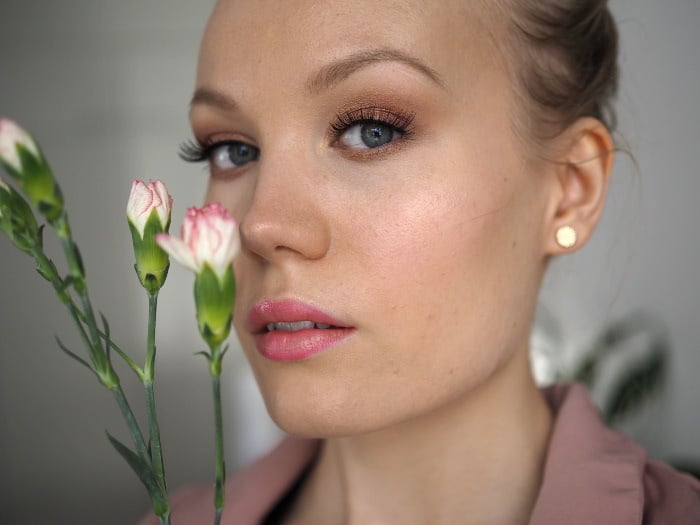
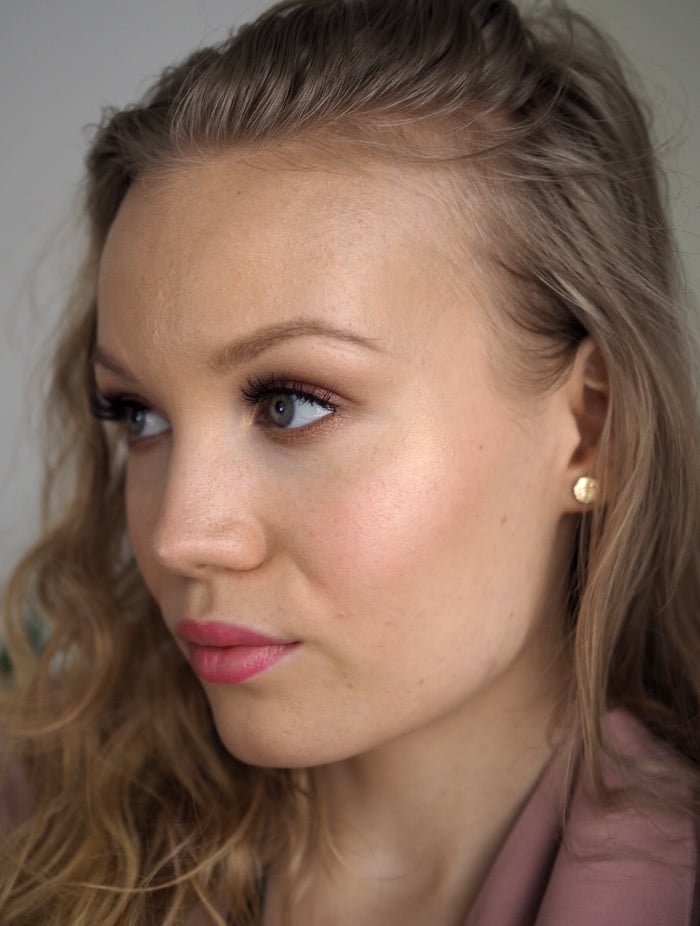
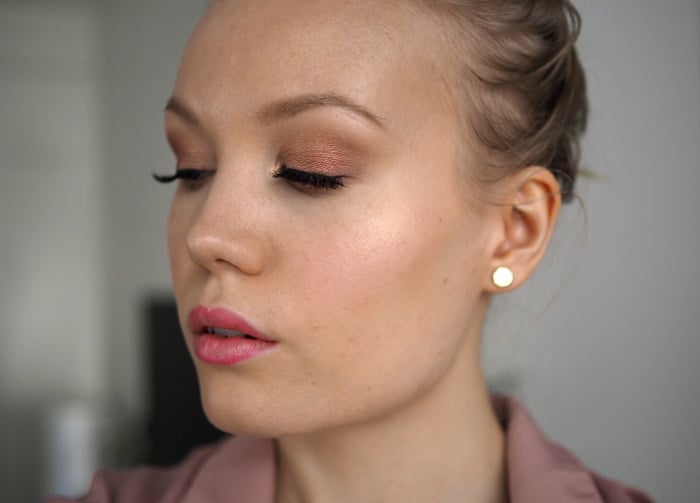
When I think of Valentine’s day makeup looks, I think of pink. And shimmer. And these beautiful yet subtle looks. So obviously I had to use a touch of pink in my look as well. But just a touch! Otherwise, I kept this look quite fresh, warm and glowy.
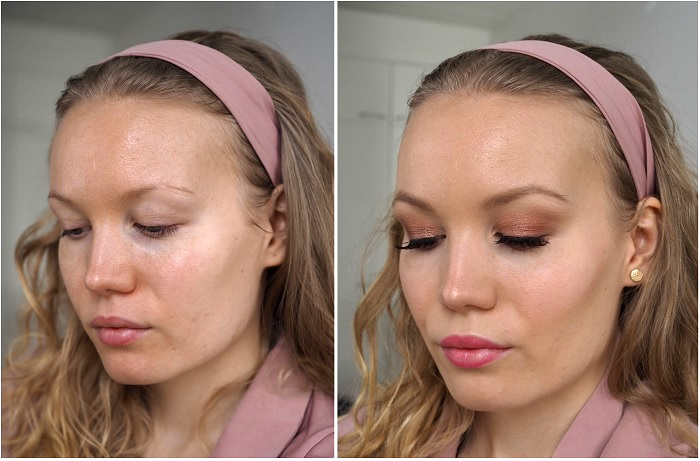
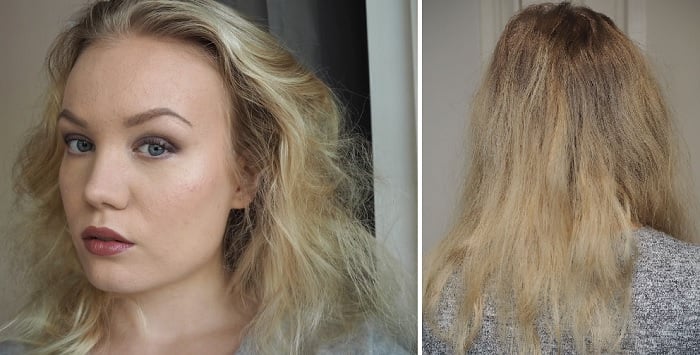
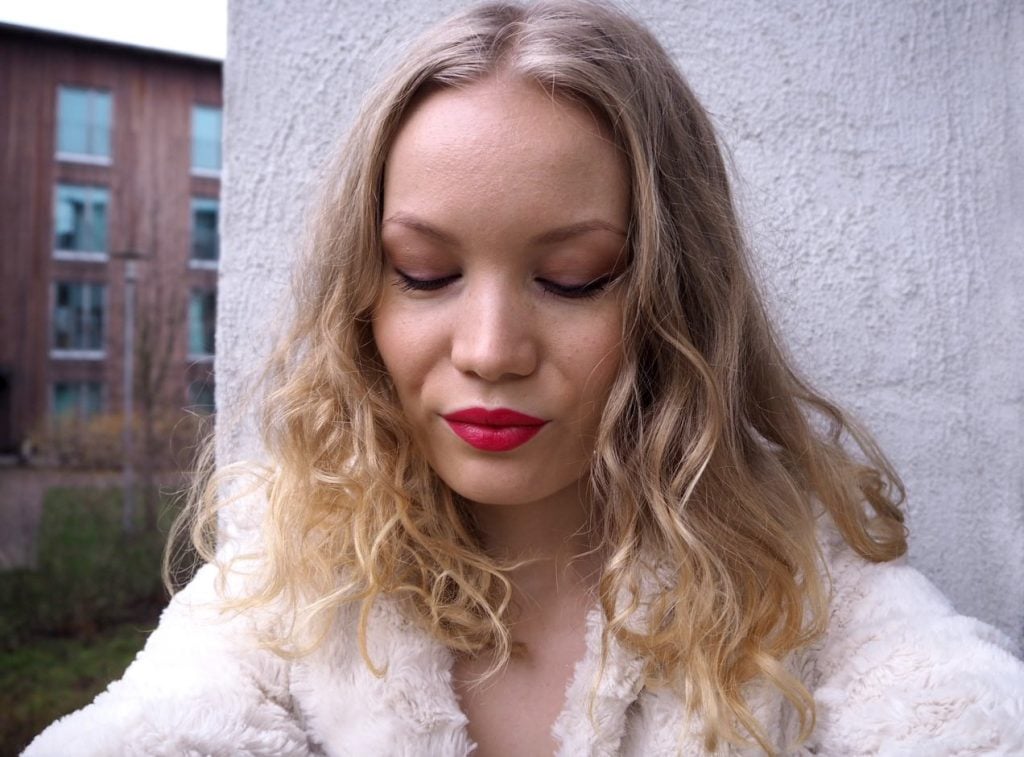
Before & after.
Valentine’s Day makeup
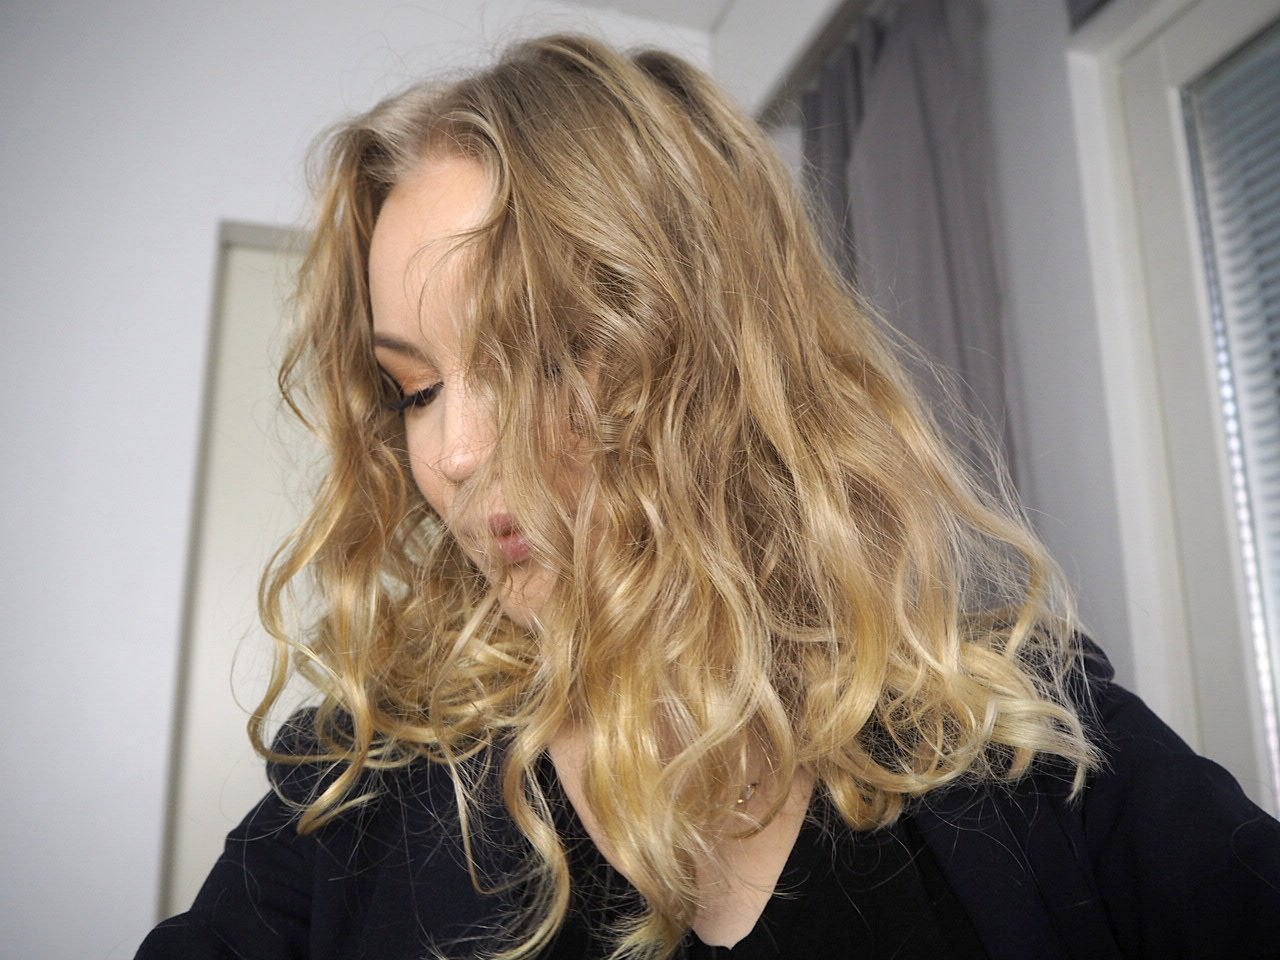
I ended up taking lots of photos and even showing you what brushes I used. I also put together a little tutorial for working with deep set and hooded eyes. The eye look is pretty simple, but the metallic shimmery colors on the lid make it interesting. I used a new eyeshadow palette that I got sent in pr. It’s Makeup Revolution’s Kisu palette.
For my base I used NYX Total Control Drop foundation* – that is an awesome foundation, since you can decide how much coverage you want. And the consistency is so dreamy and thin. I wore my YSL Rouge Volupte lipstick in the shade 41* on my lips and as my blush. I have to say I love that YSL lipstick – definitely worth the splurge! For highlight I added ‘Khaleesi’ highlight from the Kisu palette.
Brows were done with my usual recipe: mad4eyebrow Natural Brow Filler in Blond and jane iredale’s Brow Pencil in Ash Blonde.
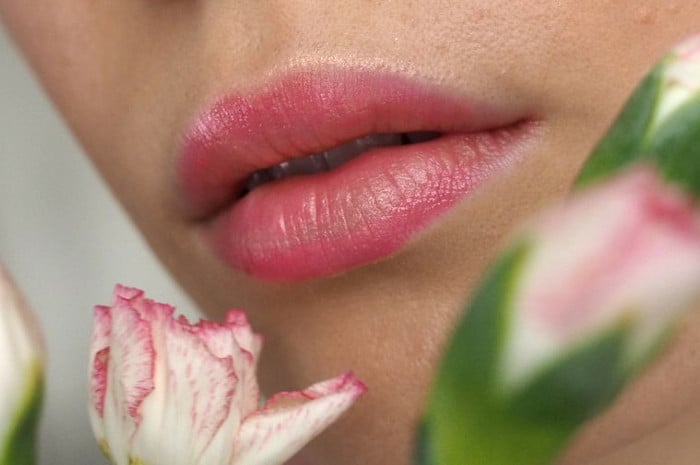
YSL Rouge Volupte Shine 41.
Valentine’s Day makeup tutorial for deep set eyes
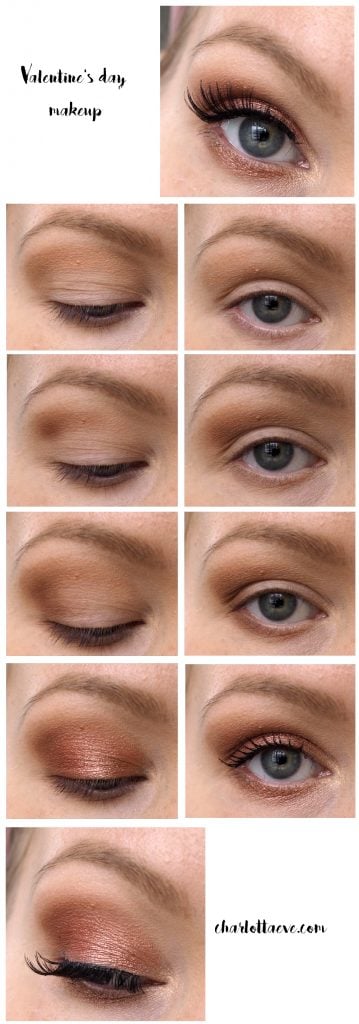
- First I primed and set the primer with a light matte color ‘1991’. Then I contoured my eye with a nude color ‘Cookie Dough’. Then I darkened my contour with a brown ‘Cat Lady’. Below I have a picture where I explain exactly how I do this.
- For my lid I used beautiful metallic shimmers ‘Royal’ and ‘London’. I applied them half and half on the lid and blended the edges carefully.
- I also applied ‘Cookie Dough’ and a touch of ‘Cat Lady’ on my lower lashline. Then I applied ‘Royal’ there.
- For my inner corner highlight I used ‘Khaleesi’. Also wore that highlighting shade on my face.
- Liner, mascara and lashes. Done!

Basic eyeshadow technique for deep set and hooded eyes
+ showing you what brushes I used
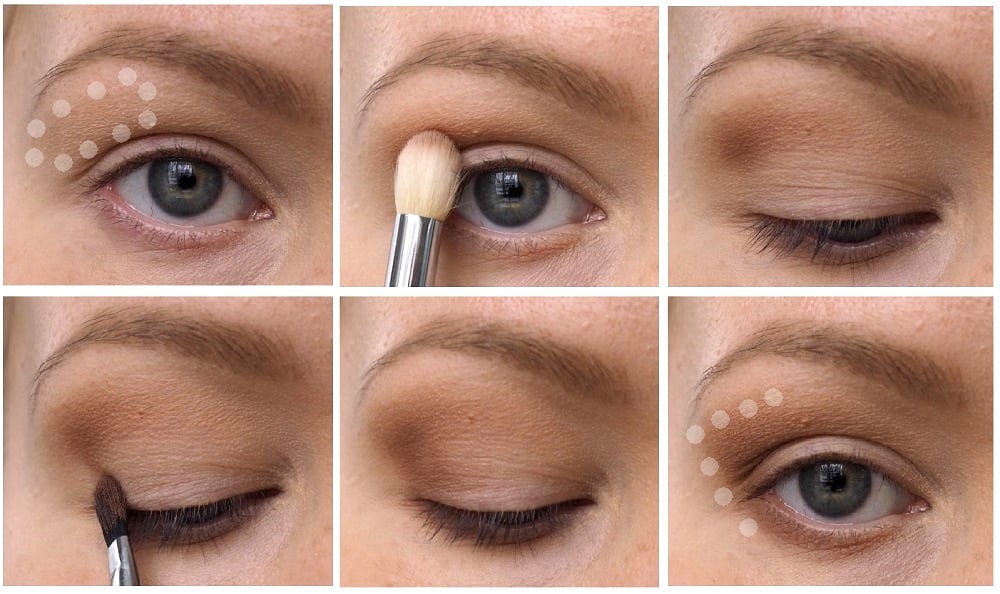
In the first photo I circled the area I want to hide and contour. That is where my brow bone/lid pushes forward, making all the rest of my lid and eye appear very deep set. If you have hooded eyes, this could also be your hood drooping on your lid. On my eyes it does droop slightly. The idea is to contour that bump with a matte shade. That way the lid appears lighter making it appear as if, well, it wasn’t that deep after all.
I also pretty often keep my eye open like in the photo, to see exactly where I want to hit that shadow. By applying it right there and making that spot the darkest, it lifts up my eye. You want to blend it well, but don’t take the shadow that much further away (to the left, in the photo), because that can make your eye look a bit sad, when the shadow makes it drop in the outer corner. You could even leave your eyeshadow like this and you get a nice lift.
But pretty often I make a straight line from there to my lash line. The line should be straight and if you’re wearing eyeshadow on your lower lashline, make sure it fits the line as well.
For this, I love to use Zoeva 225*. Since I have a lot of lid space I want to contour, I can use a fluffy brush like this. If you have smaller lid space, use something smaller. (By the way, Zoeva has awesome brushes and all my most used brushes are from them.) I connected the line in the outer corner with Sigma* E56.
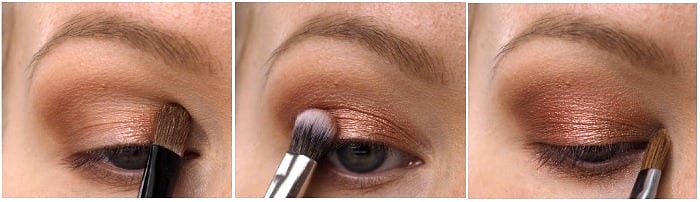
And as for the lid colors, I used quite flat brushes. Just because flat brushes make laying on the color easier, especially with metallic shimmers like these. First one is from Coastal Scents brush set*, second is look good feel better Eye Shading brush* and the last is Sigma* E47.
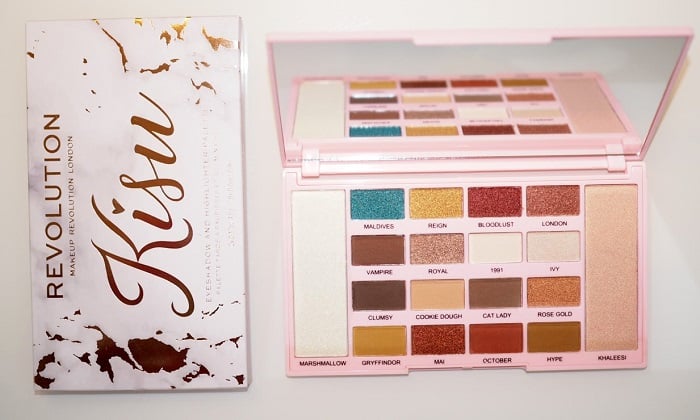
Makeup Revolution Kisu palette
Makeup Revolution’s Kisu palette has both eyeshadows and two highlighting shades in it. I’ve been using that palette quite a lot lately and have to say I’m impressed by the quality. I love the metallic shimmery colors that go on very smoothly when applied with a finger (but also work with a flat brush). The powder highlighters are a bit too dry for my taste, but I still wore ‘Khaleesi’ on my face for this look. The colors are perfect – just what I use right now.
This post ended up being way more throughout than I meant to do. I hope you find it useful. What do you think of the look?