The best makeup sponges – The beautyblender VS Miracle Complexion Sponge

makeup reviews blog

You need to try an egg-shaped makeup sponge. Really.

I always apply my foundation with a makeup sponge. Yet I’ve never written about beauty sponges here on my blog, even though it’s the ultimate makeup trick.

Okay, sure. I might have mentioned the beauty blender here and there. But since using a makeup sponge for makeup application is the key element in doing my makeup and making my base look beautiful and flawless – I think it needs a bigger spotlight.

So today, I’m gonna convince you to try it. And I have two makeup sponges for you to consider: the original beautyblender and Real Tecniques’ miracle complexion sponge.
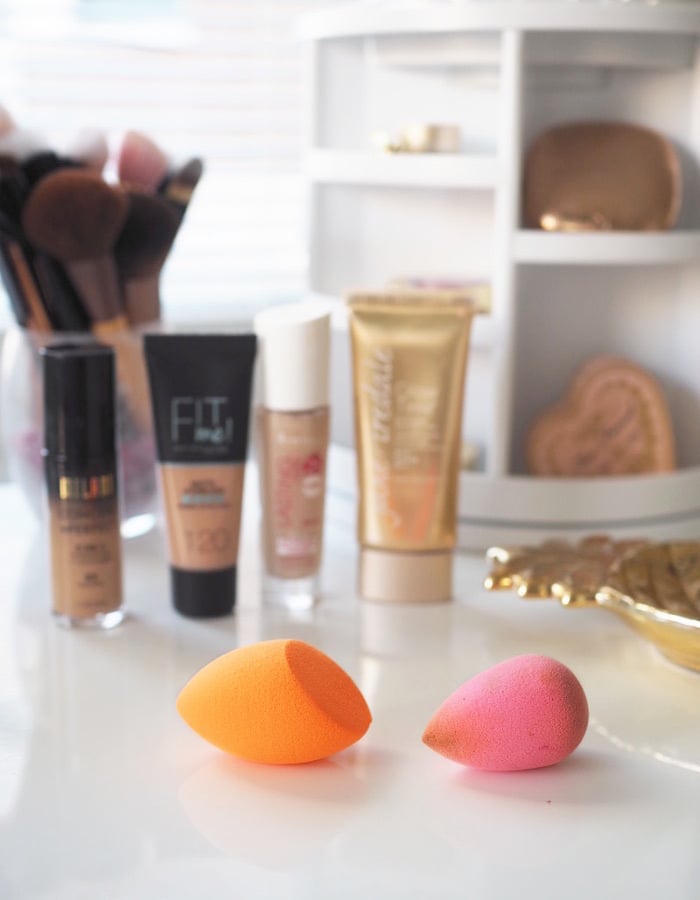
egg makeup sponges review

Why should you try a makeup sponge in the first place?

Easy: because it blends the foundation for you. A damp makeup sponge thins out the foundation just a tiny bit, making it spread evenly all over the face. The best way to create a beautiful base is to layer your foundation in thin layers. And with a makeup sponge, you can do just that.

Besides applying foundation and a concealer – you can also use makeup sponge for any cream products: contour, highlight and blush. A contour made with cream color and a makeup sponge looks very natural – and again, blending is very easy with it.

And last, but not least: you can even apply powder with the sponge. It actually makes the powder melt to your foundation, making it everything, but cakey. Just try it once!

An egg-shaped makeup sponge is the perfect shape, because you can use the pointier end under your eyes and for details – and the wider end to distribute foundation quickly all over your face.

Obviously you can also try different ways to use the sponge: if your foundation is very thick, you may want to use a very damp makeup sponge. Or if your foundation is quite sheer, you can dampen your makeup sponge, but squeeze it almost dry. For example: I think Estee Lauder’s Double Wear foundation was made to be applied with a very damp makeup sponge. Then again some lightweight BB-cream requires a not-so damp makeup sponge. Either way, it’s essential to use a makeup sponge – it just makes the base so much better.

What else should you know about makeup sponges?

One makeup sponge lasts roughly for about three months. It’s not as long lasting as makeup brushes, but the fact that I still prefer sponges instead of brushes tells you just how necessarily they are.

In order to keep it in good shape and hygienic, you need to wash it. I recommend washing it after every use. It sounds like a lot of work, but if you wash it after every use, there’s not much to wash, so it’s very quick and will only take you a minute. My worst nightmare is a makeup sponge, that hasn’t been washed in months, and is just laying there, in the makeup bag. Nope! Take it out, wash it, and let it dry somewhere, where it gets some air. And if it’s been in your use for a year already.. honey, it’s time to let it go.

I usually wash my sponges just with a regular marseille soap. But keep in mind, that some brands require their own soap to be used, so that the sponge lasts the time it is supposed to last.

So.. there are a ton of makeup sponges out there. Which one to choose? First of all, I want to say that it does make a difference, which brand you choose. I have tried some horrible ones, usually the cheapest. If your experience is with a cheap egg-shaped makeup sponge and you don’t like it: chances are that it’s just bad. A good makeup sponge should feel soft, quite lightweight and easy to use.

Try either one of these!

*adlink
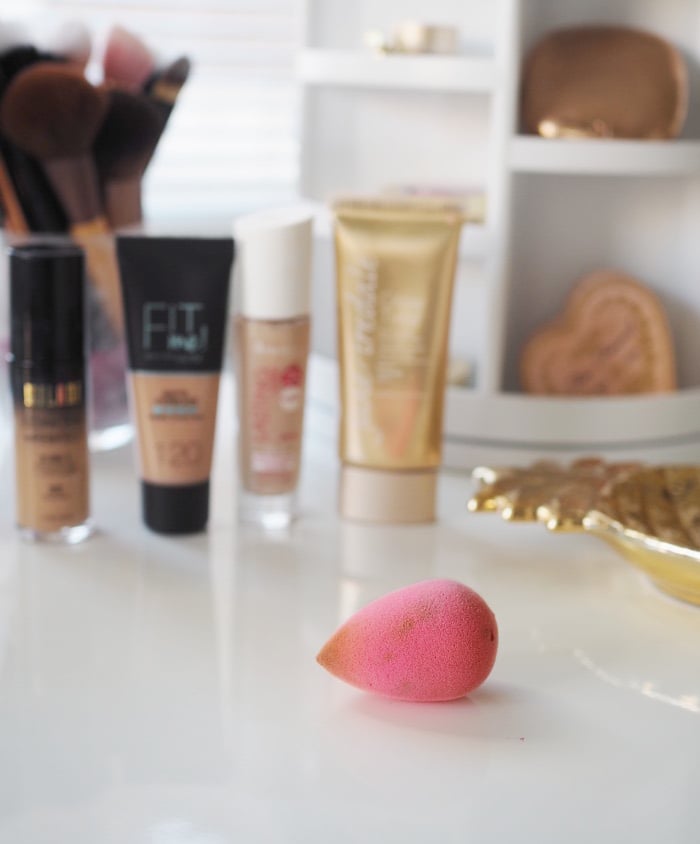
the beauty blender

The original beautyblender

The hype around the original beautyblender is real. I can’t even count how many beauty blenders I have gone through.

It came first, it conquered and it will forever stay as a classic – at least in my books. It is the perfect size, you can get it in different colors (not that it really matters) and it makes applying foundation or concealer so much easier.

Pros
+ Great quality
+ Perfect size for the whole face
+ Feels soft and airy on the skin
+ It’s very lightweight
+ Cute colors
+ It’s the ‘real deal’

Cons
– It’s quite pricey (almost 20€ for one)
– It should be washed with beauty blender’s own soap – if you use some other too harsh soap, it may not last as long

Shop on amazon:
*the beautyblender

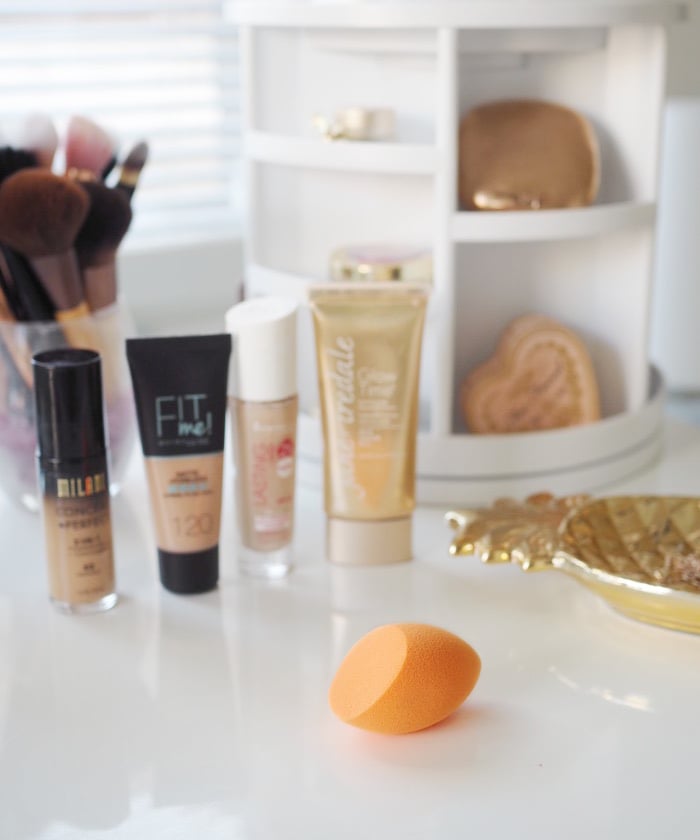
real techniques miracle complexion sponge

Real Techniques Miracle Complexion Sponge

I can’t hide my excitement with this one – it is currently my favorite makeup sponge. I was a bit skeptical about it at first, especially after using beauty blenders for so long. But now I have to admit it: it’s an awesome option for the beautyblender. It’s slightly bigger than the bb, making it not as convenient for details. It comes in one color: orange. But it makes applying foundation, concealer and other makeup products so much easier and it provides a beautiful base.

Pros
+ Great quality
+ Perfect size for applying foundation
+ Feels soft and nice on the skin
+ Very affordable (~ 5€ for one! That’s fourth of what the bb costs!)
+ You can get it in two or four packs, when it’s even more affordable (~16€ for four!)

Cons
– It’s a bit clumsy for details, such as applying concealer under your eyes
– It’s not as lightweight and airy as the beautyblender

Shop on amazon:
*Miracle Complexion sponge
beauty makeup blog

So there are my two favorite egg-shaped makeup sponges. Have you tried either one of these? Is there something that’s even better? Let me know in the comments!
Glitter makeup ideas & tutorials

glitternisti glitter

Glitter makeup ideas with tutorials and instructions on how to remove glitter from your skin. 

Glitter makeup is as fun as it gets. It’s super popular, especially during the festival season. Glitter makeup looks are amazing and you could easily think, that those dazzling looks are very high tech. But actually it is the easiest look you could do.

I love playing with glitter and it’s very uplifting to do for others as well: you get such a positive and joyous feedback instantly. I think most of us are drawn to shiny things and having our face literally lit up does work wonders for your mood as well.

Always use cosmetic grade glitter – never ever craft glitter! There is a big difference and you don’t want the craft glitter ever to get in your eyes. In this post I only used cosmetic grade glitter and I left some links to some stores, that sell them.

glitter makeup ideas

 glitter makeup how to

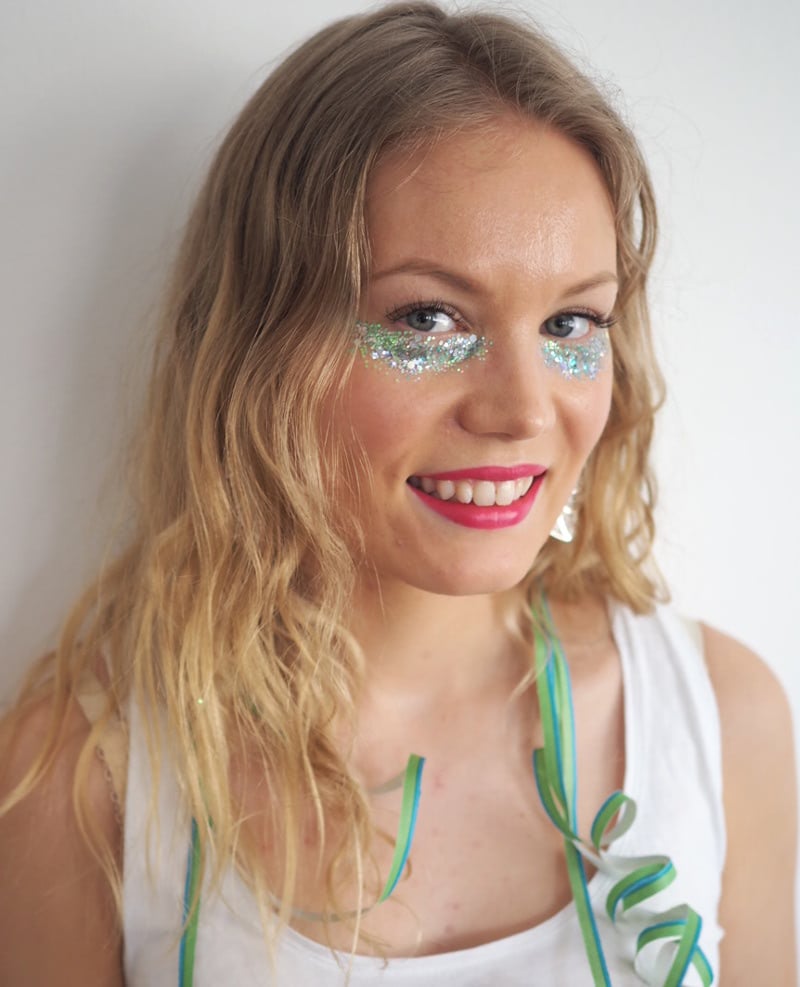
Glitter makeup ideas  & Glitter makeup tutorial x 3

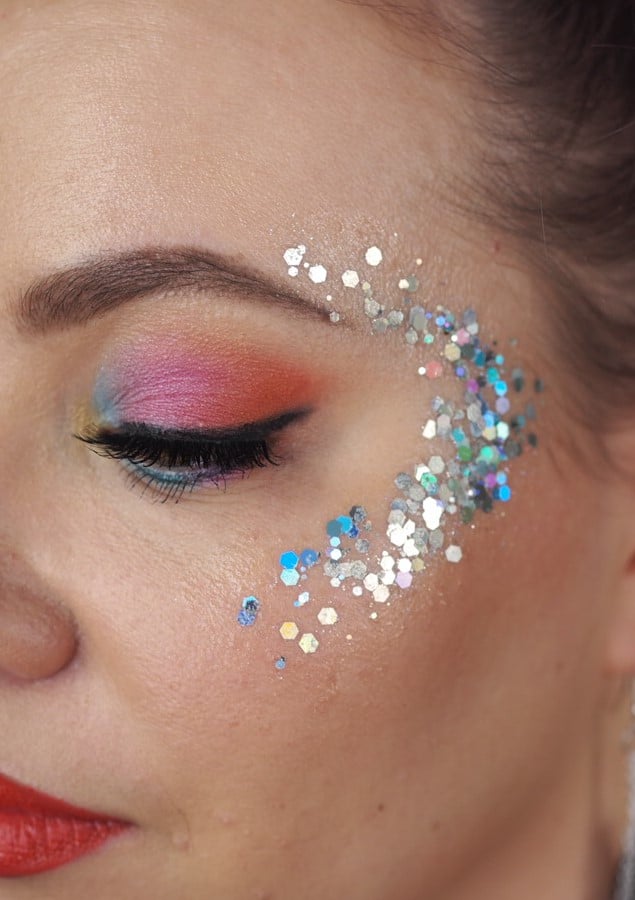
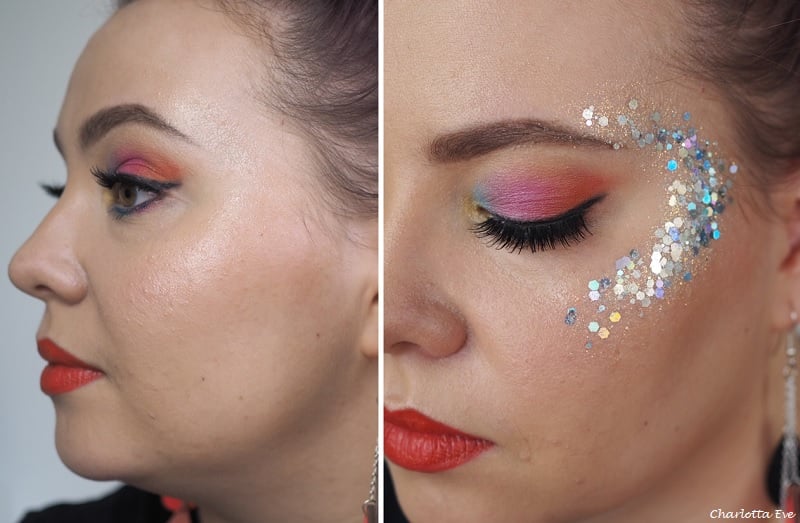
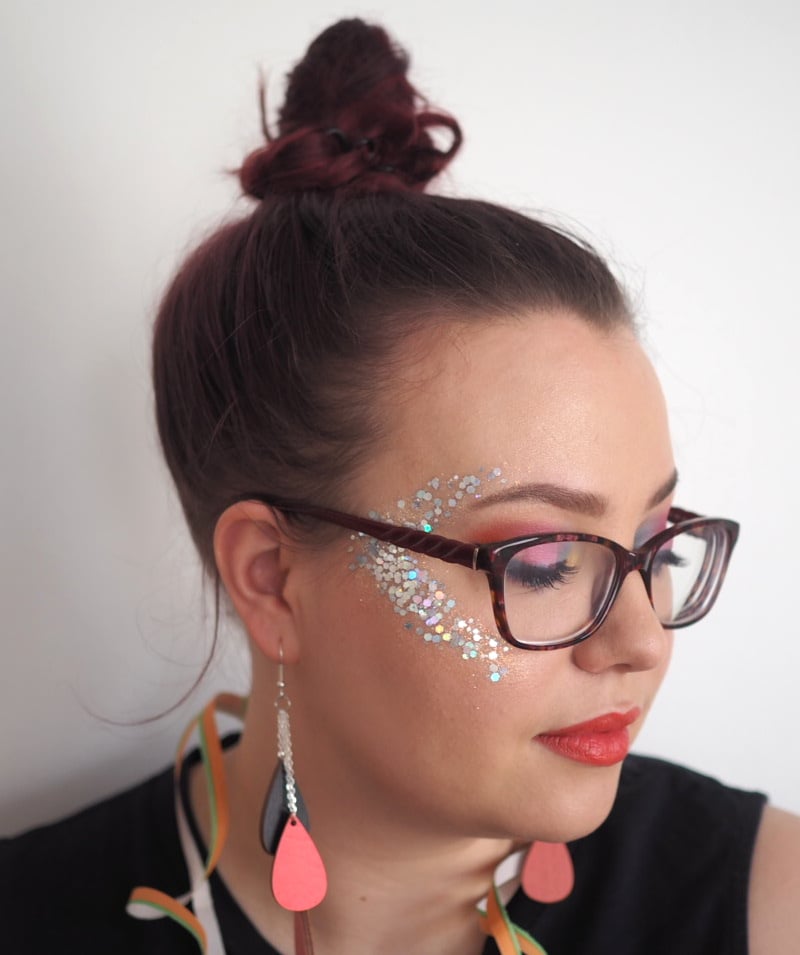
You can apply glitter to almost anywhere on your body and your hair, but you can’t go wrong with a glitter highlight, sparkly under eye bags or dazzling eye lids. But honestly – sky is the limit here! You can also make different geometrical shapes easily by using tape as your guideline.

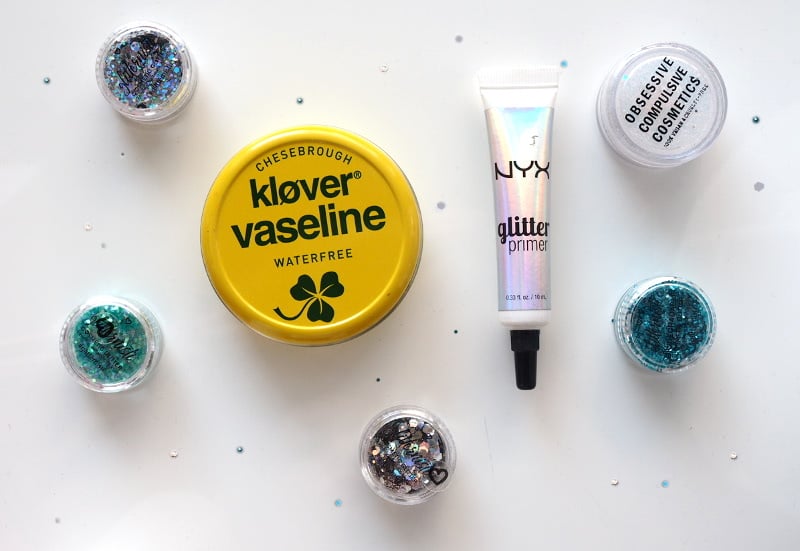
The easiest way to apply glitter is vaseline, but you could try some other cream or wax as well. Glitter glues or glitter primers are obviously perfect for this job as well, but not all of us have it ready in the drawer. I have to say though, that NYX’s glitter primer is a must have for me. I don’t only use it for glitter, but for sparkly eyeshadows as well. It really gives the perfect base for anything sparkly.

Links to some glitters products can be found at the end of this post!

glitter makeup ideas for face
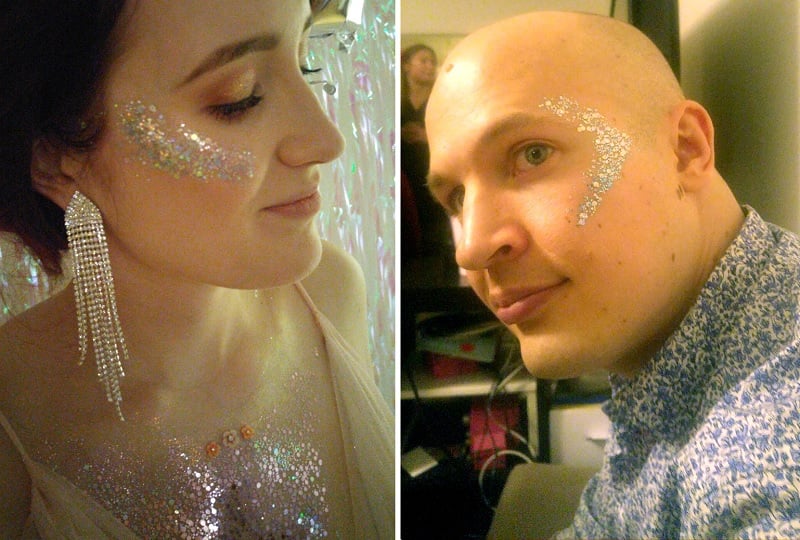
2 glitter looks I did: for Eve, I did a classic glitter highlight on the cheek – and then I covered her chest in glitter. For Risto I used tape to get a sharp edge.

Glitter eye lids

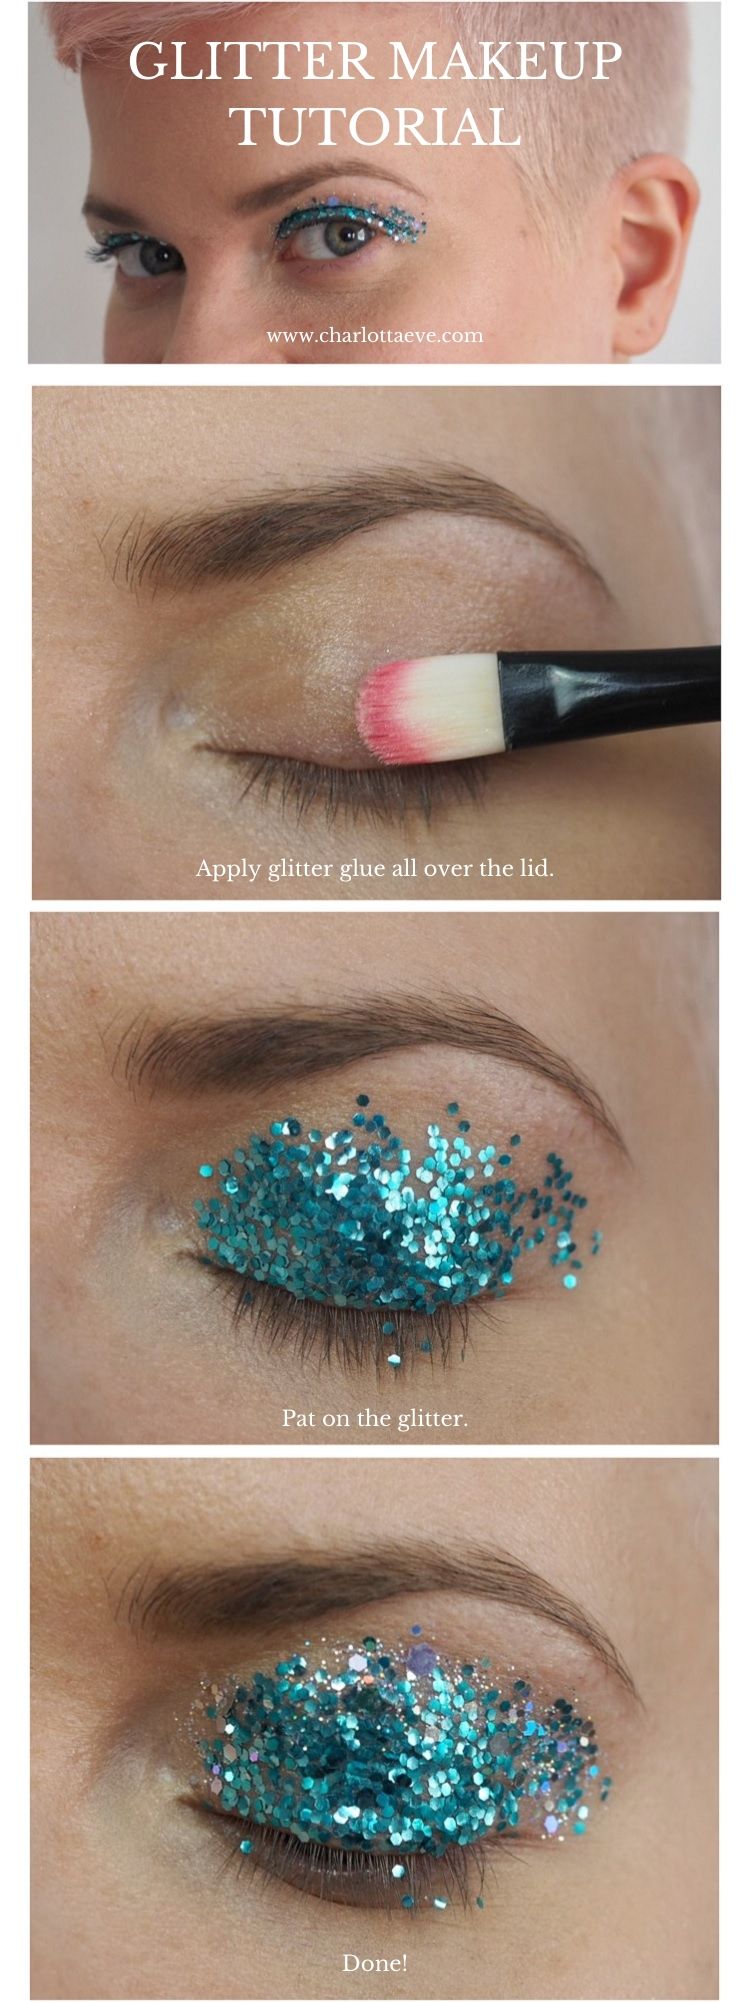
You need: glitter glue & some flat brushes & glitter

turquoise glitter eylids

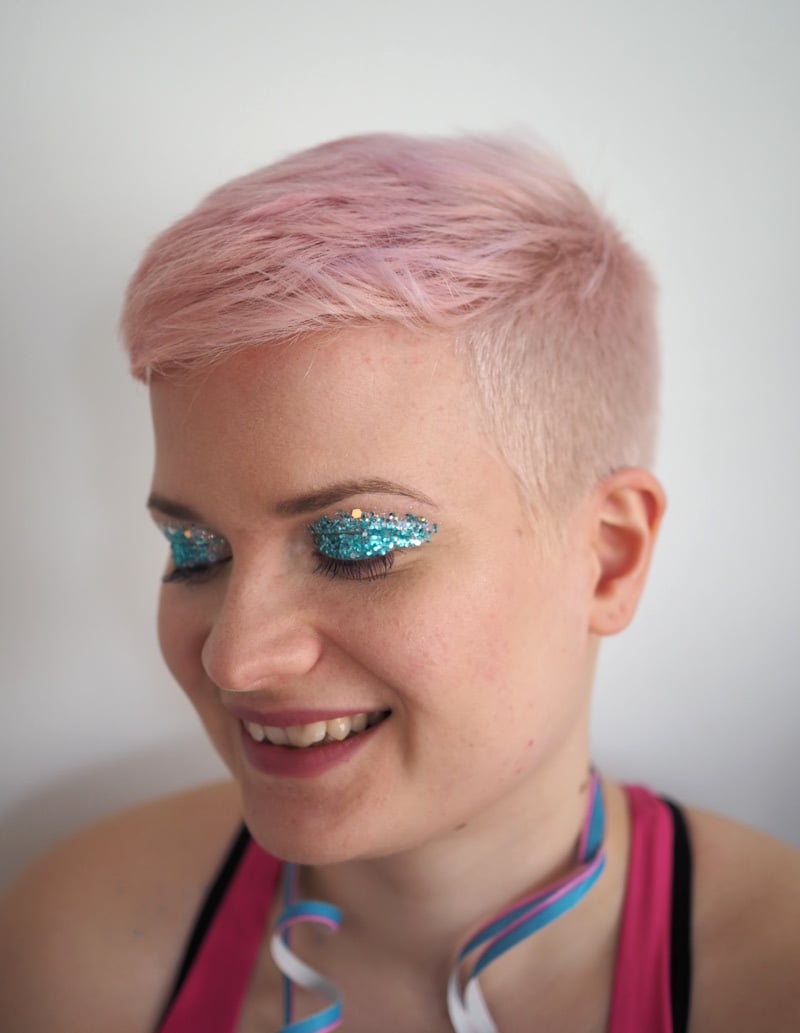
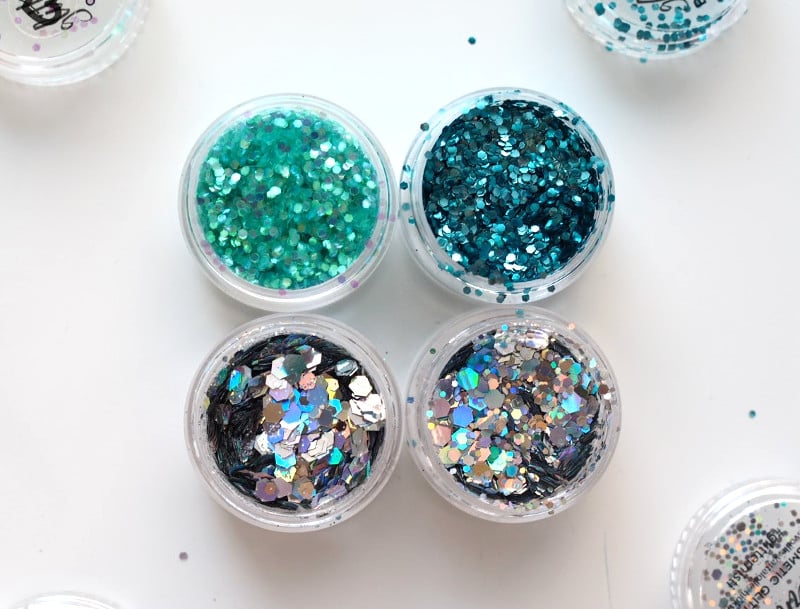
How to: First apply some glitter glue on your lids. Get an even layer and blend it towards the brow bone. Then apply the glitter of your choice. I used flat brush for this as well. I used first turquoise glitter and then silver glitter on the edges, so that it looks gradient. If you prefer a more perfected look, you could apply some eye shadow under the glitter (in this case turquoise), so that zero skin shows through.

Note! Vaseline is not enough for your lids, so do get that proper glitter glue for this look. The base needs to be sticky and very long lasting, so that the glitters don’t fall in your eye.

Glitter under eye bags (these are definitely chanel!)

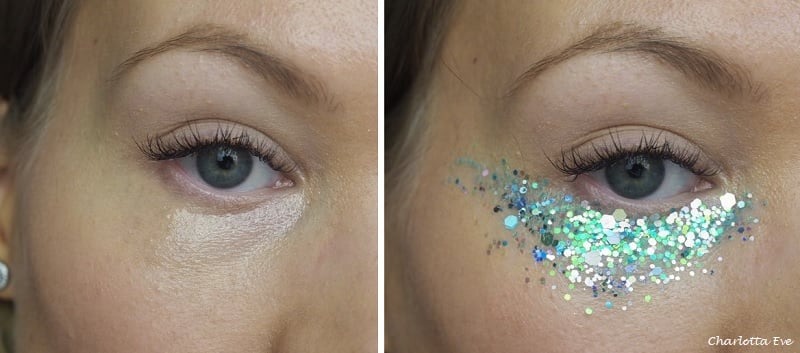
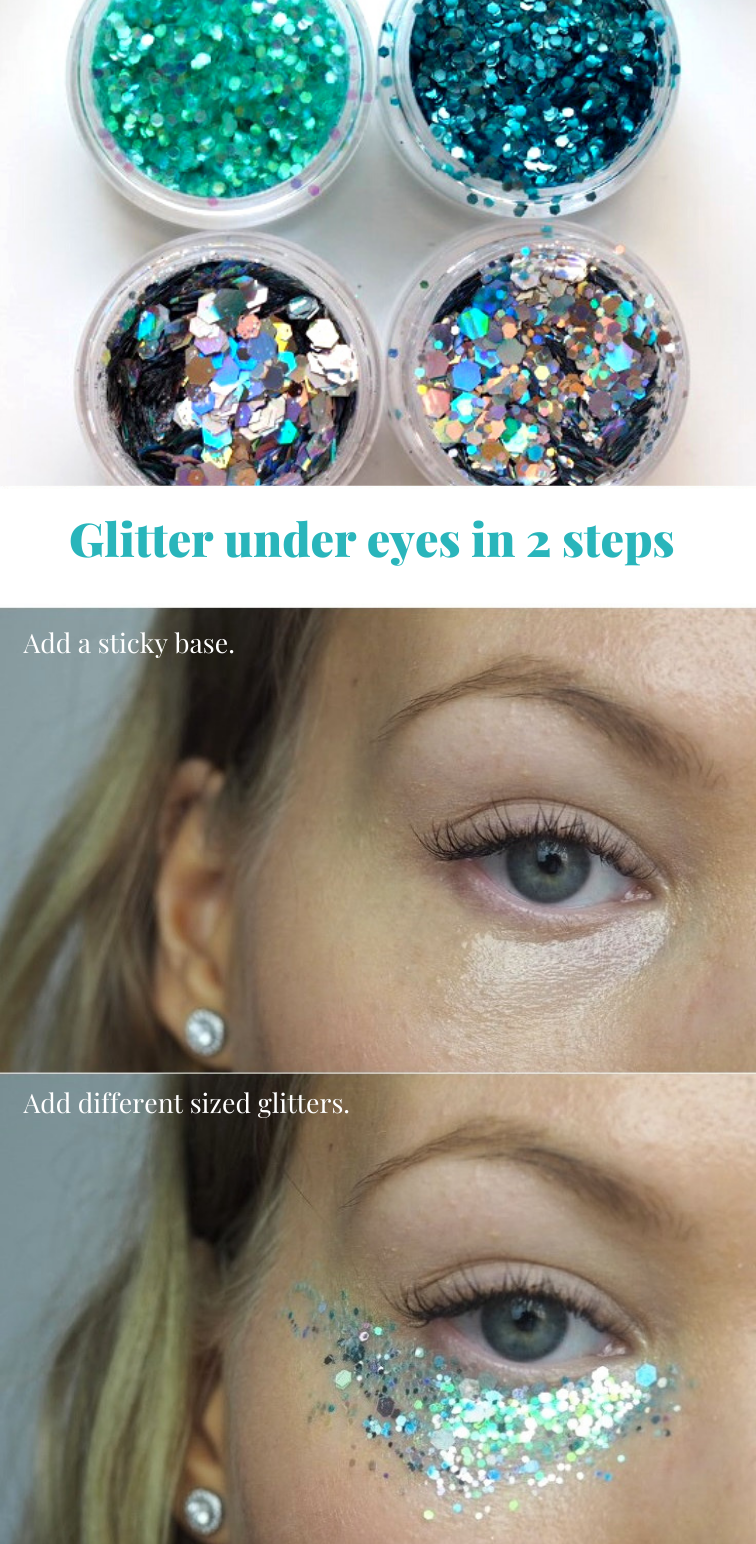
You need: vaseline & some brushes (or your fingers, if you’re good with your hands) & glitter

glitter under eye bags

glitter under eyes


How to: Apply vaseline under your eyes right where you want the glitter to stick. Try to blend the edges a bit by tapping motions. Then apply the glitter of your choice. I have found that mixing two colors and different sizes works the best. I applied the bigger glitter on the center and finer glitter on the edges (again, to get that gradient look).

You could use glitter glue for this, but since the skin around our eyes is quite thin and sensitive, it makes sense to use vaseline. It’s easier to remove, for one, and it doesn’t feel as dry as glitter glue might.

Glitter highlight

You need: vaseline & glitter

glitter highlight how to

How to: Apply vaseline as your highlight and blend the edges. Then apply your glitter. You can just use your fingers and tap it on – or use brushes. Whatever works for you. You could do this look with just one glitter or mix a few different glitters. I used silver glitter (but it reflects light and looks very colorful) and a very fine white iridescent glitter on the bottom.

glitter highlight makeup

Where to buy glitters?

Here are some options to buy safe glitters. I myself use and buy glitters mostly from a Finnish makeup artist, glitternisti. Here are some options from amazon!

Amazon
*NYX Glitter primer
*NYX Face & Body Glitter
*Glitter Eco Lovers Biodegradable Glitter

How to remove glitter makeup from your skin

Removing glitter from your skin takes some patience. But especially if you’re not using biodegradable glitter (guilty!), it is the one time you need to pull yourself together and focus. Glitter is messy, so you need to be careful with both it’s application and removal, so that it doesn’t end up in our ecosystem. You could say I’m almost hysterical about this, as I don’t want any glitter to get in the sink. These tips might not be the best for your skin, but I think a little inconvenience is okay for your skin, as long as you’re not doing it every day.

So – my tips to take off glitter would be to use

  1. Lint roll
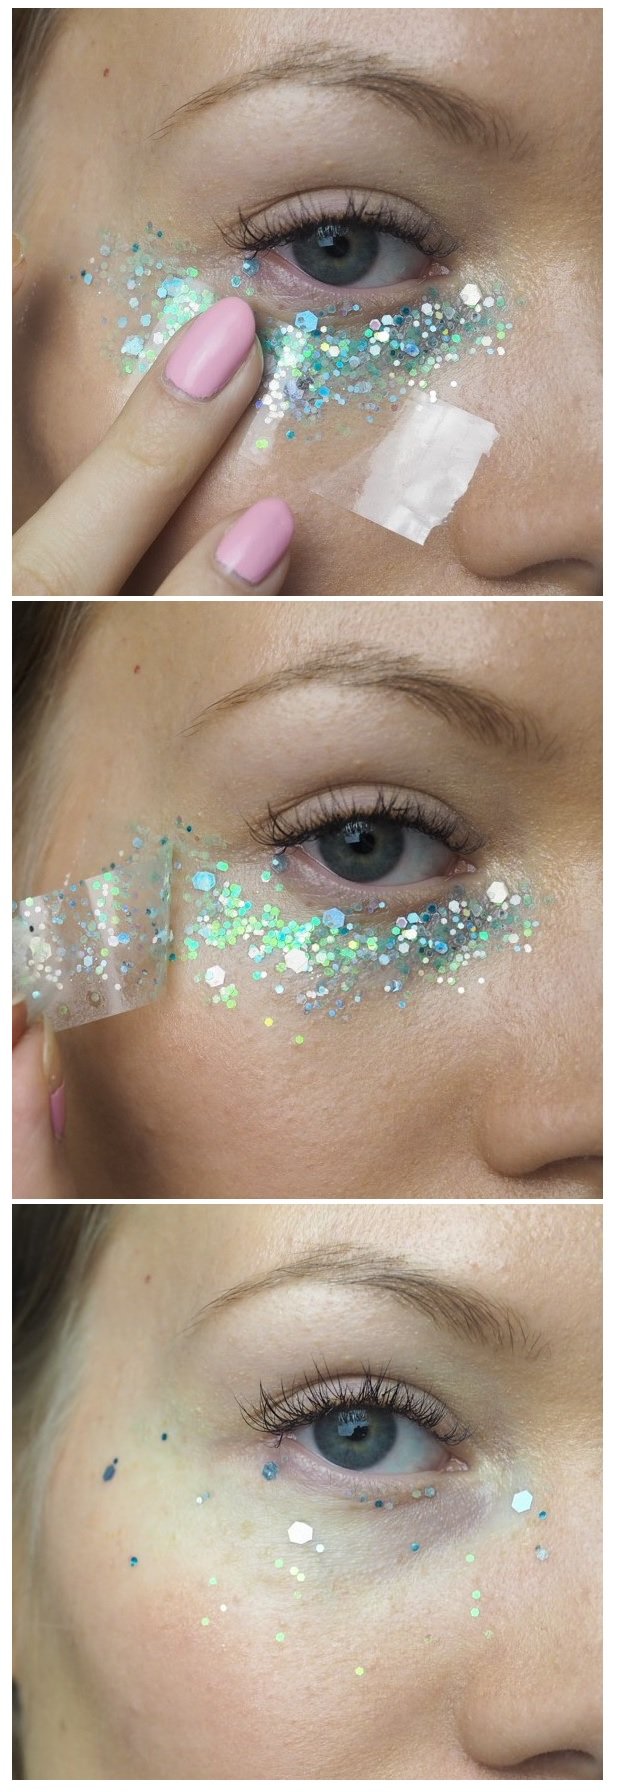
  2. Tape
  3. Cotton pads & makeup remover/micellar water/toner
  4. Makeup wipes

I have found that using just cotton pads or makeup wipes is a waste of time. I want to first lift off most of the glitter. Besides, lint roll or tape grabs the glitter in them and you can just throw it in the trash. Glitter doesn’t ‘stick’ to the cotton as well as on the tape. But always remember to finish off with a makeup remover and your skincare, so that your skin doesn’t get irritated.

how to remove glitter makeup with tape

Here I first took the most off with a tape and then when there were just a few left, I took them off with a cotton pad and a makeup remover.

glitter makeup
Thanks again sisters for being my models!

So – are you ready to sparkle? Any glitter events coming up?

Scroll to top