Olen sanonut tämän aikaisemminkin, mutta sanon sen uudelleen: luomivärien hallitseminen on haastavaa, koska meillä jokaisella on erilaiset ja erimuotoiset silmät. Meikatessa tulisikin soveltaa tiettyjä ohjeita tai malleja aina omille kasvoille sopiviksi – oli kyse sitten luomiväristä tai jostain muusta. Syvällä oleville silmille ja raskaille luomille, eli minun silmänmuodolleni on jo olemassa luomiväriohjeet täällä (klik!). Mutta haluan jatkaa sarjaa myös muille silmänmuodoille.
Tänään puhutaankin ulkonevista tai pyöreistä silmistä ja miten niitä meikataan.
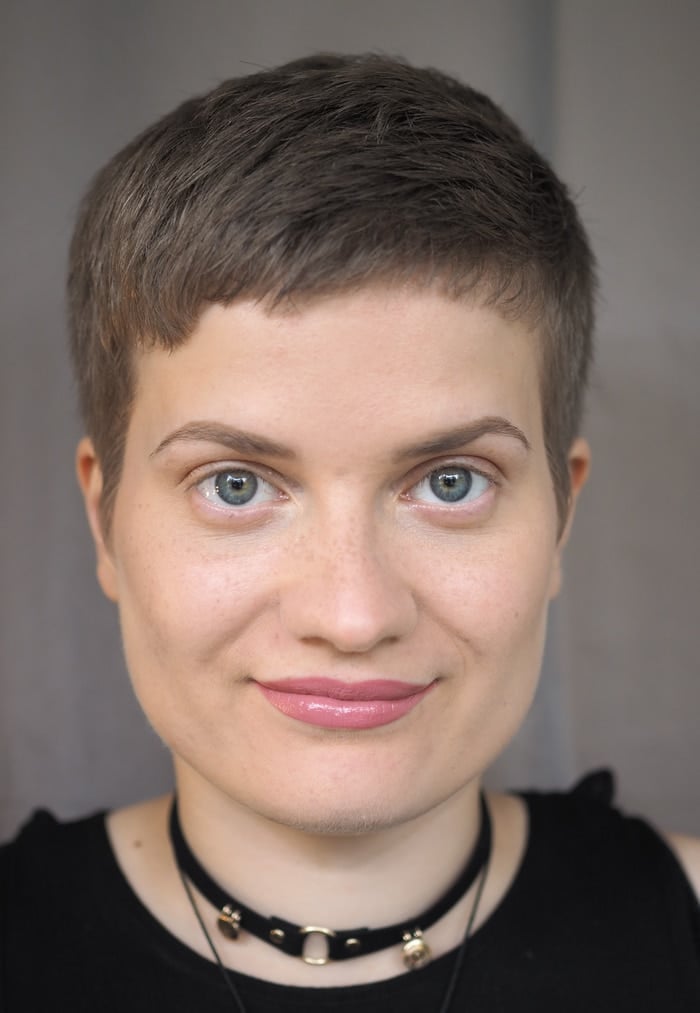
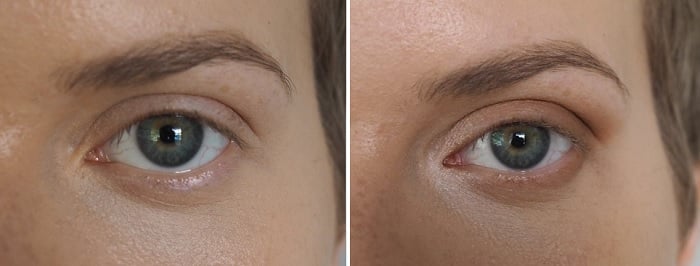
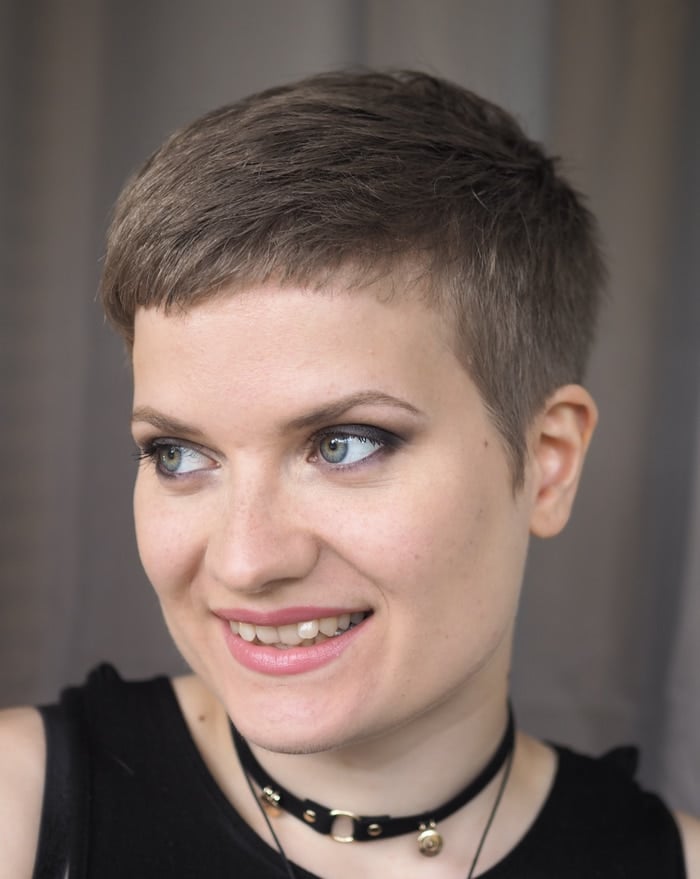
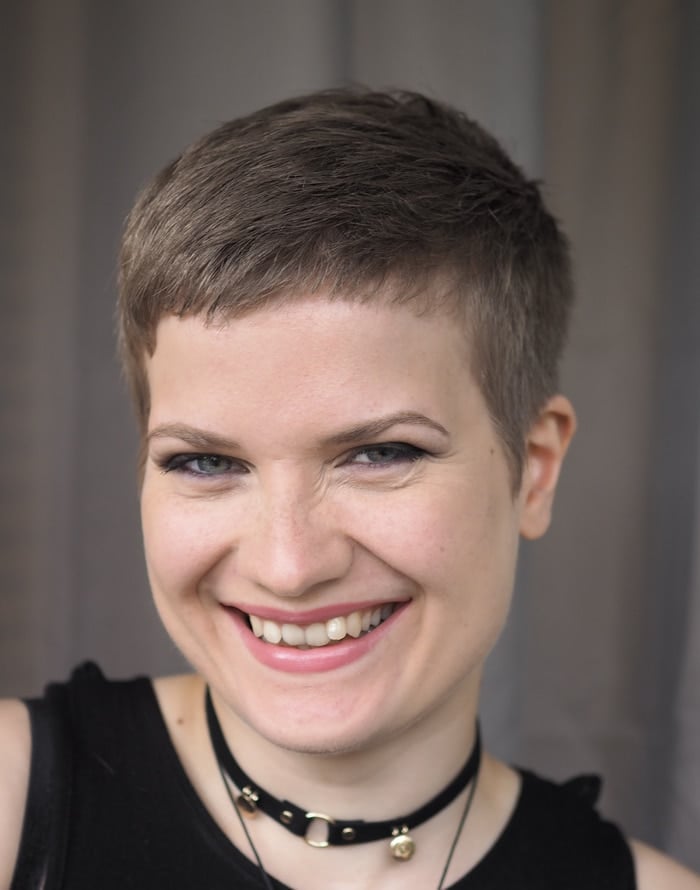
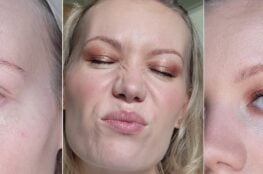
Tässä on upea siskoni. Hänellä on ulkonevat silmät, jotka ovat mielettömän kauniit. Ne näyttävät suurilta ja pyöreiltä, joten kun teen meikkiä hänelle, tasapainotan niitä hieman niin, että ne näyttävät enemmän mantelinmuotoisilta. Ja koska silmät näyttävät suurilta, on meikille tilaa enemmän niin, että silmiä voidaan meikata jopa hieman pienemmiksi.
Tässä ennen ja jälkeen kuvat – huomaatko eron?
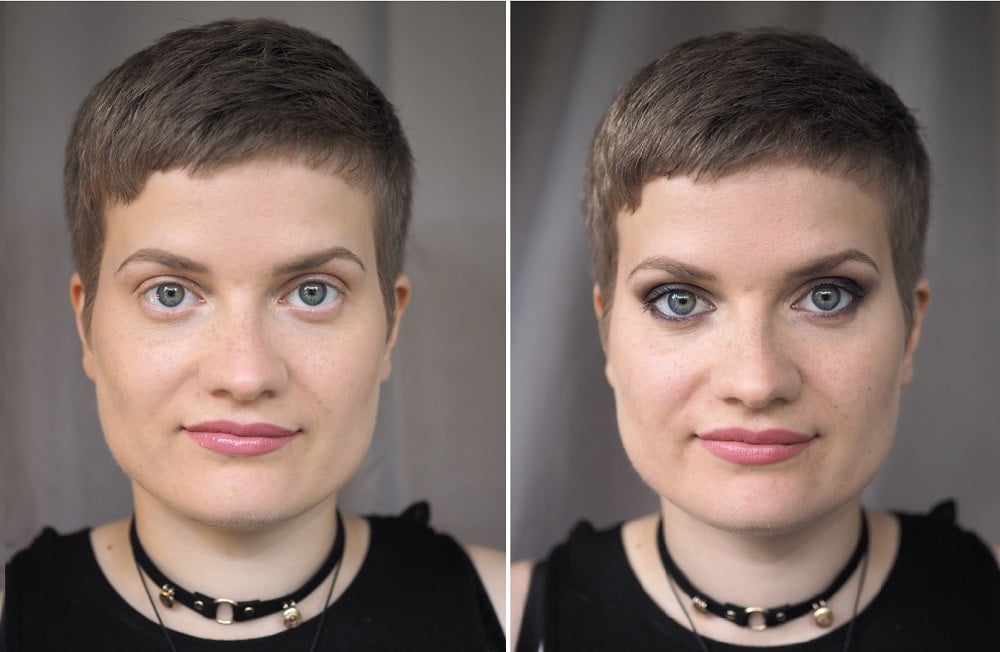
Kiitos ystävälleni paintille, joka auttoi kokoamaan tämän postauksen. No ei, vaan. Oikeasti voit nähdä aika selkeästi eron näissä kuvissa! Ilman meikkiä silmä on pyöreä ja selvästi ulkoneva. Meikin jälkeen? Mantelinmuotoiset ja tasapainotetut.
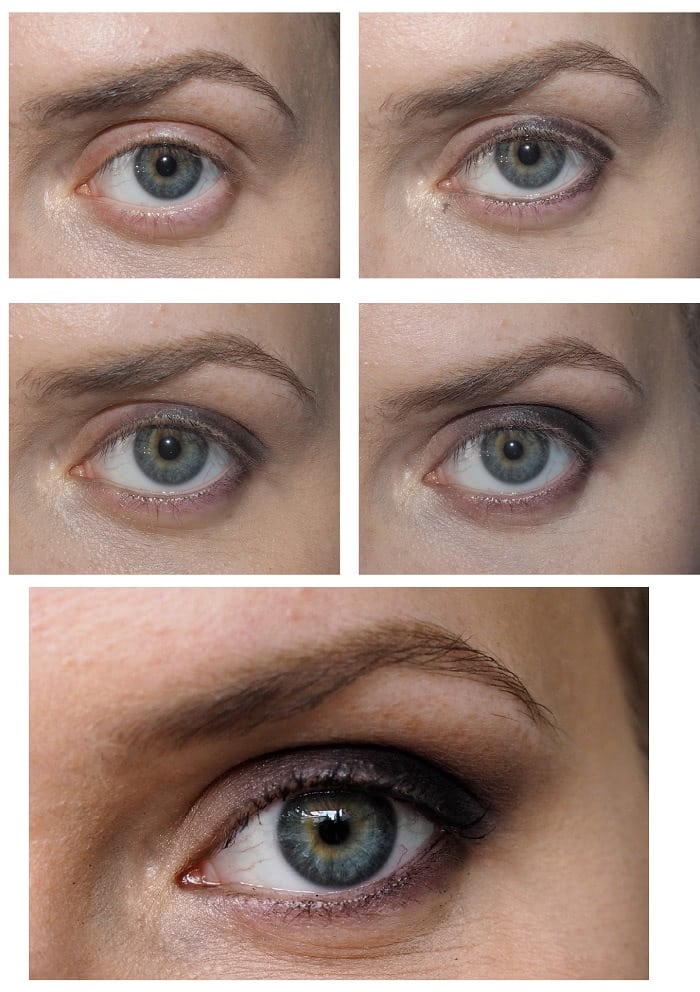
How to: meikki ulkoneville silmille
Perusmuoto luomivärille
Tässä on perusmuoto luomivärille. Näiden rajojen sisälle luomiväri rakentuu. Tärkeää tässä on varsinkin alaluomen meikkaus – luomiväriä tai kajaalia ei saa tuoda liian alas alaluomelle. Se kannattaa laittaa niin lähelle ripsirajaa kuin mahdollista – mielellään jopa sisäluomelle. Siten meikki antaa ryhtiä silmälle eikä korosta ‘pussia’, joka luonnollisesti alaluomelle muodostuu. Yläluomelle luomiväri viedään luomelle niin, että se peittää sen osan luomesta, joka näkyy kun silmä on auki. Se kannattaa viedä ulkonurkasta vielä ylöspäin kissamaisesti, näin se nostaa ja venyttää silmää.
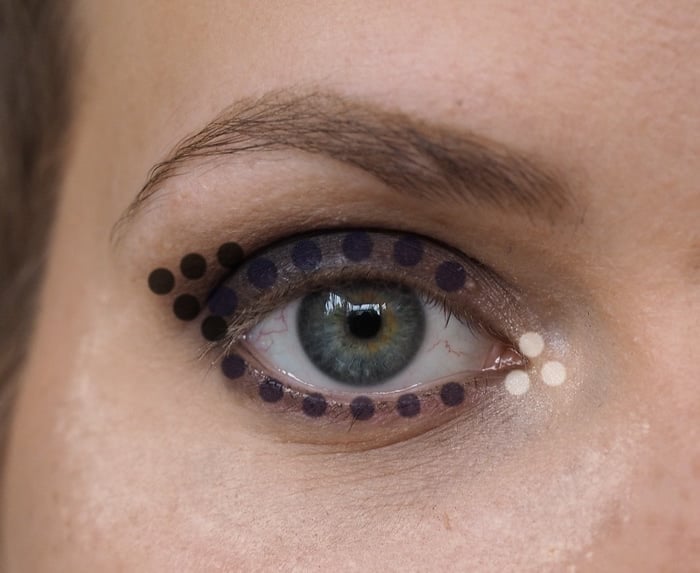
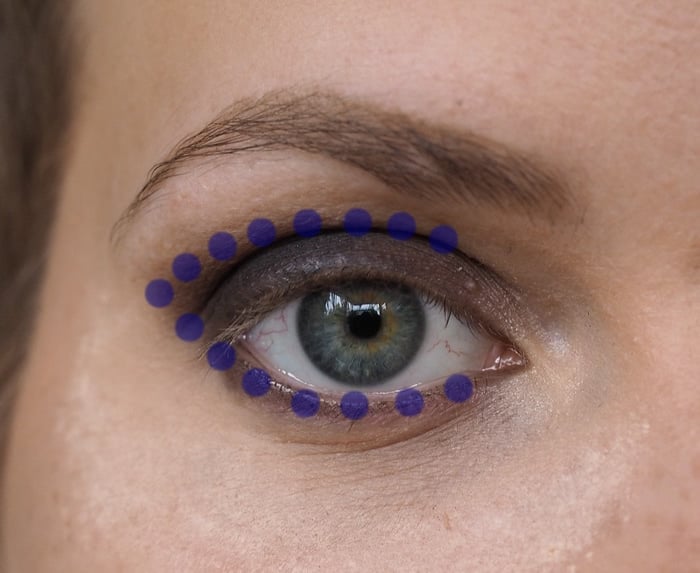
Varjostus & korostus
Kyllä – varjostus ja korostus on juttu myös luomivärissä. On kyse varjojen ja valojen leikistä. Ulkonevissa silmissä varjostetaan pyöreitä reunoja, jos näin voi sanoa. Nuo siniset pallerot näyttävät, mihin tumma luomiväri (mattainen väri) kannattaa laittaa. Se tasapainottaa luomea ja saa sen näyttämään – no – vähemmän ulkonevalta. Mustat pallot näyttävät, mihin kaikista tummin väri kannattaa laittaa, kun silmästä taiteillaan mantelinmutoista. Valkoiset pallot näyttävät valon paikan. Tavallaan meikillä venytetään silmää niin ulko kuin sisänurkastakin!
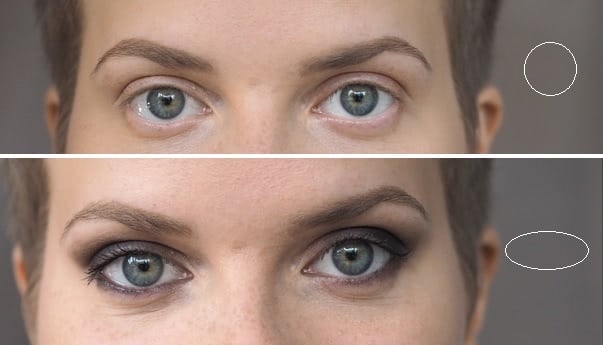
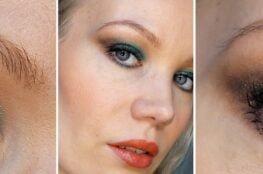
Tässä ennen ja jälkeen kuva noudattaen näitä ohjeita:
Luomiväritutorial ulkoneville silmille
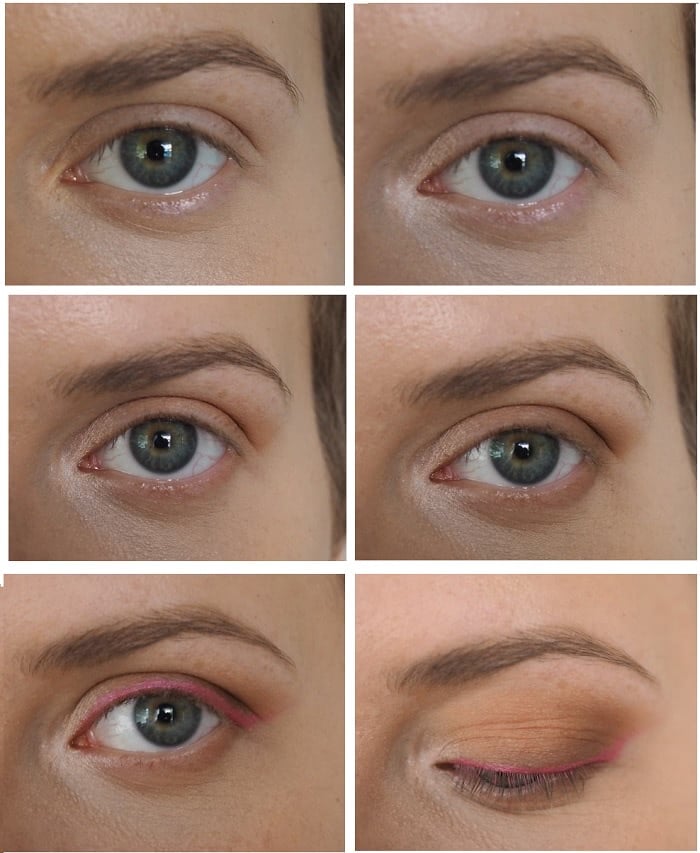
Huomaatteko muuten, miten pelkkä vaalea väri sisänurkassa muokkaa silmänmuotoa? Meikki on ihmeellistä.
Nopea tuto:
- Lisää sisänurkkaan vaaleaa shimmeristä väriä.
- Lisää mattainen vaaleanruskea väri koko luomelle ja rajaa sillä myös alaluomi.
- Varjosta luomen ulkonurkkaa tummemmalla ruskealla sävyllä.
- Rajaa silmät ja tee pieni siipi ulkonurkkaan.
- Ripsivärit sun muut.
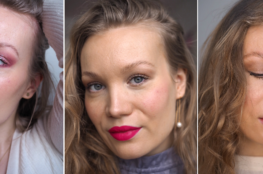
Sumusilmämeikki ulkoneville & pyöreille silmille
Jos sinulla on ulkonevat silmät – kannattaa kokeilla sumusilmiä! Tämä meikki on kuin tehty sinun silmänmuodollesi. Tavallisesti sumusilmämeikki voi vähän pienentää silmää, mutta näissä silmissä se näyttää yksinkertaisesti vain mahtavalta.
- Aloita rajaamalla silmät mustalla kajaalilla. Rajaa myös sisäluomi ja ripsiraja. Häivytä. Tämä on vain pohja luomivärille, joten se voi näyttää vähän suttuiselta tässä vaiheessa.
- Lisää tummaa luomiväriä luomelle ja häivytä. Nosta luomiväri ulkonurkasta V-muotoon pehmeästi häivyttäen. Sumusilmää tehdessä on helpointa lisätä väriä vähän kerrallaan. Tee siis niin. Lisää väriä, häivytä, lisää väriä, häivytä ja niin edelleen.
- Lisää myös alaluomelle vähän luomiväriä – älä vie sitä kuitenkaan liian alas. Painele vielä sisänurkkaan vaaleaa helmiäistä tuomaan valoa. Lisää ripsiväri ja olet valmis!
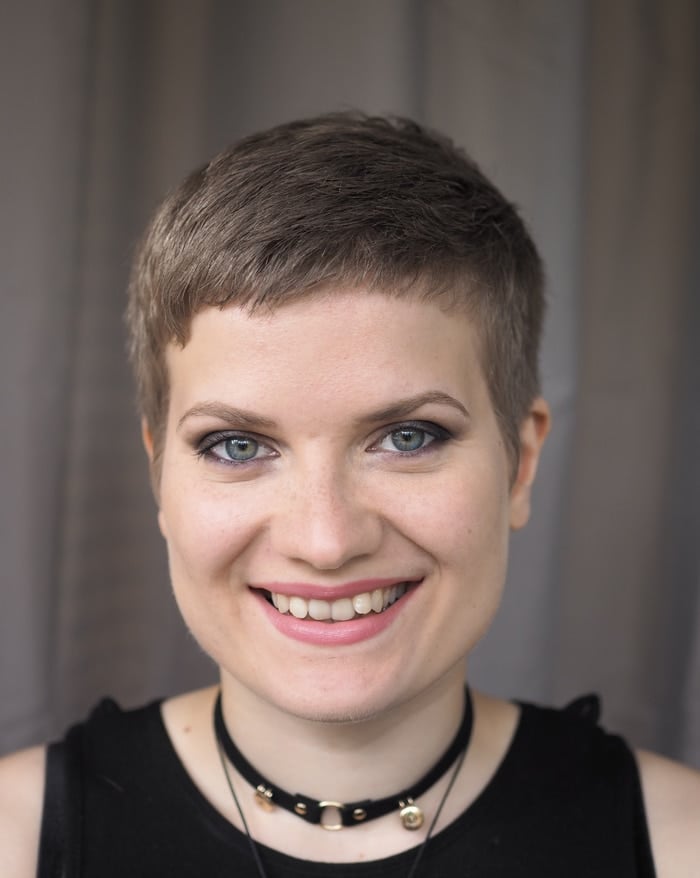
Toivottavasti postaus oli teille hyödyllinen. Kiitos Janika mallina toimimisesta!
Janikan meikki
*mainoslinkkejä
elf BB-Cream, nude
IsaDora Face Sculptor, Cool Pink
*Zuiin Eyebrow Definer, Taupe
*Alima Pure Eye Pencil, Ink*
*Urban Decay Primer Potion
*Too Faced Chocolate Bar Palette
2017-07-31
This is so interesting Charlotta, loved reading about the techniques involved in shaping the eye. Your sister is beautiful!
http://www.rougenapples.com
2017-08-08
Thank you! I think it’s fascinating too. 🙂
2017-07-31
Loved this, it’s so important to get the right shape for your eye and I have to admit I don’t always focus on that enough. Your sister is beautiful and wow do you look alike! When I saw your post I initially thought you had changed your hair.
Amy – https://amyevans.co.uk
2017-08-08
Thank you! Haha I feel like we used to look more alike before, but not anymore. 😀 She is gorgeous as are all of my sisters <3
2017-08-08
Wow it’s really interesting to know new techniques since I always hated my big round eyes and I always added eyeliner in my waterline to make them appear smaller. Your sister is a beautiful lady and I also love her eyebrows, they are so perfect!! x
Yiota
pinkdaisyloves.blogspot.com
2017-08-08
Yeah isn’t it? Thank you 🙂
2019-04-24
Thank you for the tutorial. It’s easy to understand and much appreciated. Your sister is beautiful as are you.
2019-04-25
Thank you, glad you found it helpful!
2021-05-02
Hello! I just found your site after searching for “makeup ideas for round eyes” as it’s a struggle for me and my very round, very hooded, bulging eyes. I’m glad to have found this post and intend to use the tips I see here.
If I may, I’d like to share an additional solution for eyes like these (well, for eyes that are round and/or droop downward at the outer corners): Many years ago (I’ll estimate mid-2000s), I received several beauty magazines by mail, and in one I stumbled across a great way to help round eyes. I *think* it was an issue of Allure with a closeup face shot of Jennifer Anniston on the cover (and her eyes IMO are rounded; regardless of exactly how we’d describe her eye shape, it was relevant to me as mine are similar…round and slightly drooping at the outer corners). Since it was a closeup, I was able to study her eye makeup…and I saw the “thing” that turned into my best makeup hack and I still use to this day. I don’t know how best to describe it, except that IMO all of the makeup on the upper lid (including tight eyeliner on upper lash line) was entirely separated from makeup used on the lower lid/lash line via a seemingly deliberate narrow, short diagonal swipe of a very light color at the outer corner of the eye. Like, do your UPPER eyeliner (including a small cat eye flick SLIGHTLY ABOVE the actual outer edge of the eye); work your preferred shadows on the upper lid alone, being careful to stay at or above this cat eye flick; then carefully applying liner and or color to the lower lash line, NOT smudging it all the way up to the base of the upper lid cat eye line but INSTEAD stopping at or slightly below the spot at the eye corner where you’d normally connect with the cat eye line…in other words create whatever line or smudge you want on the lower lashes but NOT drawing/smudging it all the way up to the upper-lid cat eye flick…that cat eye flick and your lower eye should NEVER meet at the outer eye corner. Instead, you’ll take the soft pointed end of an applicator or brush that has your chosen bright light color (if you use a similar color right under your brows for dimension, I’d recommend this color; if not, some light and bright product *with staying power*) and place that applicator right at the outer corner of your eye, then pull diagonally up and outwards towards the temple. And never connect the upper lid color/shadow/liner to that on the lower eye. Think about that bright diagonal swipe as a border that you can’t cross.
I’ve used this many, many (if not hundreds of) times since I got that magazine. I’ve never drawn a dark eyeliner circle completely (or even partially if near my outer eye) since then. I don’t do dark/heavier eye much (I LOVE the look of any smudgy smoky color from crazy bold to work-appropriate or casual but I have a damaged tear duct and thus watery eye and frequent blinking; EVERY eye product smudges under these circumstances…EVERY one) and I miss it, but when I do I still instinctively use this technique to “break up” the round shape of my eyes. Even with relatively lighter shadow colours, it works and it’s worth doing.
Now I’m going to search for that Allure (or Marie Claire, not sure) cover shot from so many years ago .
Early edit: I can’t find that magazine cover pic regardless of trying. I know it existed, and I know it was mid-ish 2000s. But that’s it.
I hope I explained this well in a way that any of you can try it. I’m not the best at that. Thanks for reading.
2021-05-03
Hi and thank you so much for commenting! That’s a great trick and I know what you mean. Maybe I should do my version of it here and do a little tutorial.. :>
2023-03-17
Hello, I have a quick question. I have the exact same eye color as your sister, but I am struggling with finding colors that makes it stand out. Do you by any chance know any.
It’s very hard to find this eye color online, cause you mostly just get those really light blue/ grey eyes when you search for it.
2023-03-17
Hey! I think orange bronze colors really look nice on that eye color. It’s a nice contrast. And then also I would suggest trying pink!