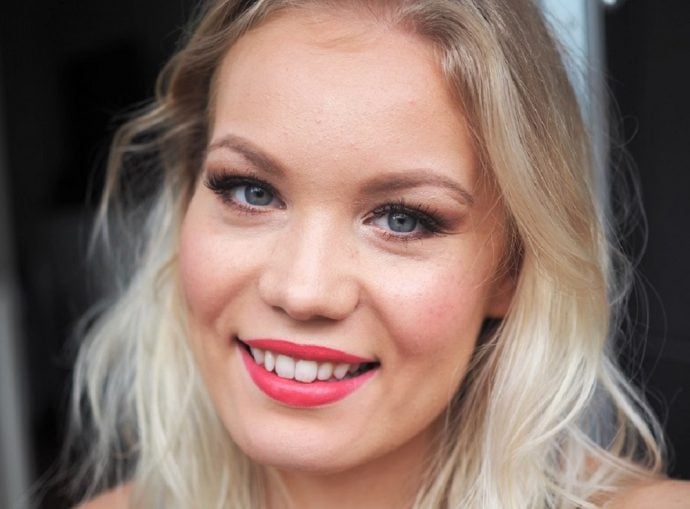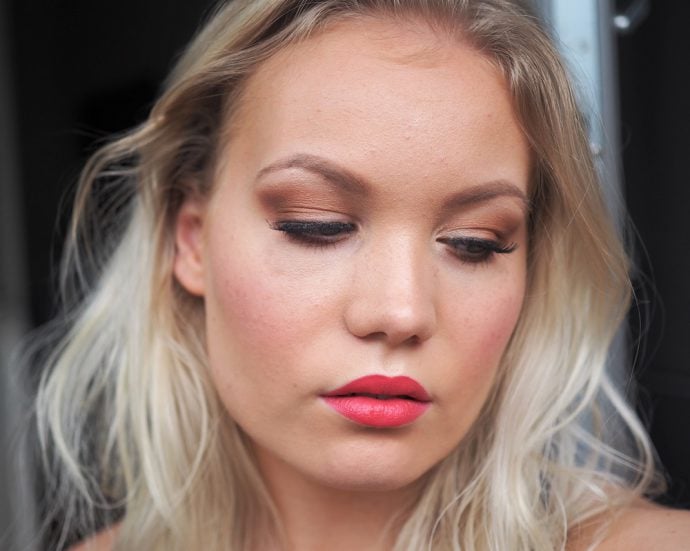
I talked about classic makeup and how it suits about everybody here. So I decided to do a tutorial about that! In this look I’m doing all that basic foundation stuff, warm brown eyeshadows and coral red lips. If you want to know how to achieve this beautiful makeup look or just want to see the process, keep on reading!
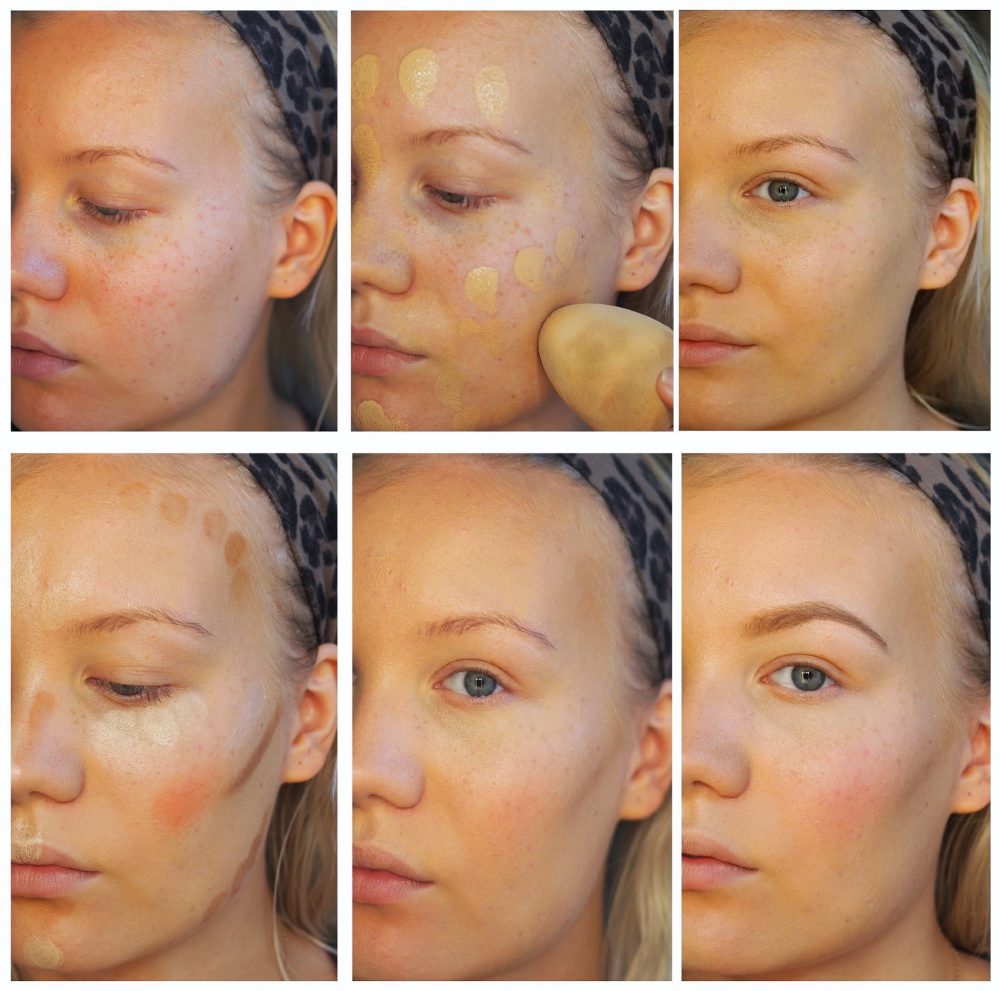 FACE/BROWS – RVB Lab The Makeup Smoothing Primer/ MUFE Ultra HD Foundation in 140 / MUFE Pro Sculpting Kit in 30 / Everyday Minerals Multitasking Concealer& Finishing Powder / KikoMilano Desert Dunes trio Baked Blush in Gypsy Pink / Guerlain Brow Pencil in Blonde / Maybelline Browdrama in Medium Brown
1. Apply primer to clean moisturised skin. You can find help on choosing what primer and other crucial makeup basic stuff here.
2. Apply foundation with beautyblender. I recommend applying 1-2 thin layers instead of putting on too much foundation at once.
3. Do your contouring and highlighting. I added also blush since I have it in my palette. Not a fan of contouring? Just add a touch of blush and lightly bronze your face to give it warmth.
4. Set your face with powder. I used a lighter powder (multitasking) in the same spots that I applied my highlighter and the regular (finishing) powder on the rest of my face.
5. Do your brows. I’m really not a pro at this so I promise to do a tutorial once I have my brows under control. Just do your best.
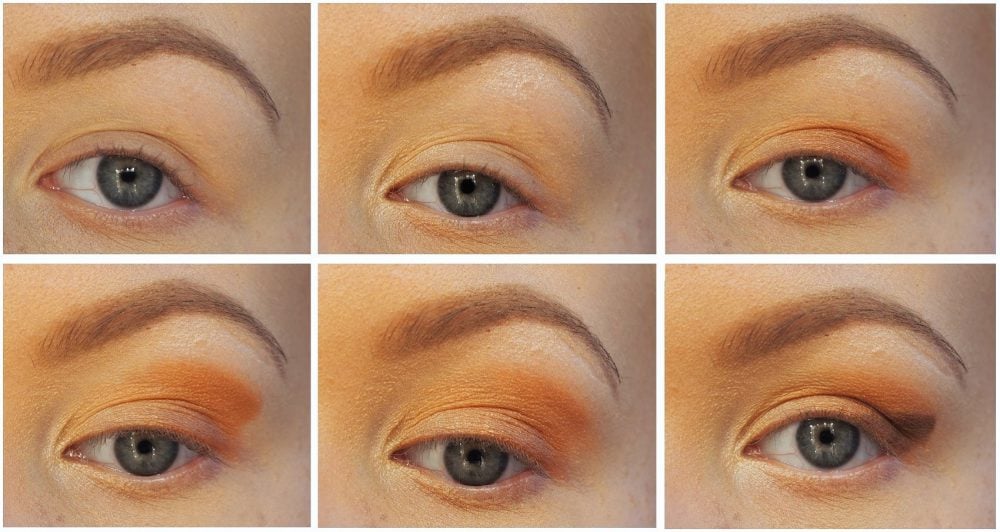
EYES – Urban Decay Primer Potion / Too Faced Semi Sweet Chocolate Bar / Zuii Organic Eye Pencil in Black / Benefit They’re Real Mascara/ Ardell Demi Wispies Lashes
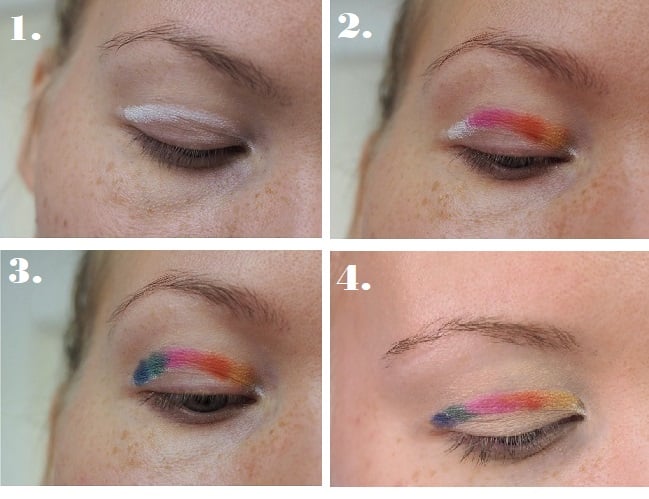
1. Apply primer to your lids and set it with powder or eyeshadow that matches your skin. I used ‘Coconut Creme’ from my palette.
2. Apply ‘Butter Pecan’ or other light shimmer colour to your inner corners as well as your brow bone.
3. Apply ‘Bon Bon’ on your lids. Press lightly to get the best pigment.
4. Apply ‘Peanut Butter’ to the crease and slightly above it – depending on your eye shape. I have hooded/deep set eyes so I take it quite high.
5. Blend. It’s up to you how visible you want your colours to be or if you want the colour to fade towards the brow bone.
6. Apply ‘Truffled’ to your outer corners and make a wing out of it. What? Okay so let’s keep on reading..
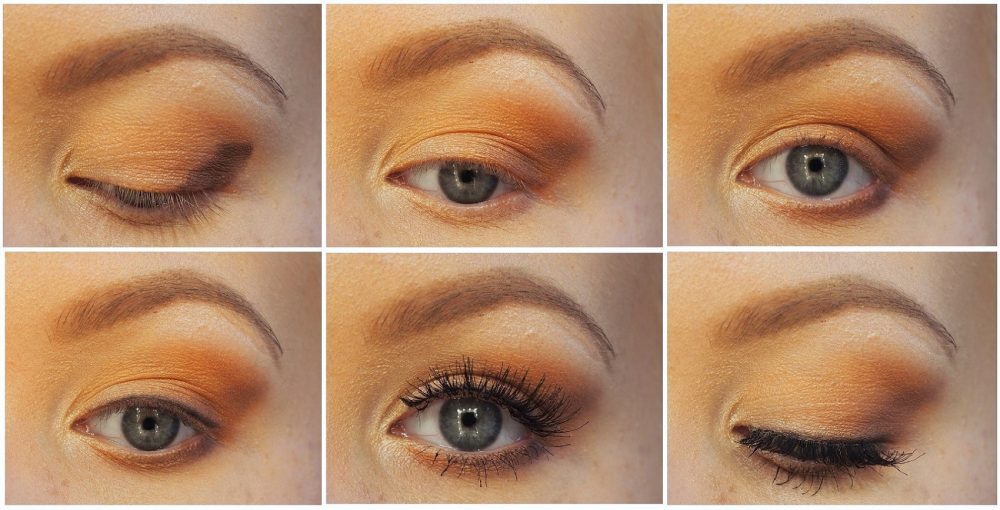
7. So here’s how it’s supposed to look when you close your eyes. It’s this V-shape/wing thing. Okay? Good. Then blend it out ’cause that looks ridiculous.
8. Apply the same shade ‘Truffled’ to your lower lashline as well. Be sure that the colours meet in the outer corner. So it’s like a line from your lower lashline all the way to the end of your brow as you can see from the third picture.
9. Line your eyes with black or brown pencil or eyeliner. I did a soft line with my black eye pencil.
10. Curl your lashes, apply mascara and fake lashes if you want to.
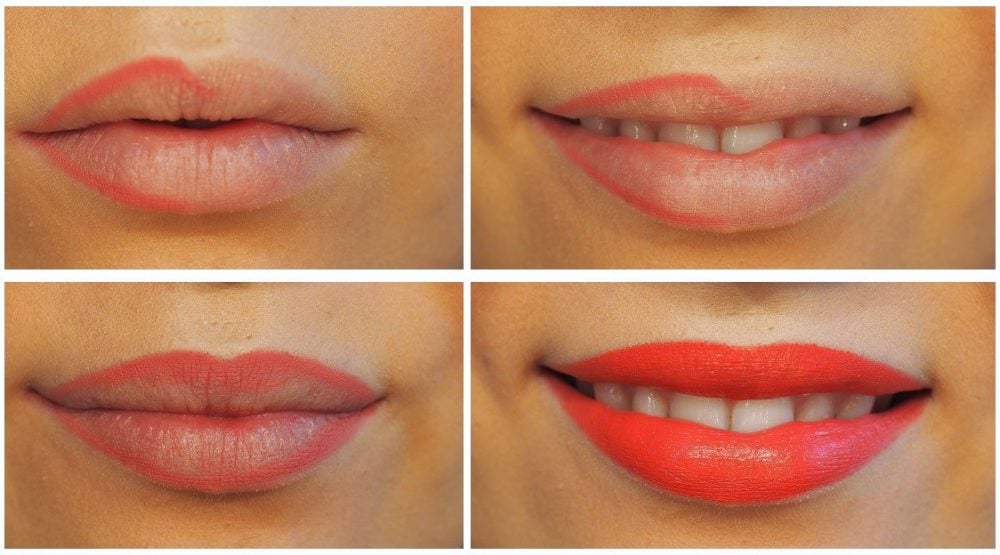
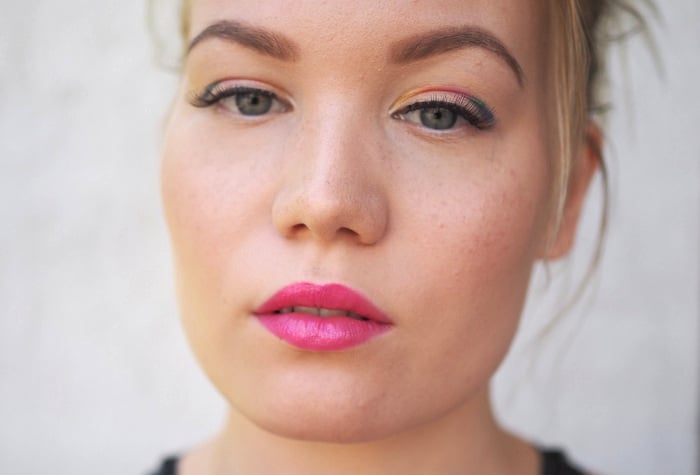
LIPS – MUFE Aqua Lip in 15C / Rimmel The Only 1 Lipstick in Cheeky Coral
11. I really recommend using a lipliner before applying lipstick. It helps to see where the lipstick should go. You can start with your cupid’s bow and just line a half of your lip. Then I recommend smiling ’cause then you can see how your lip looks naturally. Now it’s easier to make the other side match to the other. Just do all weird motions with your lips so you really get the colour to all the cracks and your lip shape looks natural!
12. Add lipstick and smile ’cause you’re done and you look fabulous!