Sometimes you just get a vision.
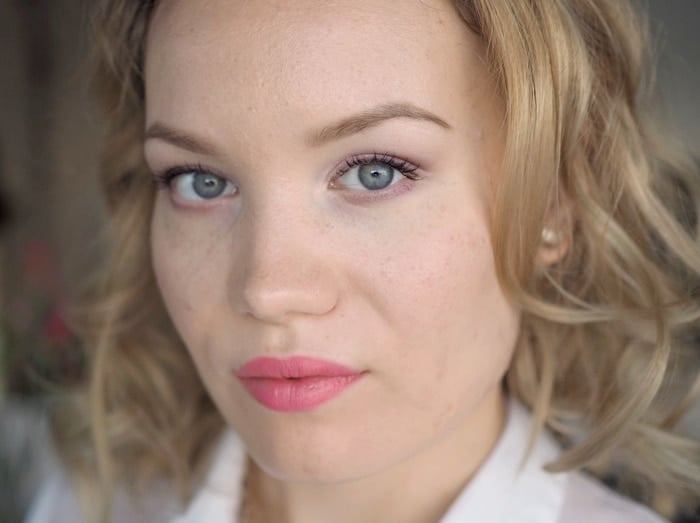
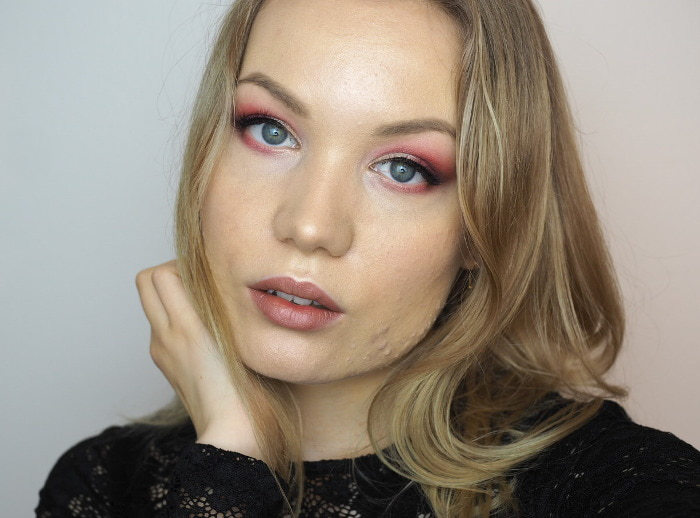
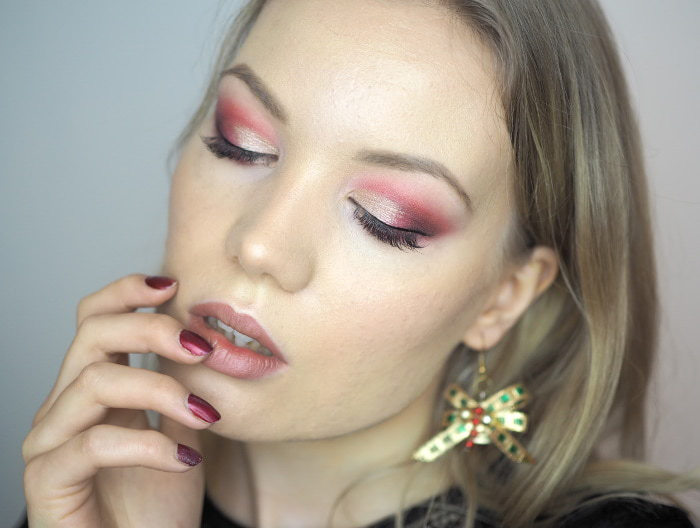
I had a vision of this makeup: it was gonna be red and awesome. Half cut-crease with a glittery touch (but not straight up glitter, ’cause ain’t nobody got time for that mess). Was I pro at cutting creases? Well, not really, but I was going to a pre-Christmas party and damn it, if my makeup game wasn’t gonna be on point that evening.
Sometimes (read:always) you just need a winner’s mindset and a great motivation. As it turns out, my makeup was gorgeous that day and I realized I needed to recreate it for a tutorial.
Also: red eyeshadow is BOMB and it suits most eye colours and no it doesn’t make you look sick.
So here we are.
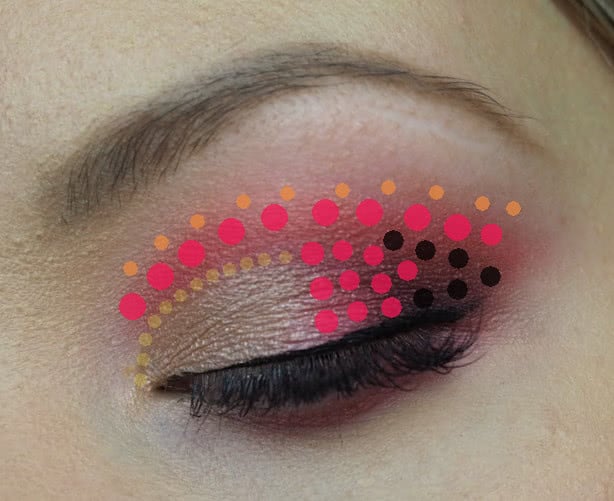
Colour placement.
Half cut-crease makeup tutorial
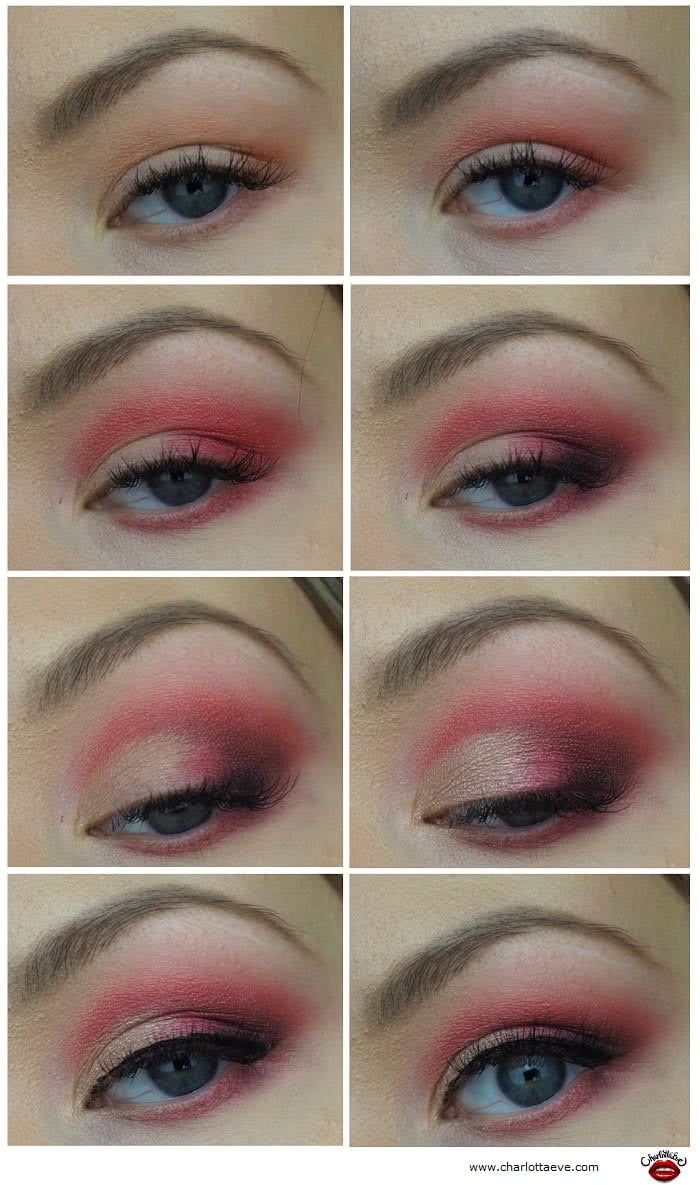
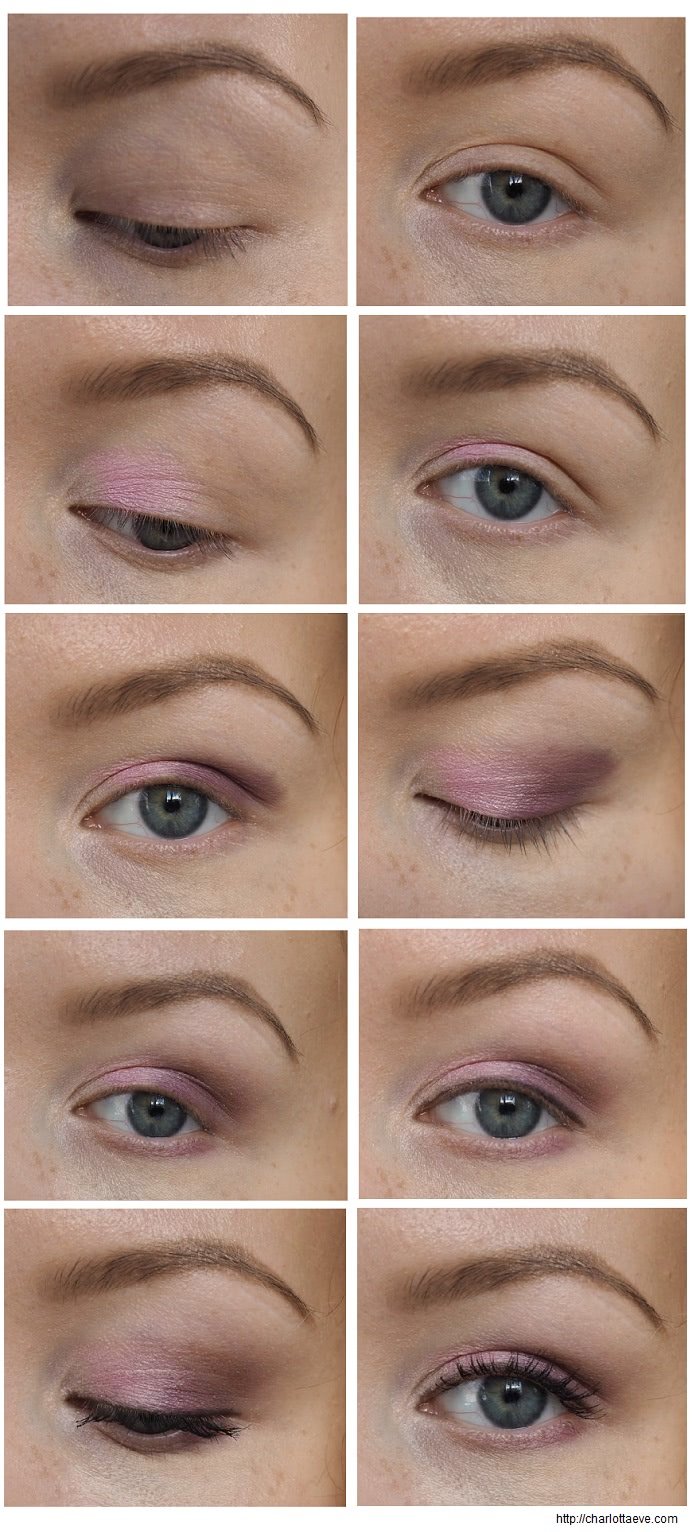
- It’s easier to start off with lighter colours. First I applied a peachy warm colour and I created the shape of my eyeshadow. Then I took a matte red eyeshadow and started to deepen the colour. Work your way into it – apply shadow, then blend, apply shadow and blend again. You want the colour to look smooth as f (eather).
- I then took a darker red colour and deepened the red colour more. I also applied that colour on half of my lid. After that I took some black eyeshadow and applied that on my outer corner in a V-shape. When you’re doing a colourful look, black is your friend. Black pulls the look together and just makes it look better.
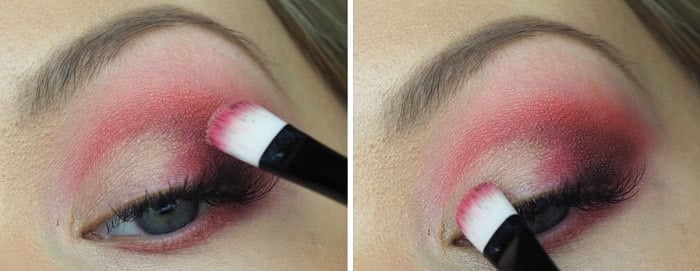
- Cut the crease. I explained this better in a photo below – but basically I used glitter glue for it and a shimmery colour. I then blended that shimmery colour with the red colour, so that the transition looks somewhat smooth. It’s up to you how high you want your crease to be – I faked the crease higher than my actual crease, but not so high, that the line is visible when my eye is open.
- You can then line your eye and maybe do a better job, than I did here, haha. Then apply mascara and lashes or whatever is your wish. I did neither, since I have eye lash extensions now HALLELUJAH! By the way, don’t forget to apply some red eyeshadow on your lower lashline as well. I kinda forgot to tell you that, but you probably figured it out from the photos.
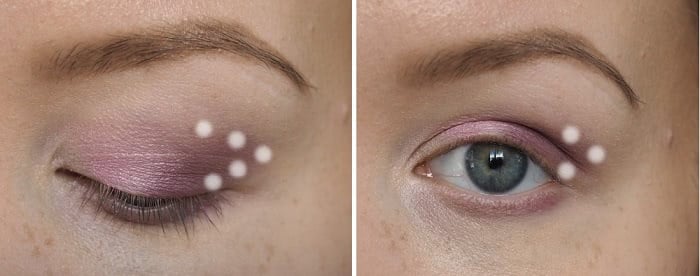
Cutting the crease
As I was going for a shimmer eyeshadow (or actually a highlight), but I wanted it to look extra sparkly, I went for my secret weapon: glitter primer. If you haven’t tried it for shimmery eyeshadows, you haven’t lived. It seriously makes them pop and last super long! I used NYX’s glitter primer, which is like a cream, which makes the powders stick. I first cut my crease using a flat brush and that glitter glue. I then patted on my shimmer colour on top of that glue.
I listed the products I used, but if you want to re-create the look with a less hassle, these palettes would be great for this look (or for my collection, dear Santa). A lot of you may already own these palettes. Links are adlinks, so if you want to show your support and was gonna buy something from Sephora anyway, here is a good chance.
*Naked Heat Palette
*Anastasia Modern Renaissance Palette
*Tarte Tartelette Toasted Palette
For my look the key products were glitter glue, Milani’s blush (which I absolutely love!) and MAC’s highlight.
PRODUCTS
EYES
Urban Decay Primer Potion
Illamasqua Look Fantastic Palette (matte bone color + orange color)
NYX Professional Makeup Beauty School Dropout Freshman (matte red color)
Milani Baked Blush, Red Vino (deep red color)
TooFaced Semi-Sweet Chocolate Bar Palette (matte black)
NYX Professional Makeup Glitter glue
MAC Soft & Gentle Highlight
FACE
Jane Iredale Smooth Affair Primer
Jane Iredale Glow Time BB-Cream
LA GIRL HD Pro Concealer, Bisque
Lumene Nordic Girl Cheeky Lip&Cheek colour, 2
Mad4eyebrow natural eyebrow filler, Blonde
*NUDESTIX Lip & Cheek Pencil, Mystic