Spring and summer are full of fun festivities and for me the best part about any party or festival is obviously makeup. Festival makeup can be bold, colorful and different.
In this post I will show you step by step how to create this colorful rainbow on your eyelids. I know it looks complex, but it’s actually very simple and easy to do! Easy? Yes, it really is. Even a beginner can manage this, I dare say. Especially, if you follow my tips on how to blend different colors together and how to pull of a colorful look.
Sidenote: the little unicorn inside me gets very happy, when seeing this many colors.
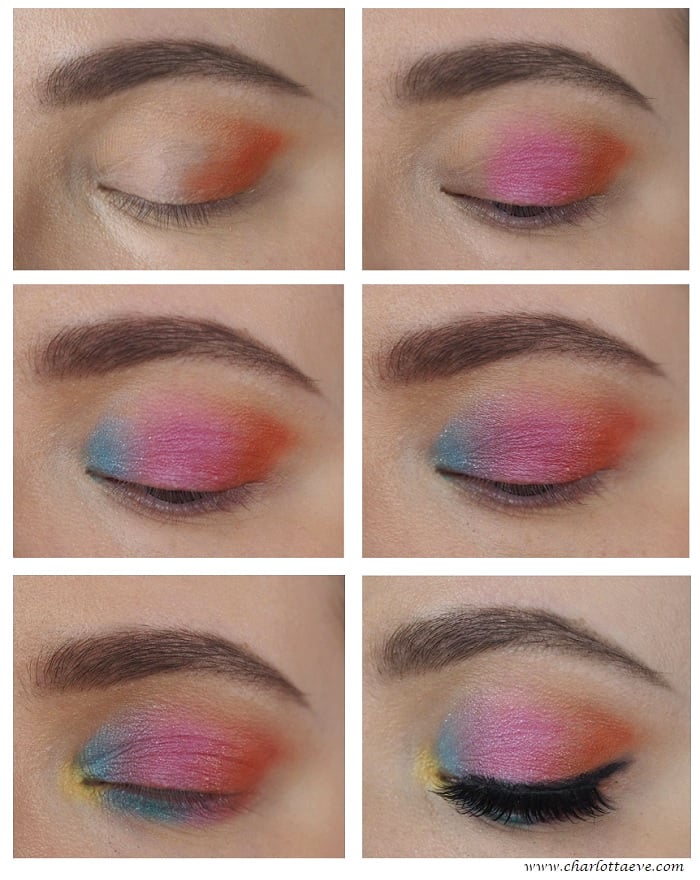
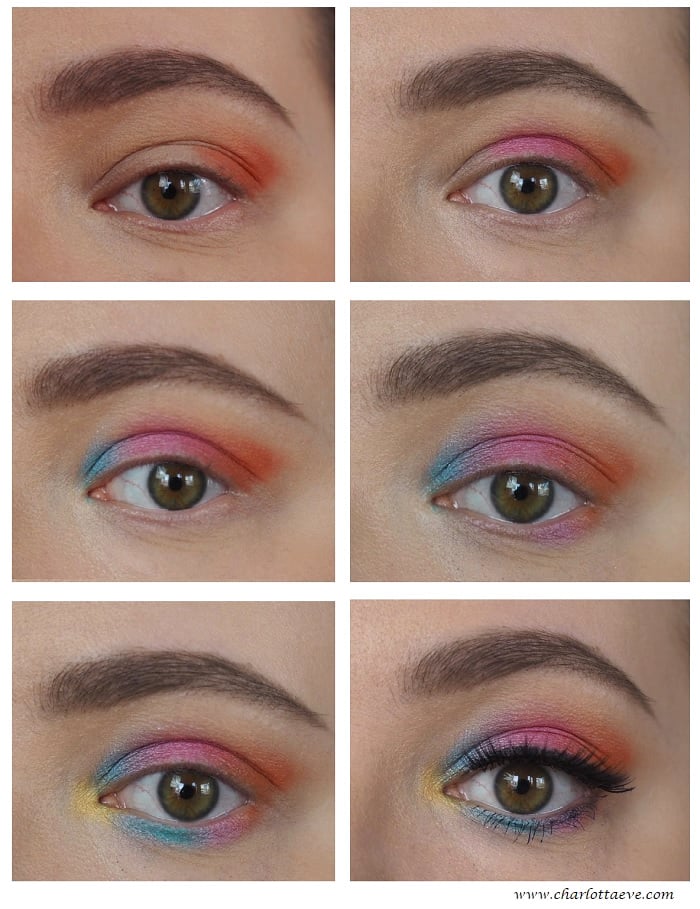
Colorful festival makeup tutorial
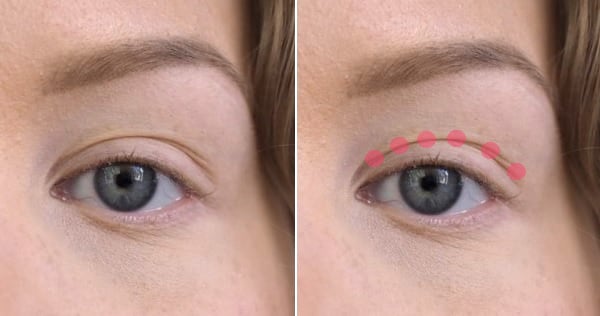
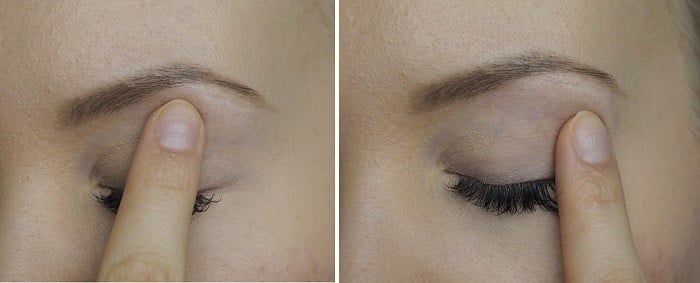
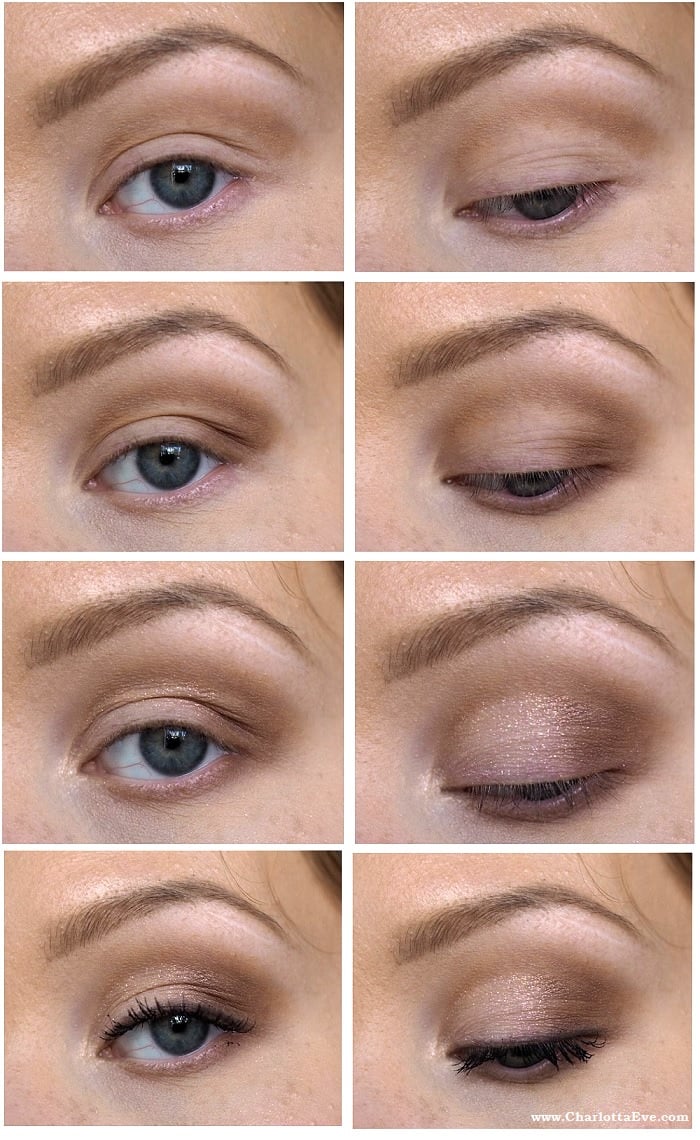
- Prime your eyelids and set the primer.
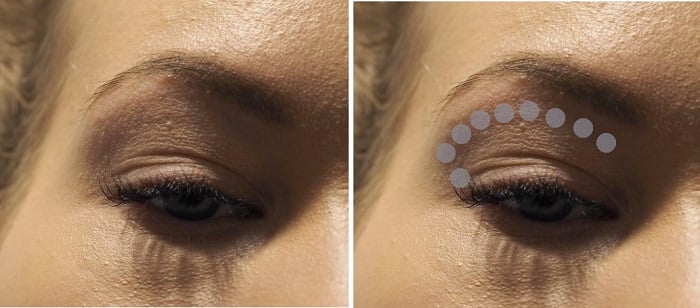
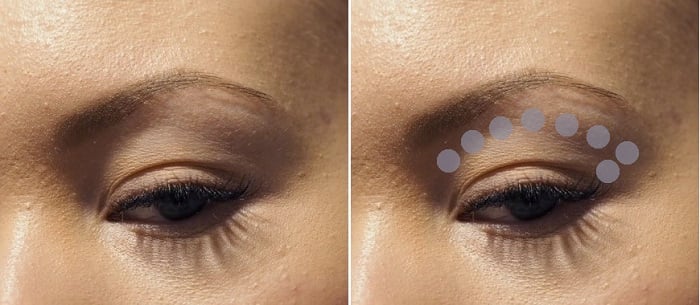
- Contour the eye just a little bit using a light shade, that is close to your own skin color. I used a light peachy shade. This also gives a nice base to all the colors and makes them look like they fade gradually towards the brow.
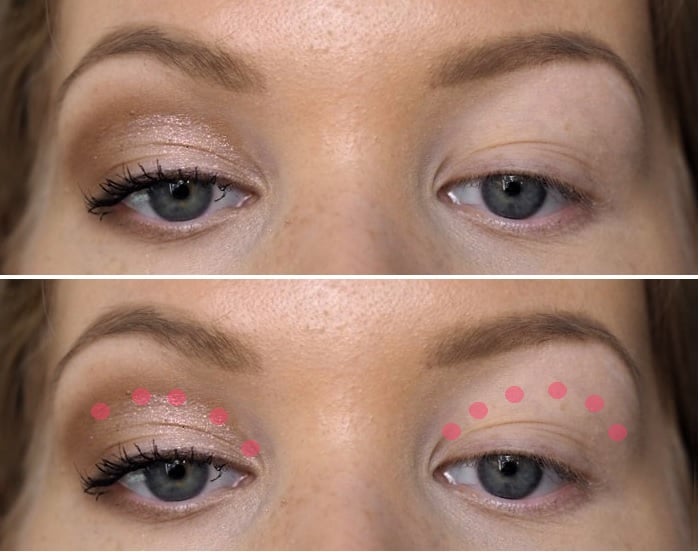
- Start applying the colors one by one. Use tapping motions and let those taps do the blending for you. The only color you’re really gonna blend is the very first one: orange. You want to make the ‘tail’ of your eyeshadow nice and smooth, so go ahead and blend it to the shape that you want.
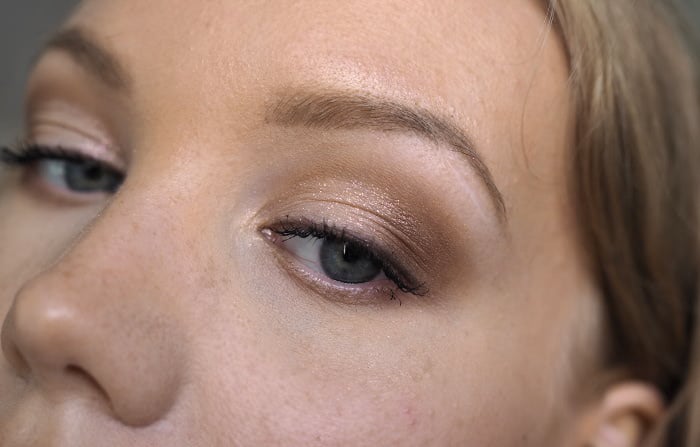
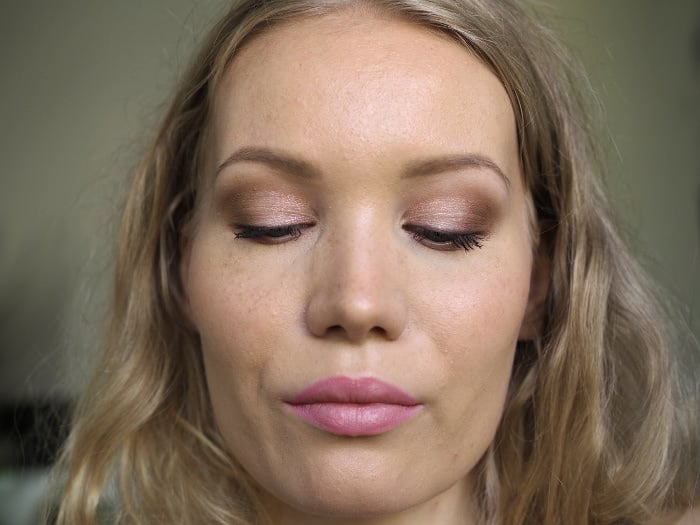
- When you’re done with all the colors (on your lower lashline as well!), go ahead and make a black liner. You can make it sharp, or smoky, as I did here. Apply your mascara and lashes and you are done!
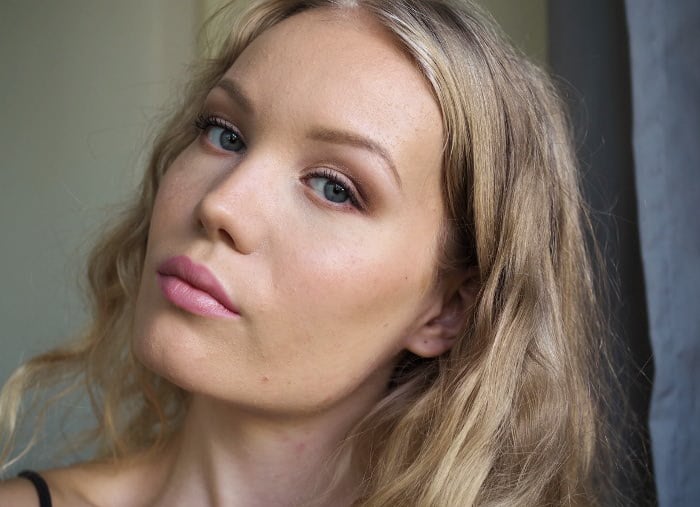
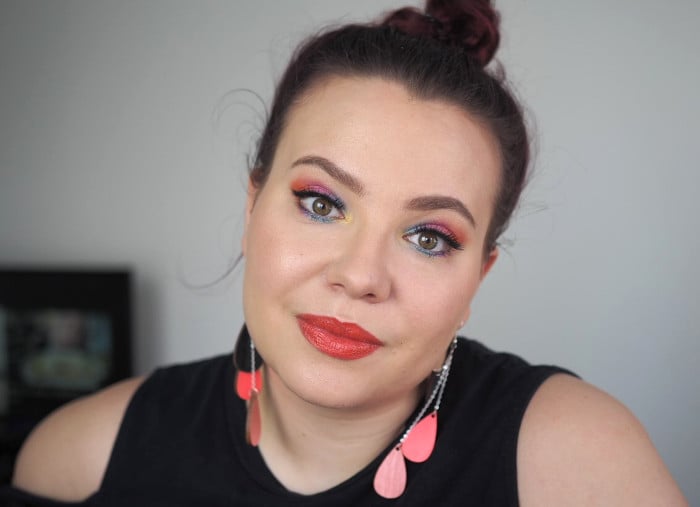
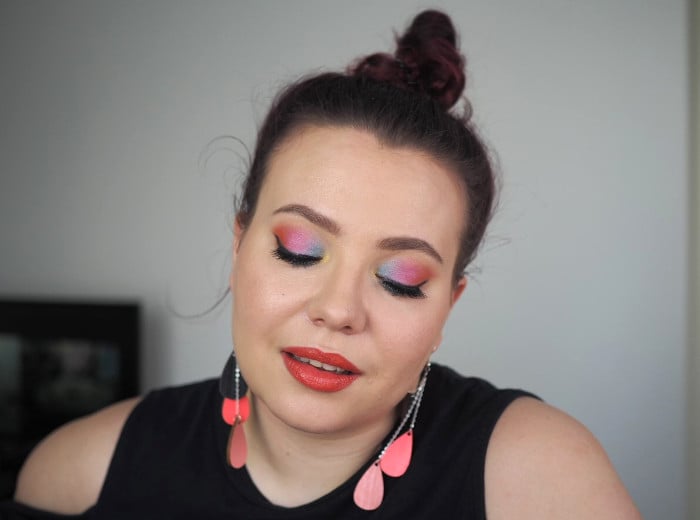
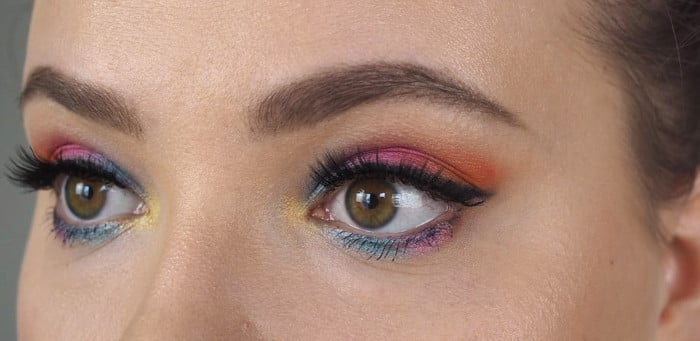
I paired this eye look with orange lips. You could go for nude lips, but choosing a color from the eye makeup looks very nice! Additional glitter won’t hurt you either.
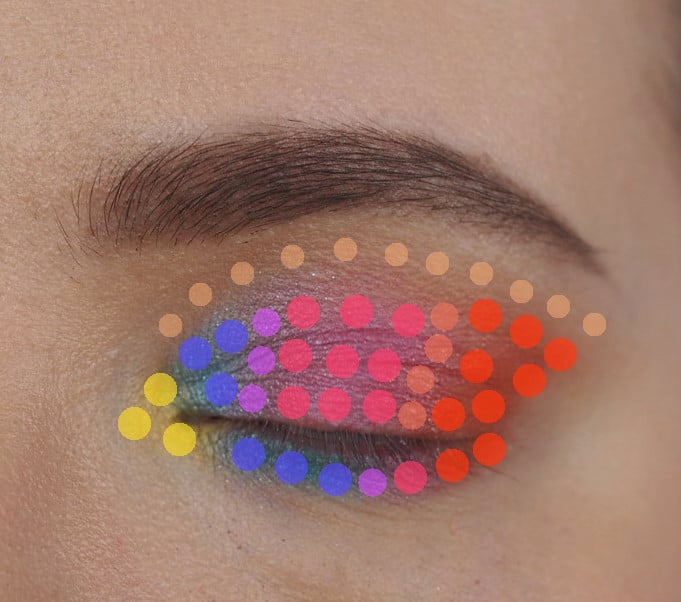
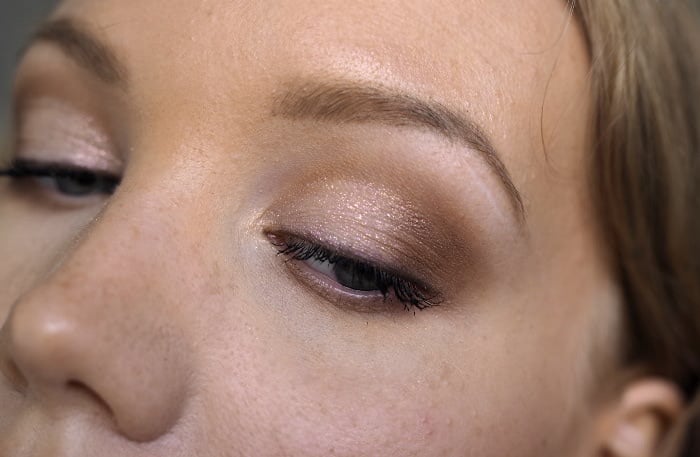
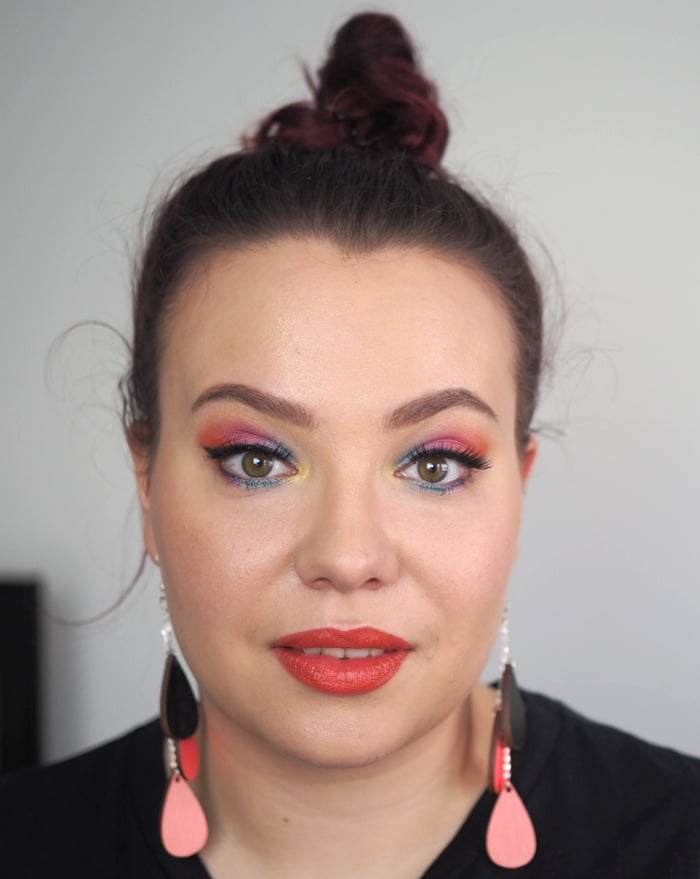
Color placement.
The lightest shade right below the brow bone is the transition color. I used a light peachy shade. It gives some definition to the eye and a nice base for all the colors. Then my main colors were: orange, pink, blue and yellow. I used the tiniest amount of rose gold between the orange and the pink, just to make them blend together even more seamlessly. I also applied a tiny amount of lavender between pink and blue. On hindsight, I should have applied some green between blue and yellow too.
Using these ‘additional’ colors between the ‘main’ colors, makes them blend together more seamlessly, since the additional color already contains both of those colors a little. For example rose gold already has some pink and some orange in it. Obviously you could just blend these colors together too, but this way you get more control over the colors and how they act.
How to blend different colors together, when doing a colorful look?
When you’re doing a colorful look, there are just a few things you should keep in mind.
First of all: don’t blend too much. I know it’s usually all about blending and swiping and windshield motions and what not. But this time I will say to you: don’t blend! If you blend all these crazy colors together, they might look muddy and messy. Especially if they don’t naturally fit together. Instead – do small tapping motions and let those taps do the blending for you. In this look I did a very minimal blending job by tapping my brush gently.
So do this: take some color to your brush and start applying it right where you want the color to be most pigmented (right next to the lashline).Then once your brush only has some color left in it, start to move towards the edges.
Second: use black. Black eyeshadow or black liner is meant for saving any colorful look. You can use all the colors of the rainbow, as long as you pull the look together using black. It somehow makes all the difference in the world and even in this tutorial you can see how big of a difference a black liner and black lashes make.
Third: every color needs it’s own brush. Don’t even think about getting away with just one or two brushes! In this makeup look I used a new brush for every color: so seven altogether! Or actually eight, if you count the brush I used to blend the light peach base color, before starting to apply the actual colors.
Thank you sister for being my model! Do you see the resemblance in us?
Btw, if you haven’t already participated, check out the giveaway I have going on right now – it’s international and all you need to do is comment on the blog post.
If this makeup is too bold for you, check out my other tutorials including this ‘Colorful, but wearable makeup tutorial‘. There’s also one for blue eyes, where I used brown and gold tones, so it’s definitely wearable as well: Makeup for blue eyes.