Easy tan – May favorites by Eco By Sonya

Organic self tanners
 best selftan for light skin
face tan water on fair skin
For me, Summer isn’t the high season for cosmetic products. What I mean is – I use way less products.

I easily forget to wear any makeup. I barely use any moisturizer (on my face, that is). I skip all the extra products and treat my skin with the bare minimum. Summer is so beautiful and so short here, that I try and catch every moment I can.

Even if it means drinking more mojitos and sparkling wine. No, actually, especially when it means that.

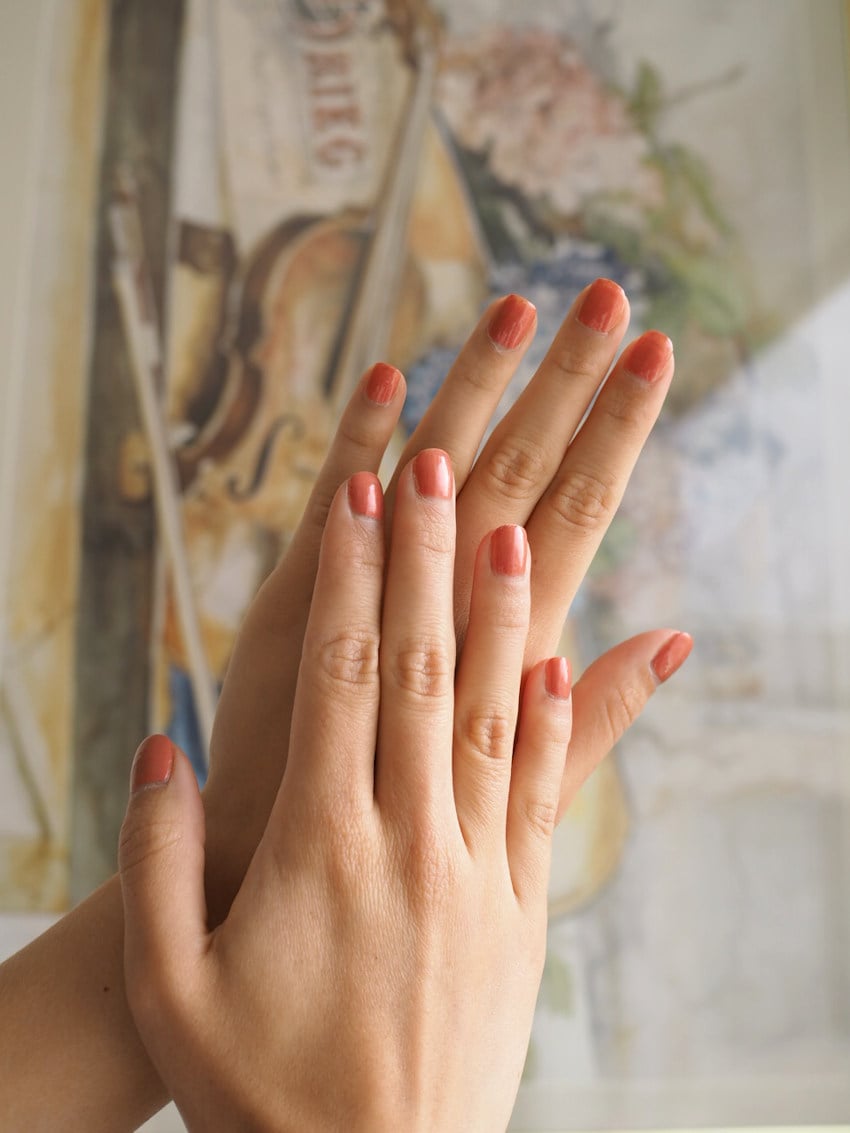
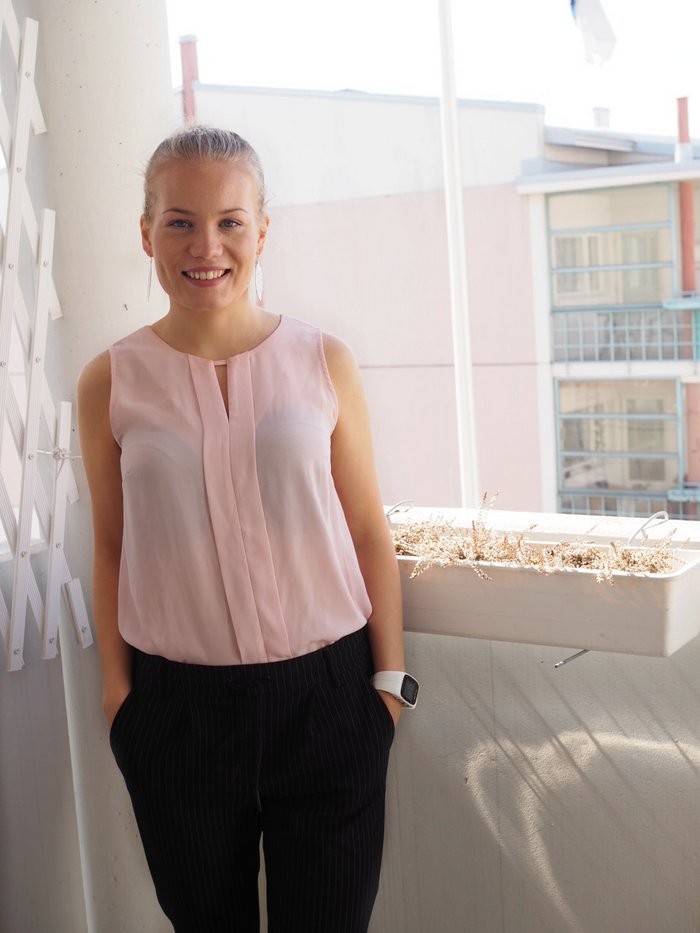
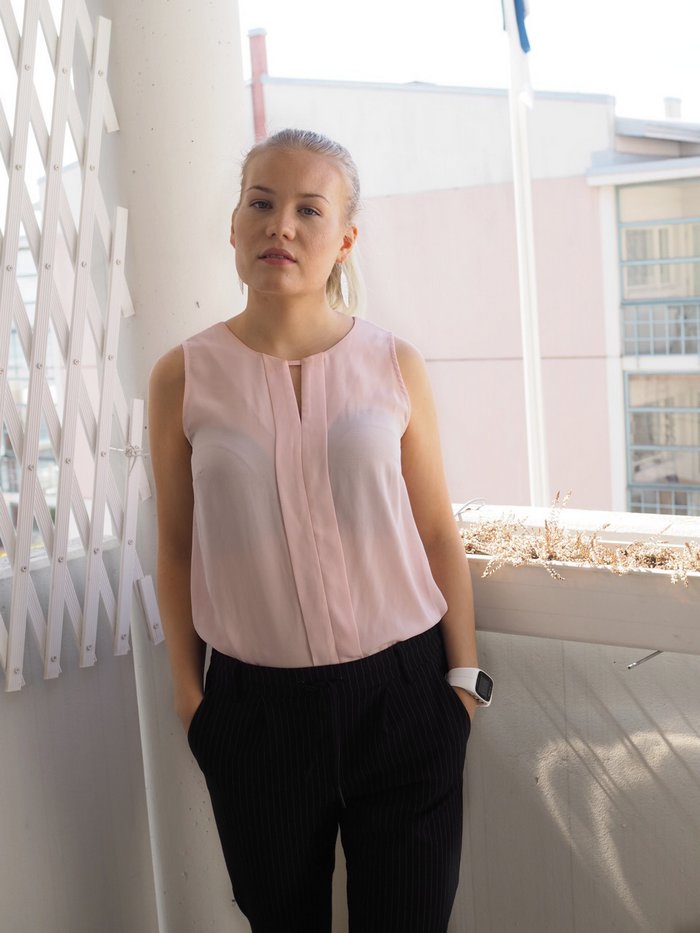
That said, there are some products that are in a frequent use – that I don’t really touch otherwise during the year. And those are of course self-tanners. I’ve gotten lots of compliments from my friends, telling me I look beautifully tan. Now a good way to tell if your self tanner is working is if people say to you “You are so tanned!” Instead of a “What self-tanner are you using?” (Unless the one asking is a good friend of yours and knows you’re pale as a wall normally.)

The brand I use and have been using for the past year is Eco By Sonya. It’s the best I’ve tried and I always recommend the products to my friends (who love it too). I used to hate self-tanners, I got lines whenever I applied them and I hated the scent.

With these, I have zero complaints.

I got the products as pr-samples.

the best Self tanner

Eco By Sonya FACE TAN WATER*

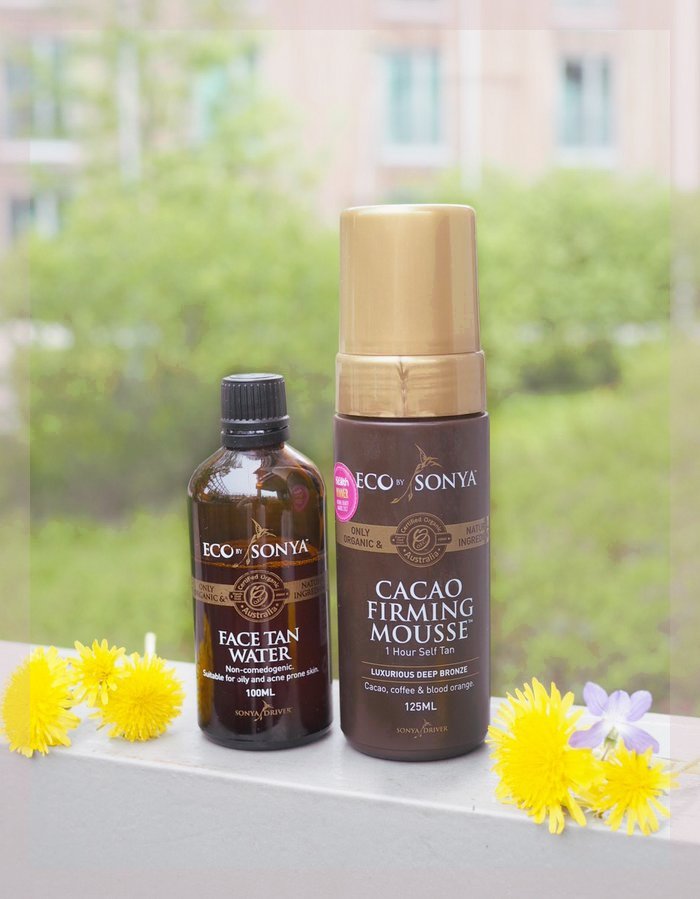
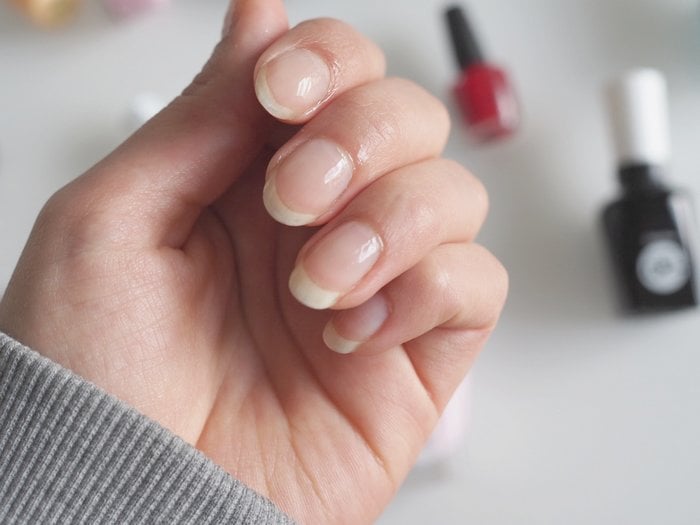
This is honestly the best self-tanner for face. This toner is formulated to suit oily skin and even acne so it actually suits all skin types. It’s easy to apply with a cotton pad and it doesn’t leave a greasy feeling on the skin. It actually kinda feels like nothing, but somehow you wake up having a tan which is magic. You get a deeper colour depending on how much product you take to your cotton pad. I usually wet the cotton pad before applying the toner in it, so that I don’t waste any product.

Eco By Sonya CACAO FIRMING MOUSSE*

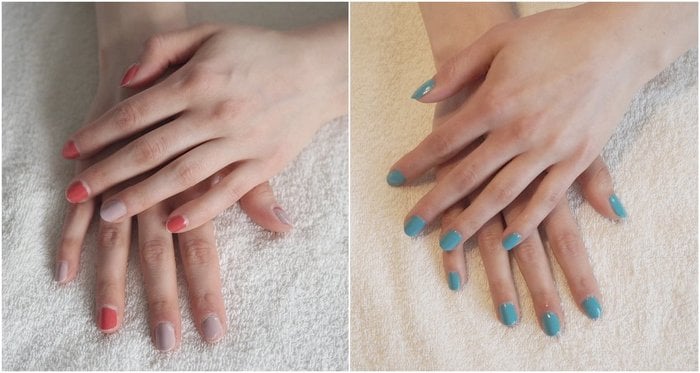
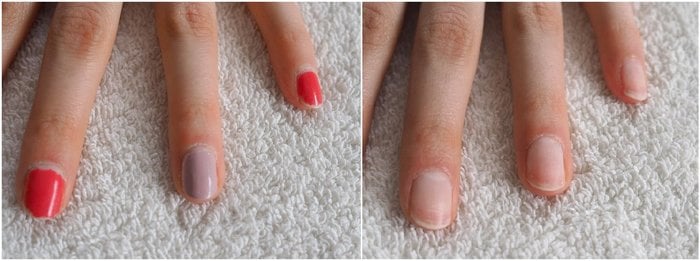
I was so excited to see this product at the organic cosmetics exhibition, because it promises to make you tan in just one hour! You can build up the color by leaving it on for 1-4 hours. I usually do 2-3 hours. The only boring thing about self-tanners is that you usually have to sleep through the night to get results – but with this I can be done in just a few hours! And the color that I get by chilling with my bathrobe on in the morning while doing some work on the computer is just beautiful. This is a mousse, which dries pretty quickly without leaving you greasy. It’s still easy to apply and blend – I haven’t got any streaks with this. You should still be quick with your application and focus on one area at a time.

You can read more about the brand on their website, but I’ll tell you a few facts: it’s Australian, eco-certified & great quality.

Eco By Sonya Firming Cacao Mousse and Face Tan Water Review

Eco by sonya firming cacao mousse before after

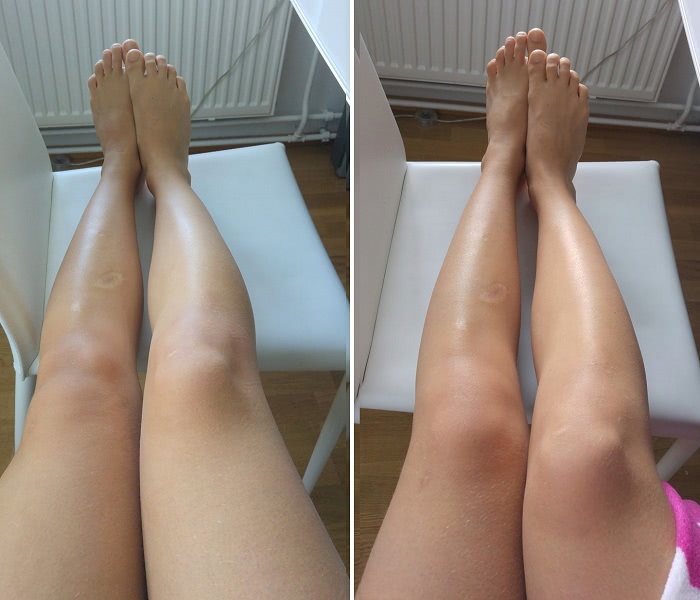
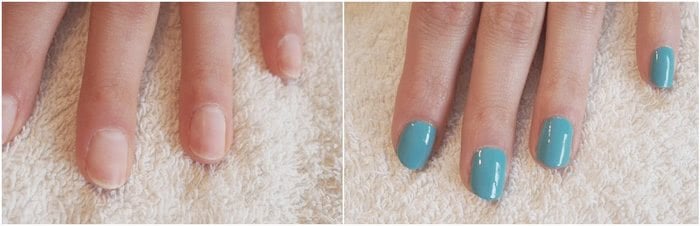
It’s super hard to take the exact same picture in the same lighting to show you the difference, but here it is. The tan isn’t that red in real life, I had to edit the colors a bit. Here I used the Firming Cacao Mousse once and left it on for 2,5 hours.

You can read more about the brand on their website, but I’ll tell you a few things: it’s Australian, ecocertified and of great quality.

Eco By Sonya also has a gradual tanning moisturiser, that is great for a really pale skin and/or to maintain the tan. It’s also buildable and you can get a nice tan with that also –  here is my review about that with a before/after photo.

Do you use self-tanners? What products do you only use during the Summer?

How to do a manicure like a pro

manicure at home step by step

after manicure
Manicure with clear nail polish.

A manicure was one of the hardest things to learn at beauty school.

It wasn’t so much about it being actually that hard to learn, it was just hard to fathom that a manicure is really that simple and easy. Like – can we actually charge for that?

Okay, now that I really think of it -it just felt so easy after all the other harder things we learned and studied. Still, it’s pretty simple, so I’m going to teach you to do it yourself!


manicure
Before & after a manicure.

How to do a professional manicure at home – Step by step

how to do a manicure

  1. Wash your hands and use a disinfectant. Just to start things off fresh and clean.
  2. Remove the old nail polish, if there is any.

manicure at home

  1. Give your nails and hands a warm bath. I usually use a moisturizing shower gel, foam or a shower oil for the bath. Bathe for about 5-10 minutes. This helps to soften your cuticles and nails and it also feels nice and relaxing.
    + If you’re feeling extra, you can also exfoliate your hands. A body exfoliator will work just fine. Exfoliating gets rid of dead skin cells and makes your cream absorb better.
  2. Push your cuticles using a cuticle pusher tool. Be gentle – this shouldn’t hurt. (If you absolutely need to, here is where you would cut your cuticles. But do it only if they’re really grown out or sticking out.)
  3. Shape your nails with a nail file. I strongly recommend getting a glass file, because it’s more gentle to your nails. With a glass file you can file back and forth without breaking the layers on your nails.

how to manicure

  1. Clean your nails with a nail polish remover. This is to remove any dirt and oils from the surface so that the nail polish lasts longer.
  2. Apply your nail polish. I recommend doing it in three phases: a base coat, two layers of color polish and a top coat. Let the nail polish dry in-between layers. A base coat is super important, because it protects your nails. There are different types of base coats – hardening, ridge-filling, moisturizing etc. Pick a base coat suitable for your needs. You can also use a 2-in-1 clear polish that can be used as a top coat as well. There are different types of top coats as well: quick drying or hardening.
  3. Add a hand cream to your hands and cuticles. A cuticle treatment is recommended too. I like using just coconut oil. Your nail polish should be dry before adding the oil. If you’re worried about messing up the nail polish, let it dry before adding a hand cream.

And that’s it! A good old manicure. The order of these steps may vary but this is the very basic routine.


how to do manicure


What you need for a home manicure:

*Professional Nail Spa Bowl Manicure
*Cuticle pusher & cutter, metallic
Base coat, color nail polish & top coat (Check out some brand recommendations from below)
Hand or body lotion

easy manicure at home

My favorite nail polishes for a home manicure

I like Essie’s nail polishes. I especially like their *all in one base coat + top coat + strengthener

For color polish, I like Isadora and *Mavala. We actually used Mavala at school too. I love their small sizes, because they don’t dry out and I get to use all the product. Isadora’s nail polishes I’ve used for several years and sometimes I even skip top coat with them, because they dry so quickly and have a good shine.

My absolute favorite top coat is *Seche Vite Fast Dry  Top Coat. That has actually changed the whole game for me. Check out my full review and demo on it here.

natural nails

When was the last time you treated yourself to a manicure? 

Scroll to top